Simon Todd Astrophotography
Search
Primary Menu
Skip to content
Informational
A step by step guide to Collimation
Knowledge – The sky is not the limit
The source to the halo around bright stars
ColdMOS Images
ColdMOS Images
M101 / NGC 5457 – Pinwheel Galaxy in RGB
NGC4565 – Needle Galaxy in RGB
NGC 2264 – Cone Nebula and Christmas Tree Cluster in HaRGB
M78 / NGC 2068 in RGB
IC36 Y Cas Nebula in SHO
IC5146 / Cocoon Nebula in HaRGB
NGC6888 – Crescent Nebula in SHO Narrowband
M51 – Whirlpool Galaxy in LRGB
Leo Triplet in LRGB
M81 and M82 Bodes Galaxy and Cigar Galaxy in LHaRGB
M97 / NGC3587 – Owl Nebula in LHaRGB
IC434 – Horsehead Nebula in LRGB
CCD Images
CCD Image Gallery
NGC2264 – Cone Nebula in SHO Narrowband
M81 and M82 Galaxies in LRGB+HA
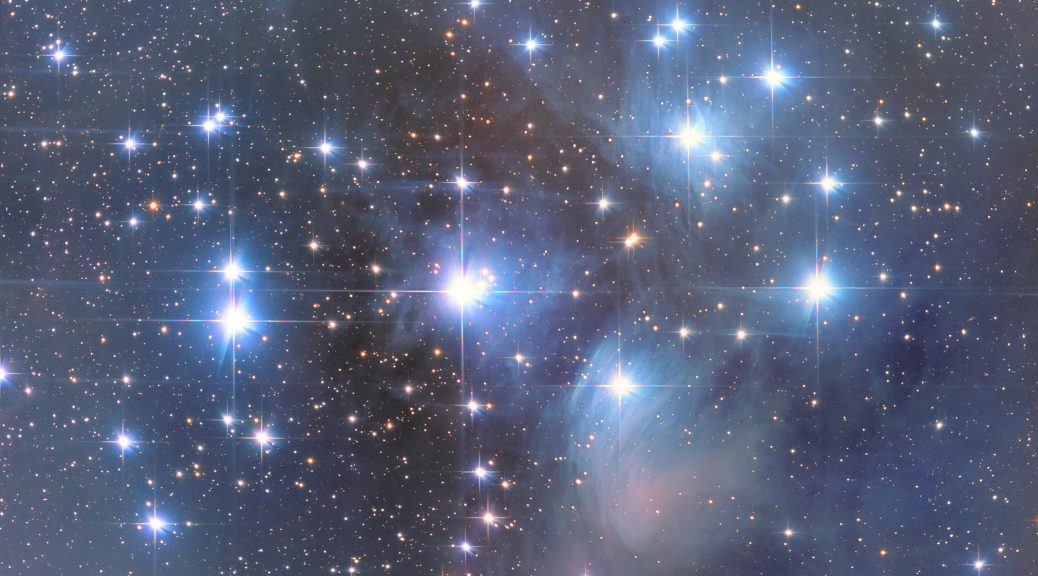
M45 – Pleiades 15mpx Image
M33 – Triangulum Galaxy
NGC281 – Pacman Nebula in Hubble Palette Narrowband
NGC6960 – Witch#s Broom in RGB+HA+OIII
NGC6960 – Witches Broom Nebula in Hubble Palette Narrowband
NGC7380 – Wizard Nebula in Hubble Palette Narrowband
IC1396 – Elephant’s Trunk Nebula in Hubble Palette Narrowband
IC1396 – Elephant’s Trunk Nebula
NGC7635 – Bubble Nebula
My first image with the Skywatcher Quattro 8-CF F4
DSLR Images
DSLR Image Galllery
Equipment
My Observatory MkII
My Observatory
Cooling a DSLR
Gear Reviews
Sharpstar 20032PNT F3.2 Paraboloid Astrograph Review
ZWO ASI6200 62mpx Full Frame Camera Review
ZWO ASI2400MC Pro Full Frame 24mpx camera review
QHY268C APS-C Colour Camera Review – Part 1
SharpStar 15028HNT
StarlightXpress Lodestar X2
PrimaluceLabs Sesto Senso Robo Focuser
Pegasus Astro Ultimate PowerBox
QHY183M Review – Part 1
QHY183M Review – Part 2
Atik 383L+ Cooled Mono CCD Imaging Camera
Skywatcher Quattro 8-CF Imaging Newtonian
About Me
Search for:
CCD Images
M45 – Pleiades 15mpx Image
December 23, 2016
Simon Todd
Leave a comment