
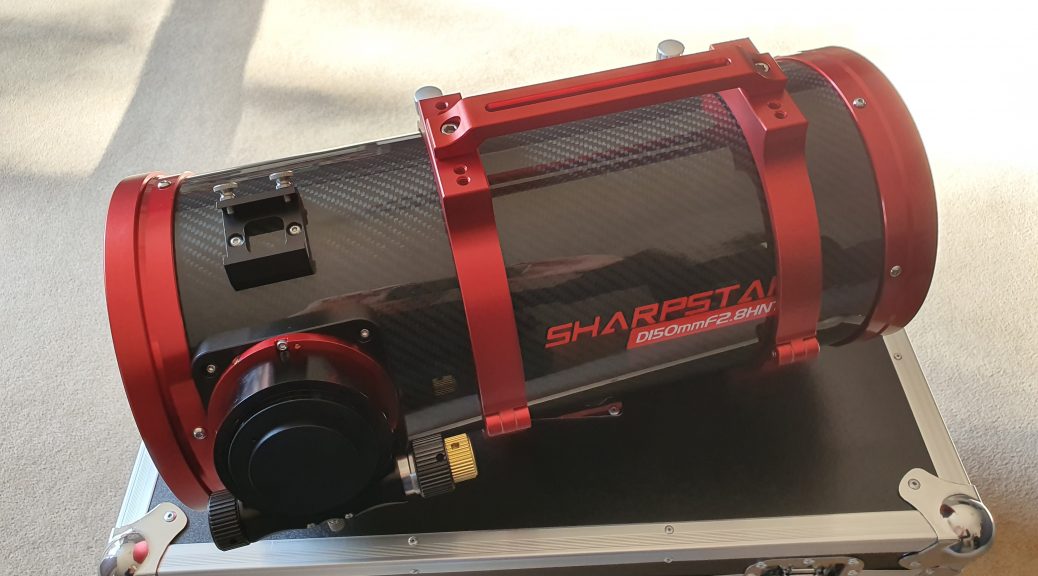
After months of trying to get my trusty Sky-Watcher Quattro F4 to work with the ASA 0.73x reducer I decided to go all in on an F2.8 astrograph. After doing some research I stumbled across the SharpStar 15028HNT F2.8 Hyperboloid Newtonian Reflector from my local supplier 365Astronomy.
After toying with the idea and speaking to my good friend Nick from Altair Astro and with the idea of going back to a refractor, I decided that I could not go back to slower than F4 and I wanted something that in essence would work with a bigger sensor than my QHY183M, and the Sharpstar looked like it could work for me, so I placed my order with Zoltan from 365Astronomy and collected it the following day.
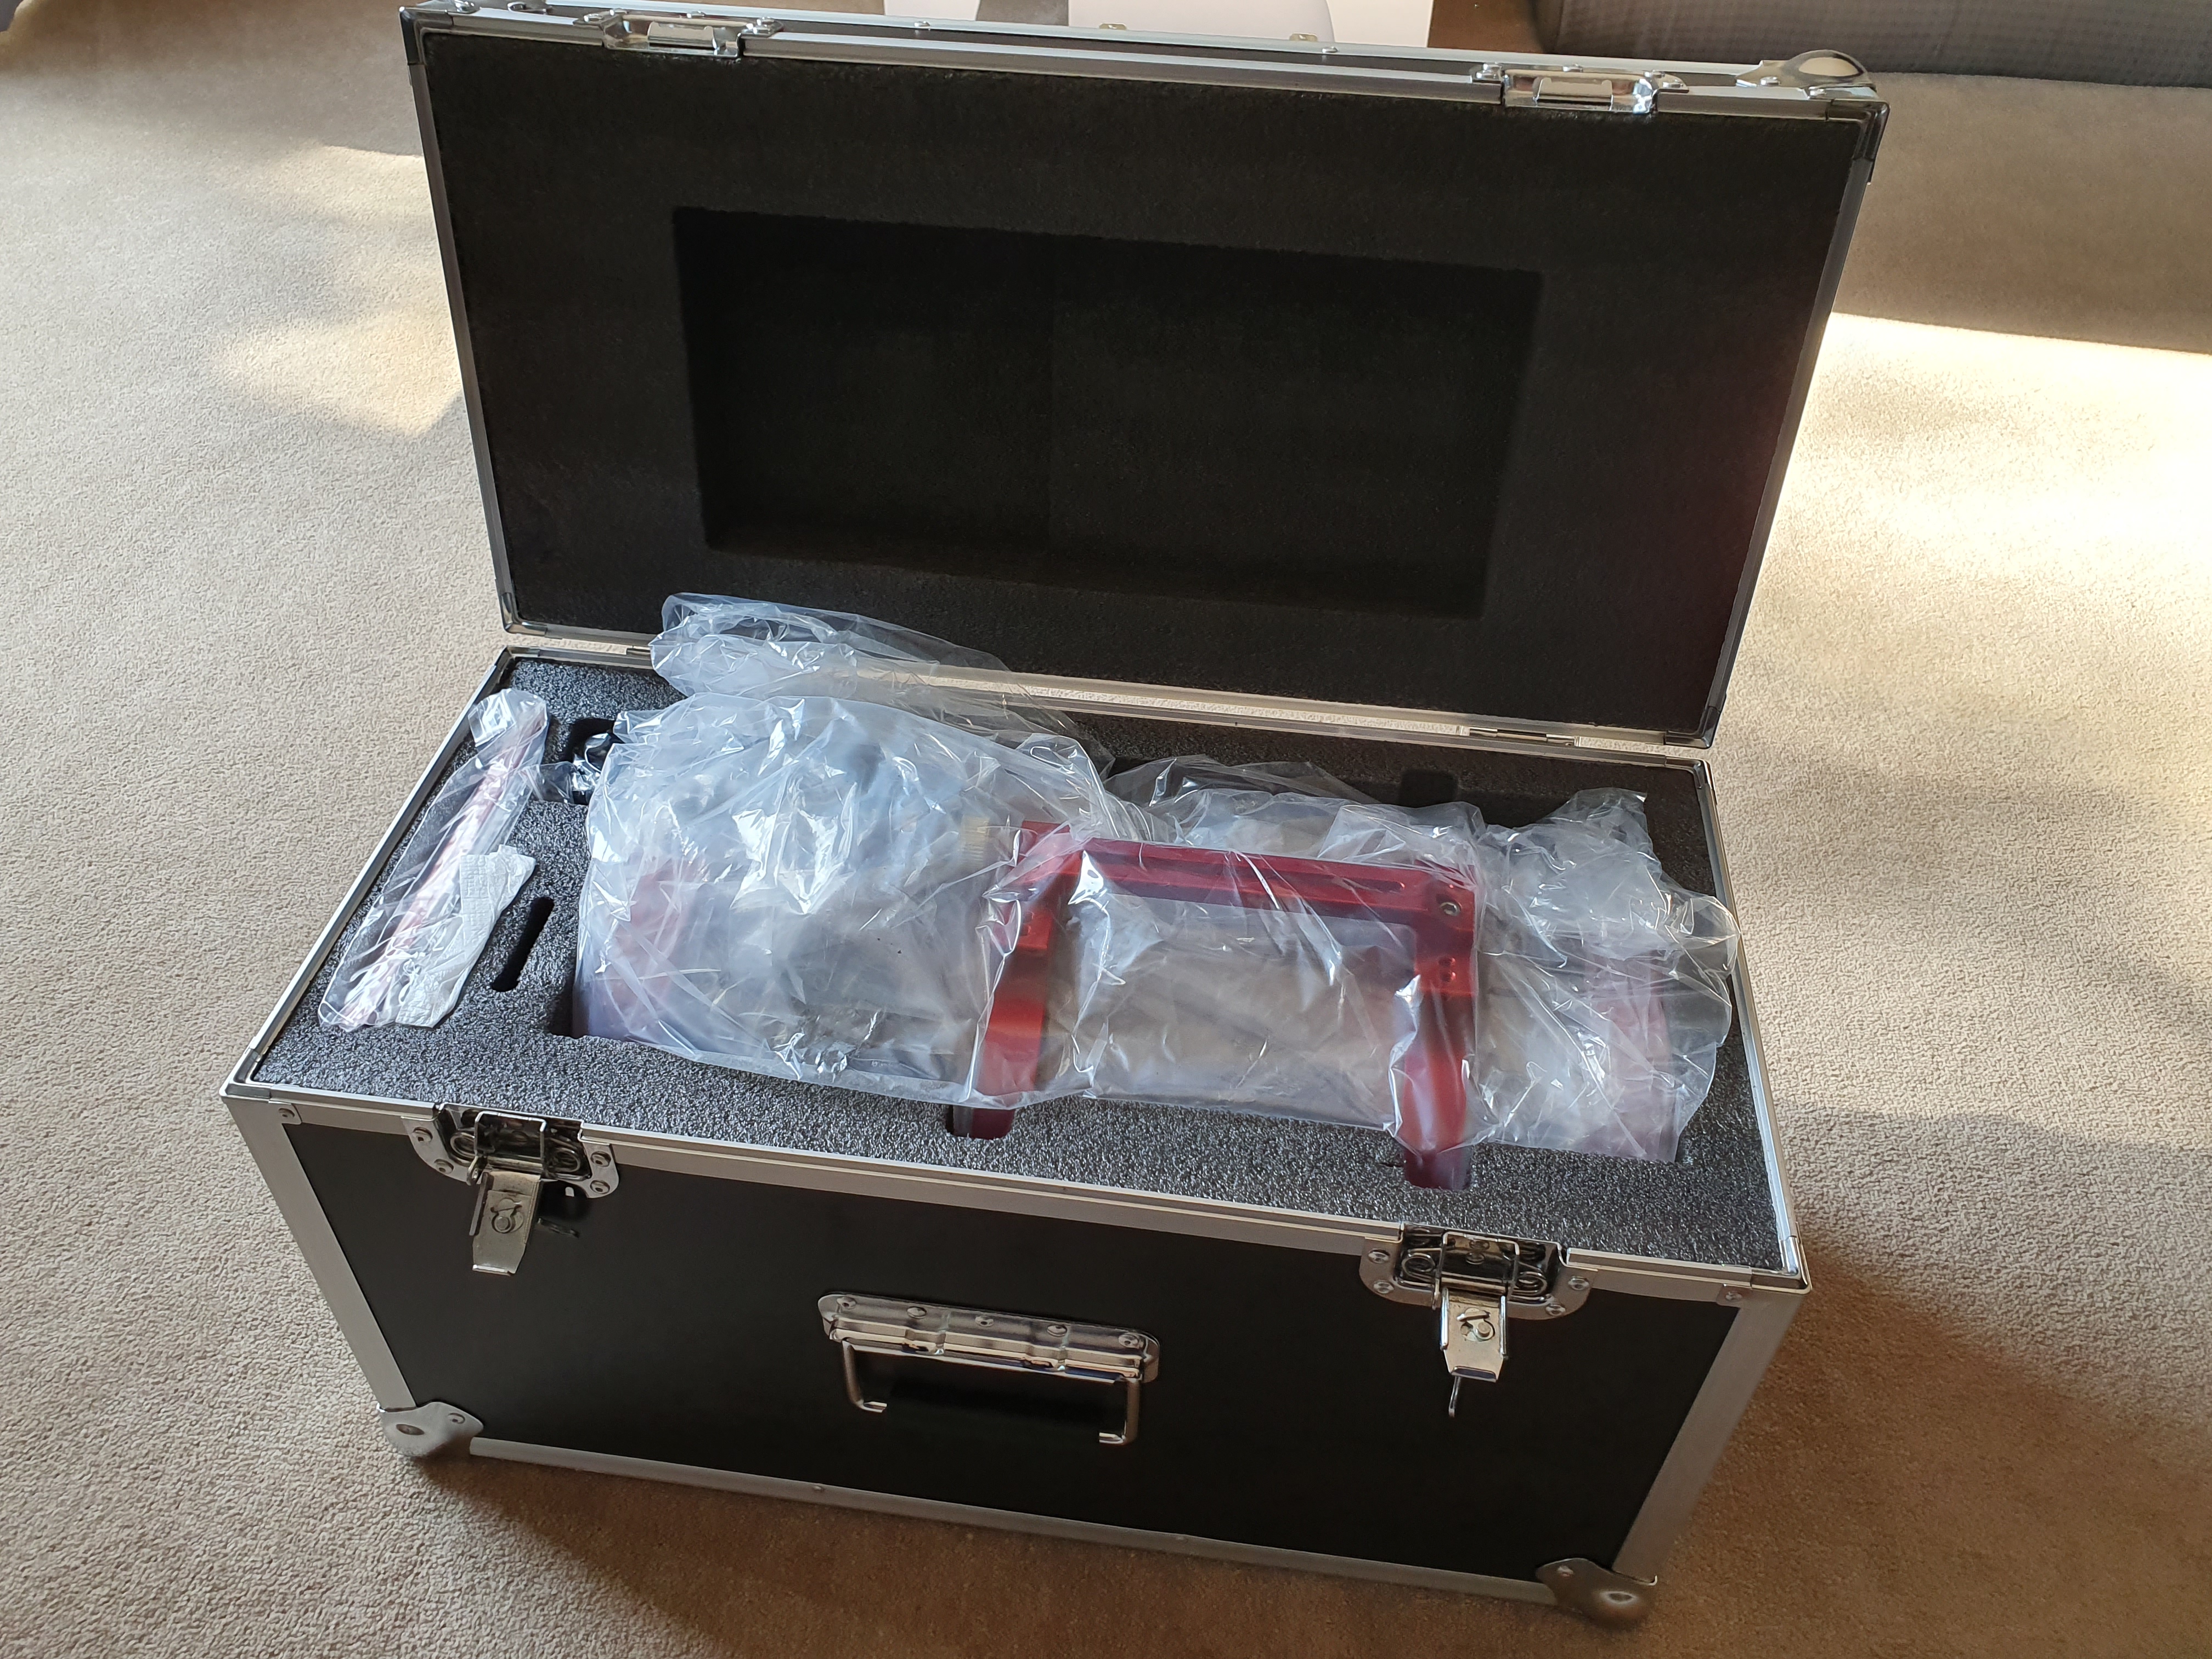
Unboxing the scope, I was like a young child at christmas, the scope came with a very sturdy protective hard case and removing the scope out of the case you could immediately feel that a lot of time and effort had gone into producing the 15028HNT.
Aperture: 150mm
Focal Length: 420mm
Focal Ratio: F2.8
Weight: 6kg
Tube Material: Carbon Fiber
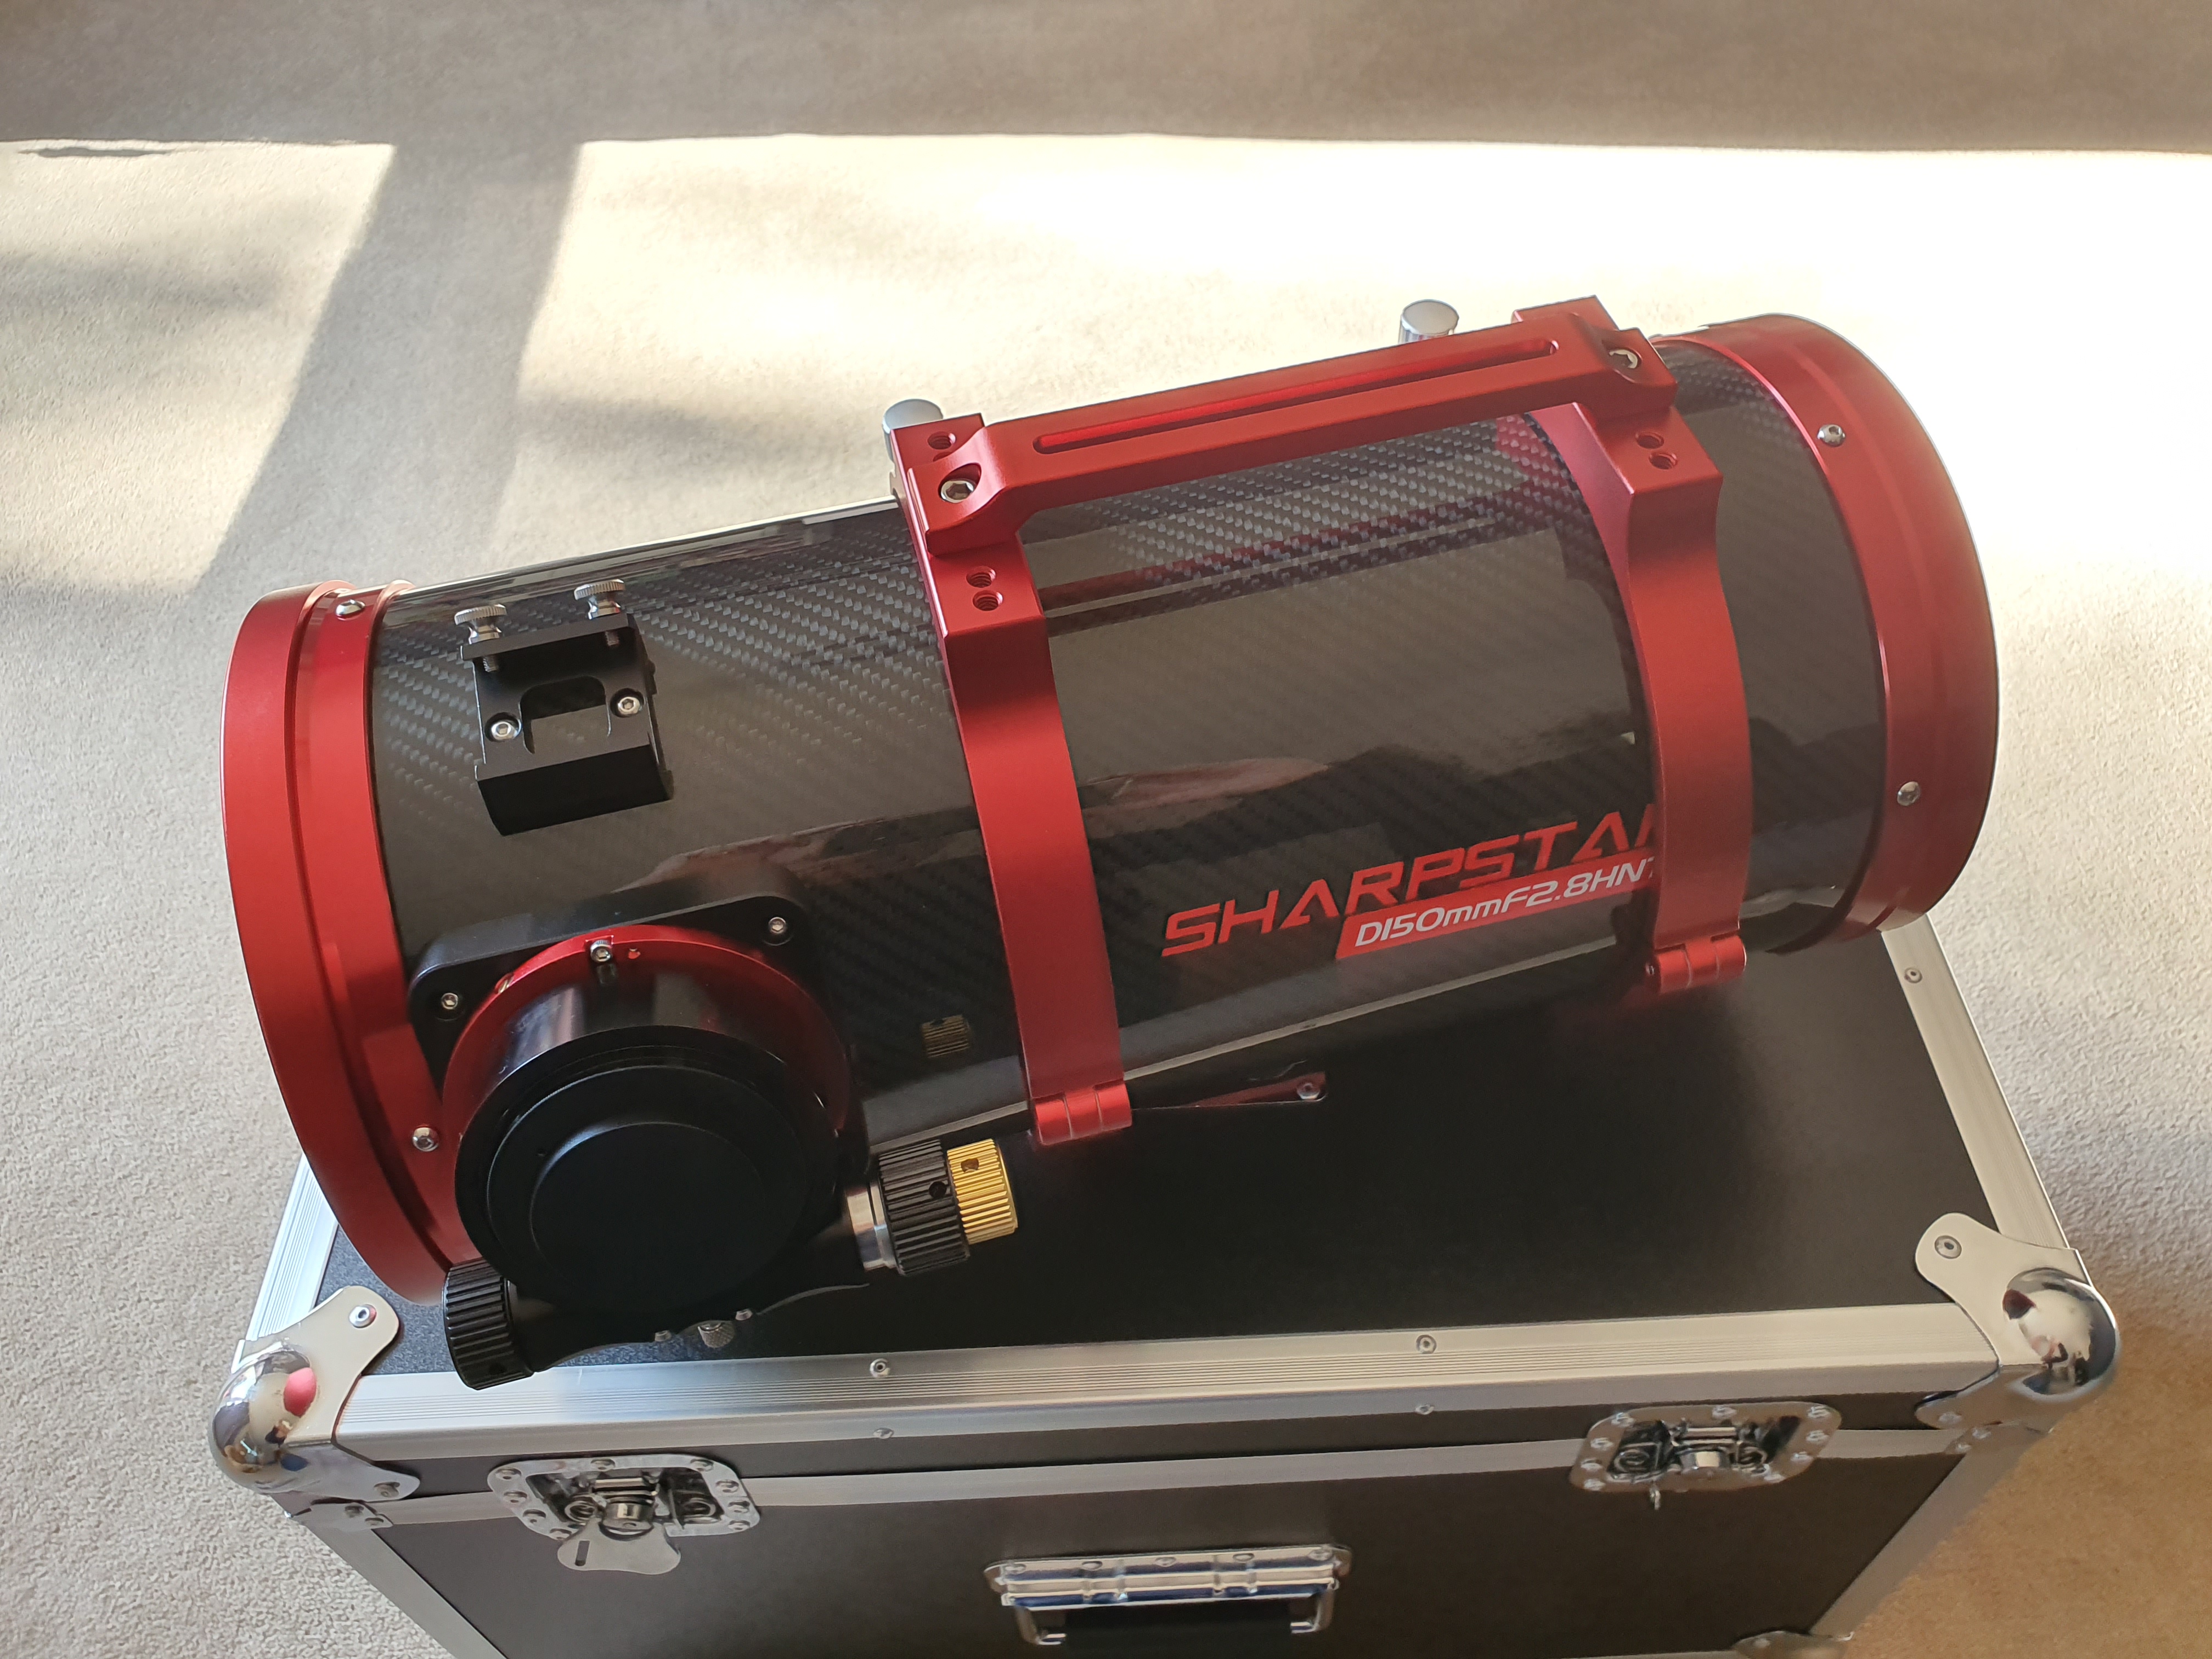
With the scope unboxed I started to fit my equipment onto the scope. In order to fit my Sesto Senso I had to rotate the focuser 90 degrees clockwise due to the telescope mounting rings, this is when I noticed an isue that one of the grub screws on the focuser would not tighten and I needed to stop the backlash, fortunately there’s another grub screw on the other side that tightened and stopped the backlash.
Before I attached my imaging equipment, I had to ensure that the telescope was collimated, so I stumbled across the collimation guide which after speaking with my good friend Terry Hancock over at Grand Mesa Observatory who was also evaluating the same scope, we both agreed that the colimation guide wasn’t very well written as it mentioned nothing about collimating the primary. One thing that it mentioned is to remove the corrector, Sharpstar include a tool for you to remove the mounting plate and corrector, but here is a word of advice……..remove this when the telescope is cold, take that advice from someone who tried to remove it whilst it was warm!
I performed a laser collimation with my Concenter Eyepiece to check the secondary, and then a laser to check the primary, now the collimation guide says to remove the corrector, I have done validation with both the corrector removed and the corrector in place, and it made no difference whatsoever, so my opinion is to leave the corrector in place.
With the scope closely collimated, I mounted my StarlightXpress Filterwheel and Camera which with the 15028HNT is an M48 thread for the gear to screw onto.

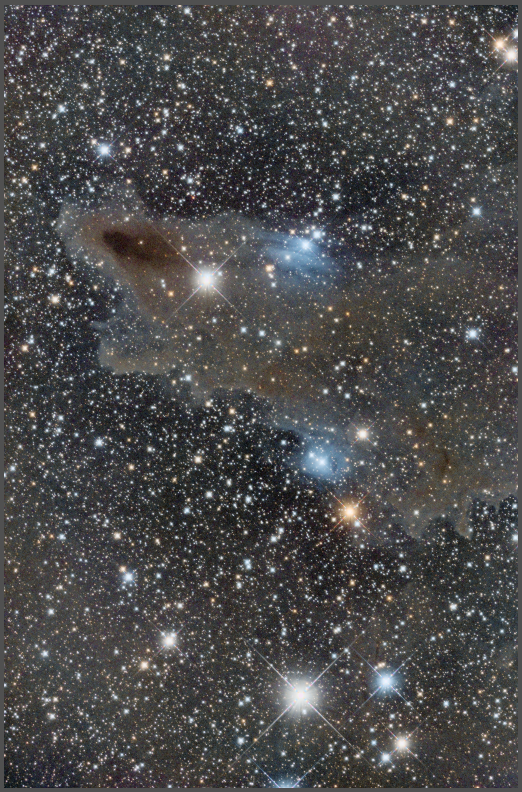
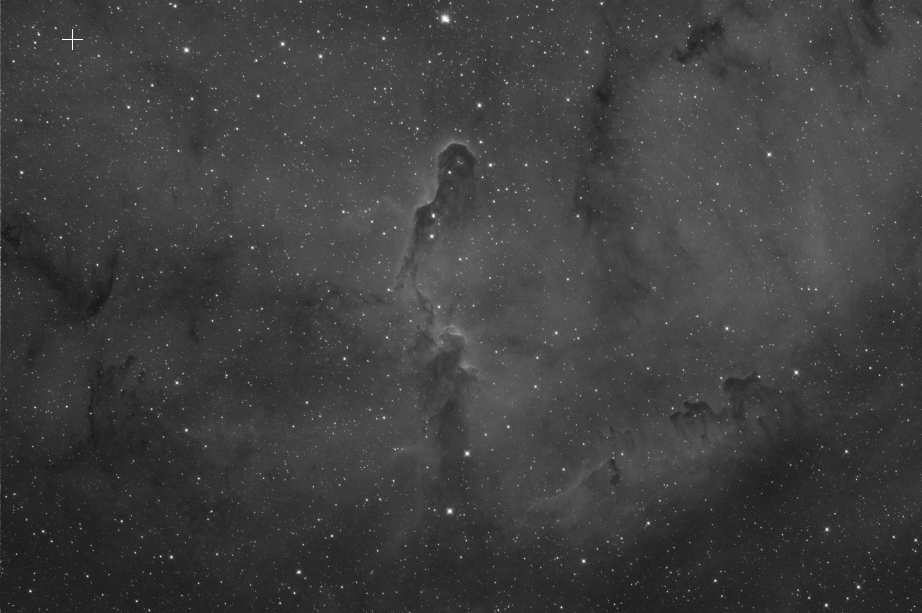
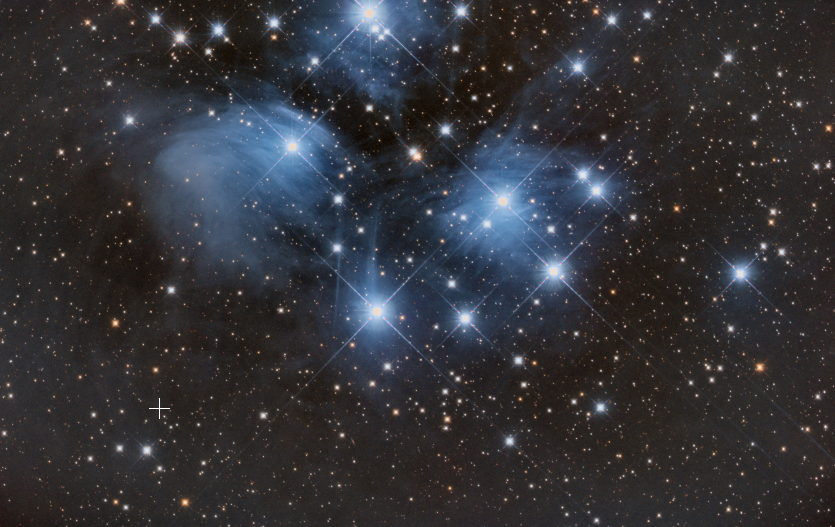
I will post some images as soon as I have completed some, the weather has been pretty poor (probably because I bought a new scope), but the frames I have got so far are very sharp, pinpoint and I can honestly say I have never seen images come directly off the camera so sharp.
My field of view with the QHY183M is around 1.21 Arcsec/Pixel which gives me a FOV or around 1.81°x1.2° and I love the difraction spikes being at 45 degrees compared to the 90 degrees on the skywatcher and I already have a pretty full target list for this scope ready to go this season.
Apart from the couple of product issues I have experienced (Grub screw on focuser and tube clamp thumbscrew being threaded) I am extremely happy with the scope, it is performing really well and here are a couple of work in progress images that I have started
After a few weeks, the telescope has held collimation very well, I have not had to perform any re-collimation, I will re-evaluate this in the much colder months of winter.
I am so happy with the scope that I am actually considering a second one for an OSC Camera with a bigger sensor.
Hello Simon,
My name is Lior Spiegel and I`m from Israel.
I do Astrophotography and I`m looking to buy a new Astrograph.
I`m showing interest of the Sharpstar 150 F/2.8, saw that you have it, I do have couple of questions:
I do own the same CCD camera and FW as yours, the only difference is that I use an OAG and you use a guide scope, the manufacturer specified the back focus to be 55mm but with my OAG I reach 60mm, I wish not to uninstall the OAG so will need another solution, can you help me with that?
Just to let you know, Terry Hancock is a friend of mine as well, he recommended you to remove the corrector prior to collimation, can you explain to me how to do that? I`m using a Glatter 2″ collimator.
I can see that you are using Pegasus control box, are satisfied with it? I`m planning to buy the expensive one.
Generally, do you like the performance of this scope? what are the drawback of this scope? Does it hold collimation well during a night session?
Thanks a lot and clear skies,
Lior
Hi Lior
I did not use an OAG with this because of the limited back focus, especially as you have to factor in a filterwheel too, you may be able to get away with a TS9OAG perhaps, but yes the back focus is pretty spot on for 55mm. I am moving to an APS-C sized OSC now, so I will be using an OAG again.
I am very happy with the Pegasus Astro USB HUB, it works flawlessley for me, I have even made some suggestions to Pegasus Astro that have been implemented into their software.
I have not had to re-collimate the scope across a whole season, it has held collimation very well, I love the performance and how razor sharp the images are that come off the sensor without any sharpening. In all my images I have done tiwh the 15028HNT I have not had to do any sharepening whatsoever
Hi Simon,
Wow!!! Two years has passes and I completely forgot about our conversation until today, so sorry about that!
Well, since my first respond to you a lot of things has changed, I finally bought the FSQ85EDX and Pegasus ultimate v2 controller, I still image with SX694 Trius mono and SX FW & OAG, recently I bought a QHY268M and waiting to give it a first light using the Tak flattener 1.01x.
I still haven`t excluded the option for the Sharpstar 150HNT, but maybe later on.
Best regards and clear skies,
Lior
BTW- nice images you made there with this Astrograph
. 🙂
Hi there Simon,
I also own a SharpStar 15028HNT that I use with my ASI183MM. I really appreciate your review and collimation guide!
In your collimation guide, it looks like you have a dew heater on your secondary mirror. Would you mind telling me which brand this is or if you made it? I really suffer from dew forming on my secondary, it would be very much appreciated!
Thanks,
Stefan
Hi Stefan
Yes I use a secondary heater which I got from 365astronomy.com I also cut out a hole in the plate behind the primary and fitted a 90mm fan which also prevents dew forming on the primary with it being such a short tube
Simon
Hi Simon,
Thanks for the collimator guide, I think the Sharpstar instructions have been put through Google Translate, they make very little sense.
I have used the scope a couple of times on easy targets and got OKish results but not great. I think my problem may be the reducer which I know had been removed and replaced before I received it.
What depth should it sit at? Sky & Telescope suggests that bring it forward reduces coma.
Regards,
John
Hi John
My corrector is screwed all the way in, whilst I ma currently at a distance of 55mm from the corrector, I think I need to reduce it slightly, by around 0.5mm, so I have some PrimaluceLabs M48 7mm extension tubes, if I replace one of the 7.5’s with the 7mm then I can reduce by 0.5mm, and again if I need to by replacing the other, however I am not going to do that right now, whilst it is not really noticable unless you really zoom in on the images, I know it’s there.
So my spacing is currently, 2×7.5mm M48 Extension Tubes, + 22mm ZWO M54 Filter Drawer + 17.5mm for camera sensor = 54.5mm
Regards
Simon
Hi Simon,
If you remember me from my questions on one of your ZWO Facebook posts (the Andromeda galaxy from last year), I also own the SharpStar 15028HN, and I appreciated the info you gave me! I have a question about rotating the focuser though. I assume it’s the four screws which bolt the red anodized ring to the focuser housing which I need to loosen, then rotate the focuser 90 degrees, and then tighten? Or is it the four screws which bolt the whole focuser housing to the main tube which I have to loosen, rotate everything, and then tighten?
Best wishes,
Rich
Hi Simon,
I bought the Sharpstar from 365Astronomy (after we discussed on Facebook a year or so ago). I’ve attached a ZWO EAF, the mini filter wheel and a 294MM to mine, and I realise that the EAF juts out a long way above the tube opening, and taking flats is problematic (and there’s effectively a reflective surface handing above the scope opening!).
I recall you mentioning somewhere that you rotated your focus tube. Which screws/bolts did you loosen/remove to do this? Any advice is appreciated.
Cheers,
Rich