Tag Archives: Dark Frames

QHY268C APS-C Colour Camera Review – Part 1

As many of you know, I have been using QHY cameras for a while, but with my plan to move to a RASA telescope next year and wanting to image with a bigger sensor than the QHY183M I decided to go for a bigger sensor but moving away from Mono, the latest addition to the QHY familly is the QHY268C Photographic Version. I had been talking to the QHY team for a long time about this particular camera, and finally I have one.

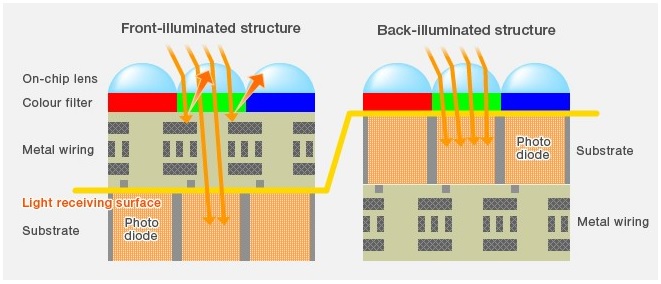
The QHY268C is a once shot colour camera based on the APS-C Sized back illimunated Sony IMX571 sensor, the camera has a true 16-Bit Analog to Digital Convertor (ADC), now there are a few camera models out there using this sensor, cameras such as the ZWO ASI2600, but one thing that sets the QHY268C apart from the others is the ability to have a 75ke full well capacity which is 25ke higher than the ZWO ASI2600. In my opinion, when imaging at fast focal ratios, a higher full well is desired to protect the colour around bright stars for example.

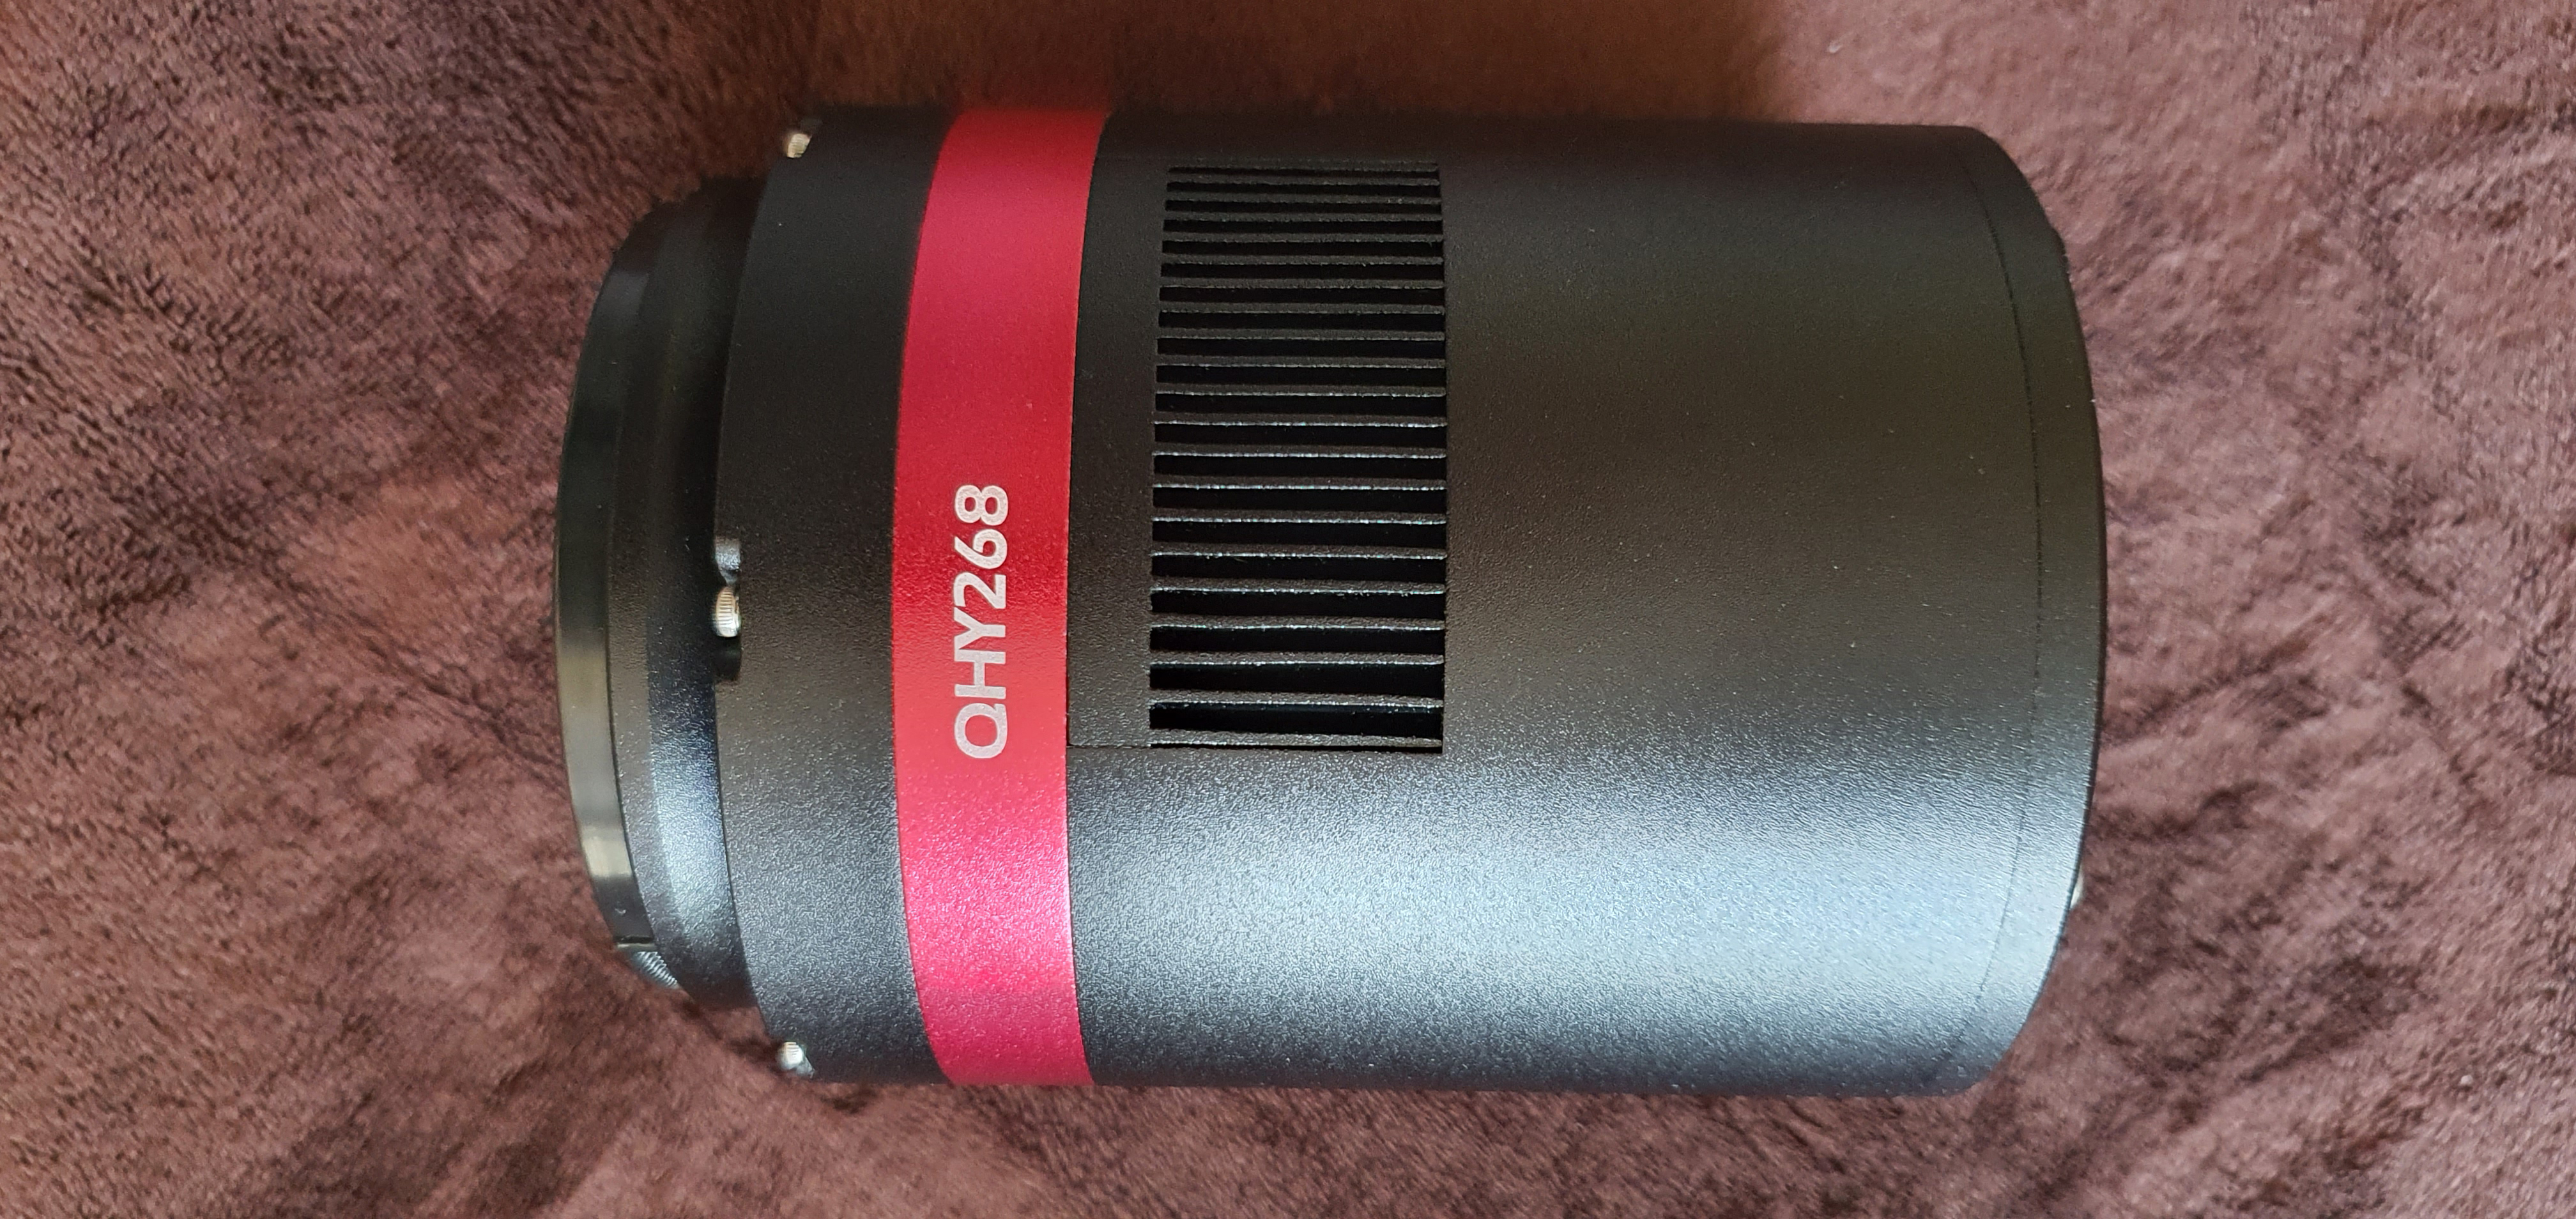
Opening the box I was greeted with a camera that was bigger and heavier than my 183M, but then the sensor is much bigger than the 183M anyway so this would be expected, but what I did not expect is the additional items that came with the camera:
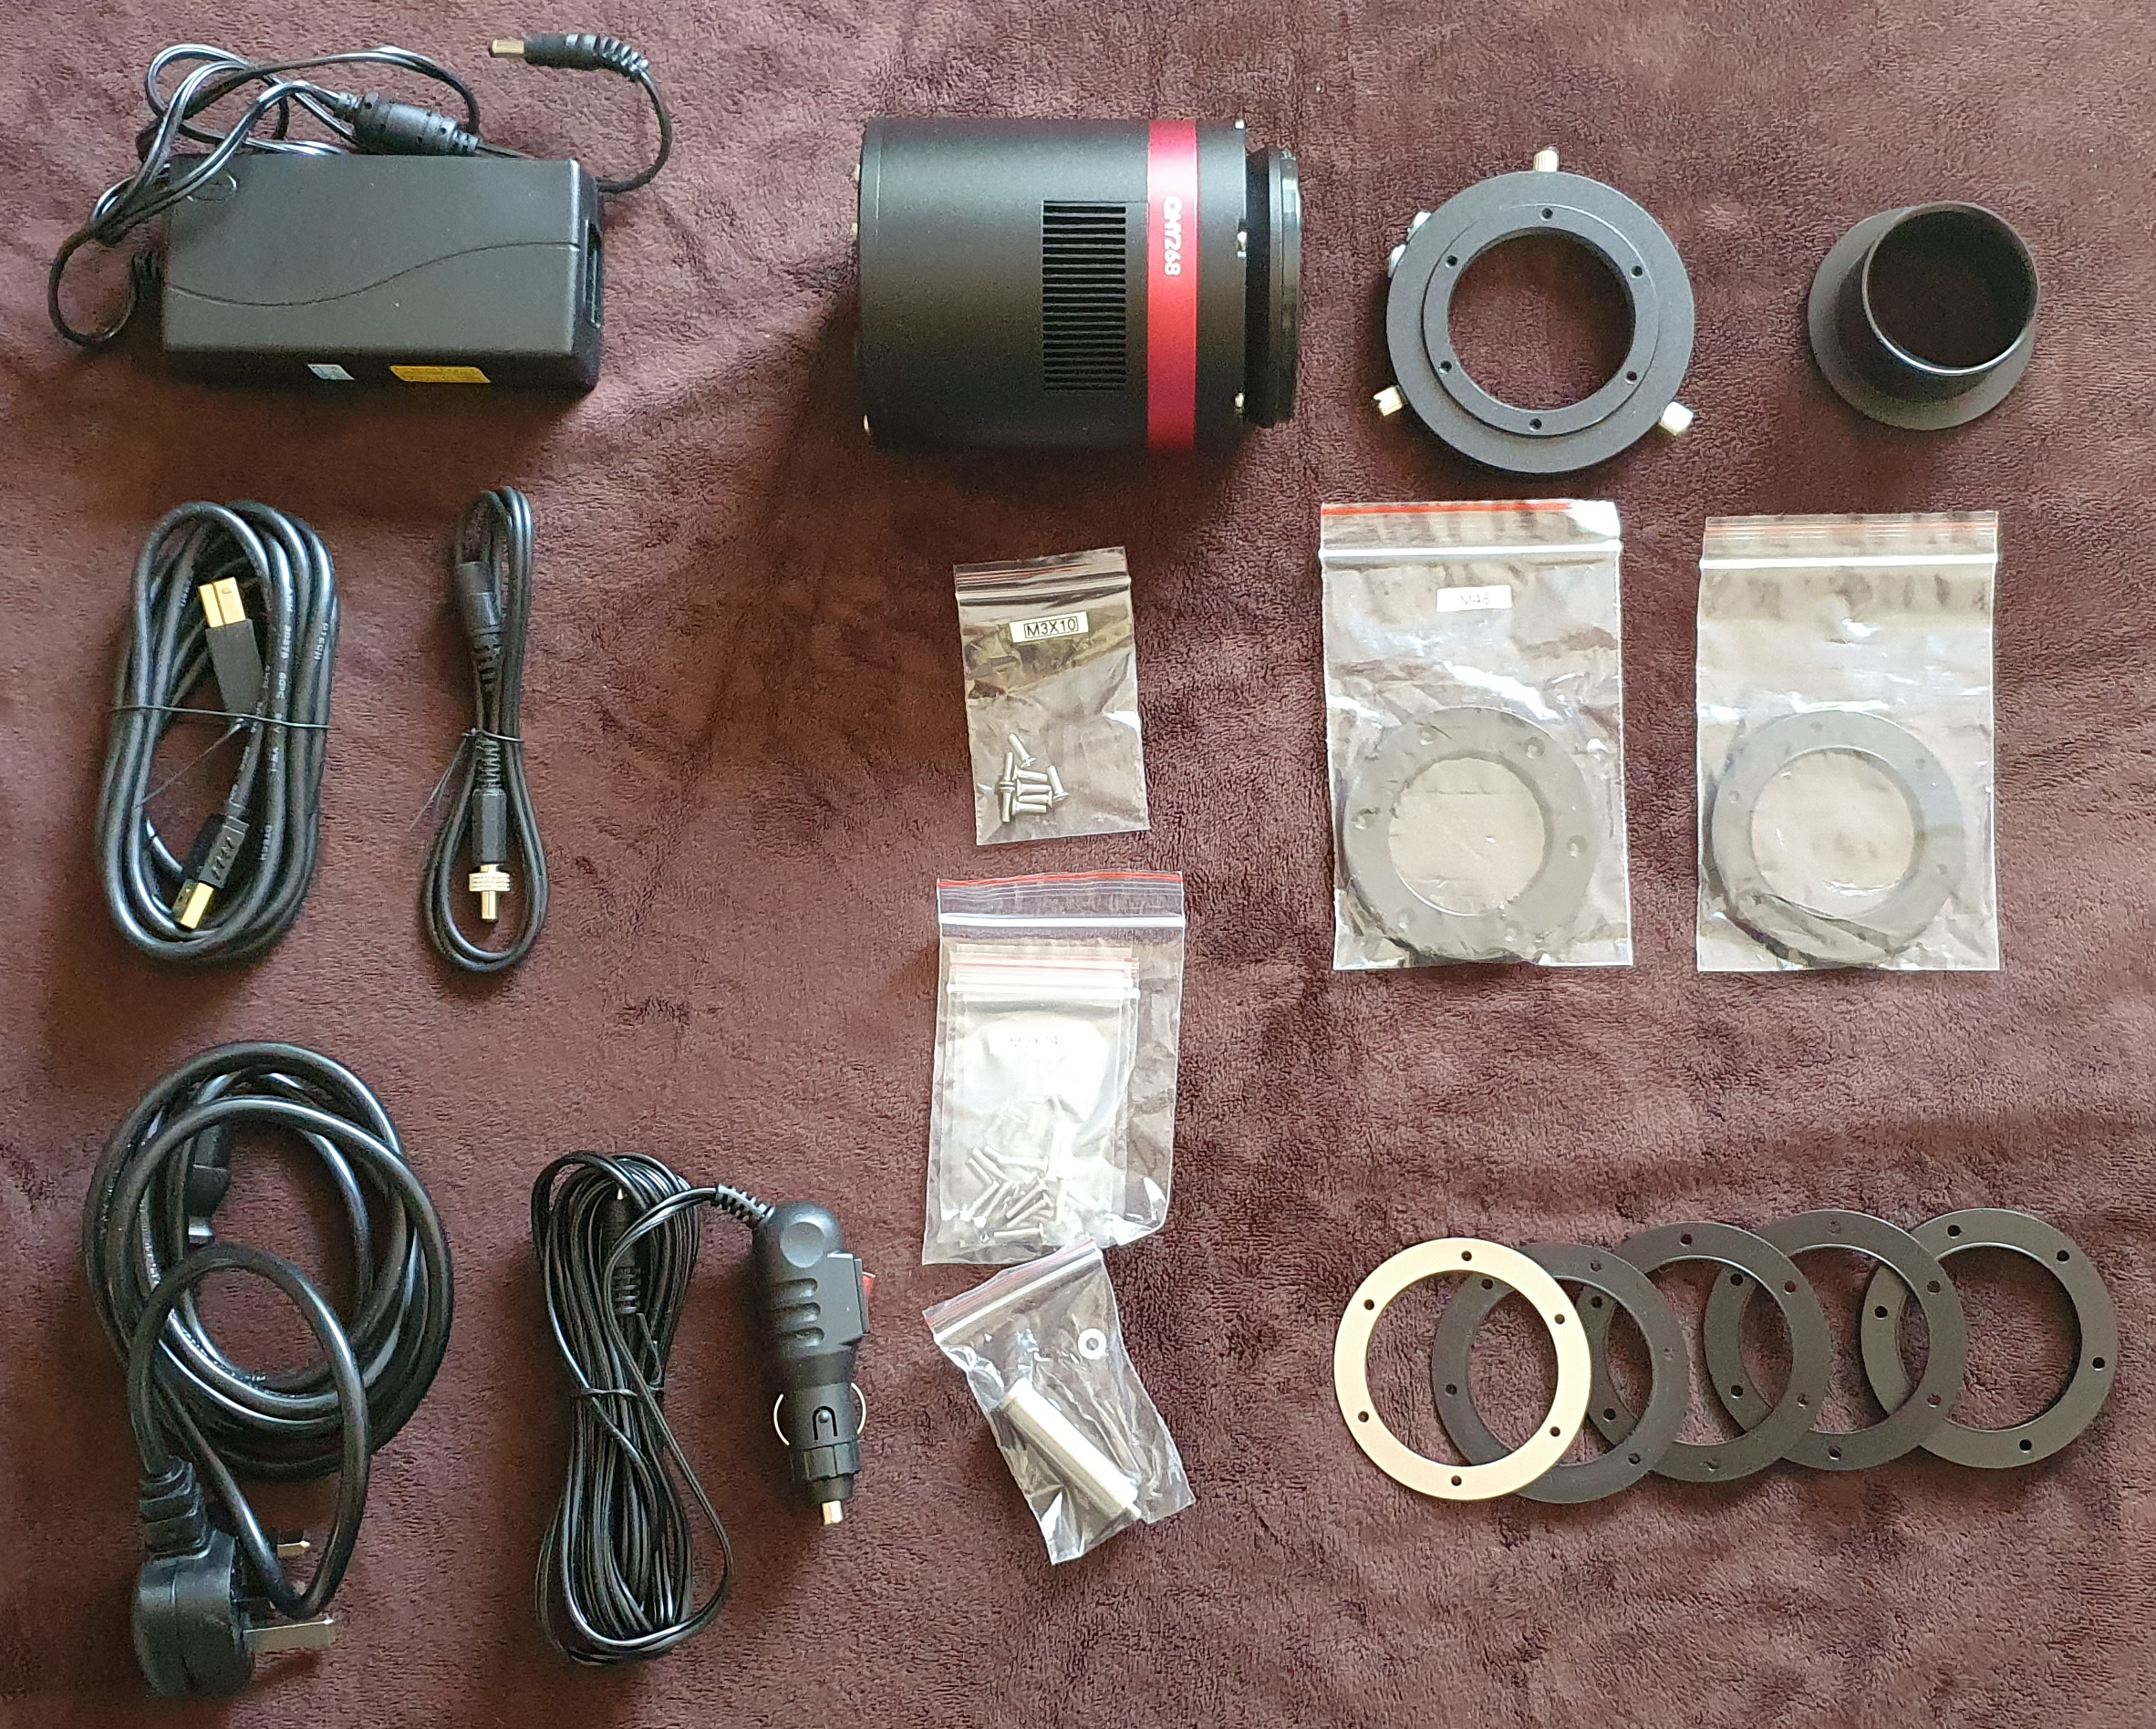
Inside the box was:

  • QHY268C Photographic Version
  • UK mains plug for 12V AC adapter
  • 12V AC adapter
  • Car 12v power cable
  • Self locking power cable
  • 1.5M USB 3.0 cable
  • Dessicant drying tube
  • Self centering adapter plate
  • M54 to M48 adapter plate
  • M54 to 2″ nose adapter
  • A range of spacers to give you from 0.5mm to 13.5mm spacing
  • Associated screws for spacing adapters

QHY cameras have come along way since I bought my QHY183M, one of the things QHY has really worked on is amp glow, my early version of the QHY183M was renowned for was amp glow, which could be removed in image calibrations, but the QHY268C produces no amp glow whatsoever, below is a dark frame of 600S taken at -13.5C and you can clearly see there is no evidence of amp glow.

Single frame 600 seconds, Gain 26, Offset 30, -13.5C – Mono (Not Debayered)

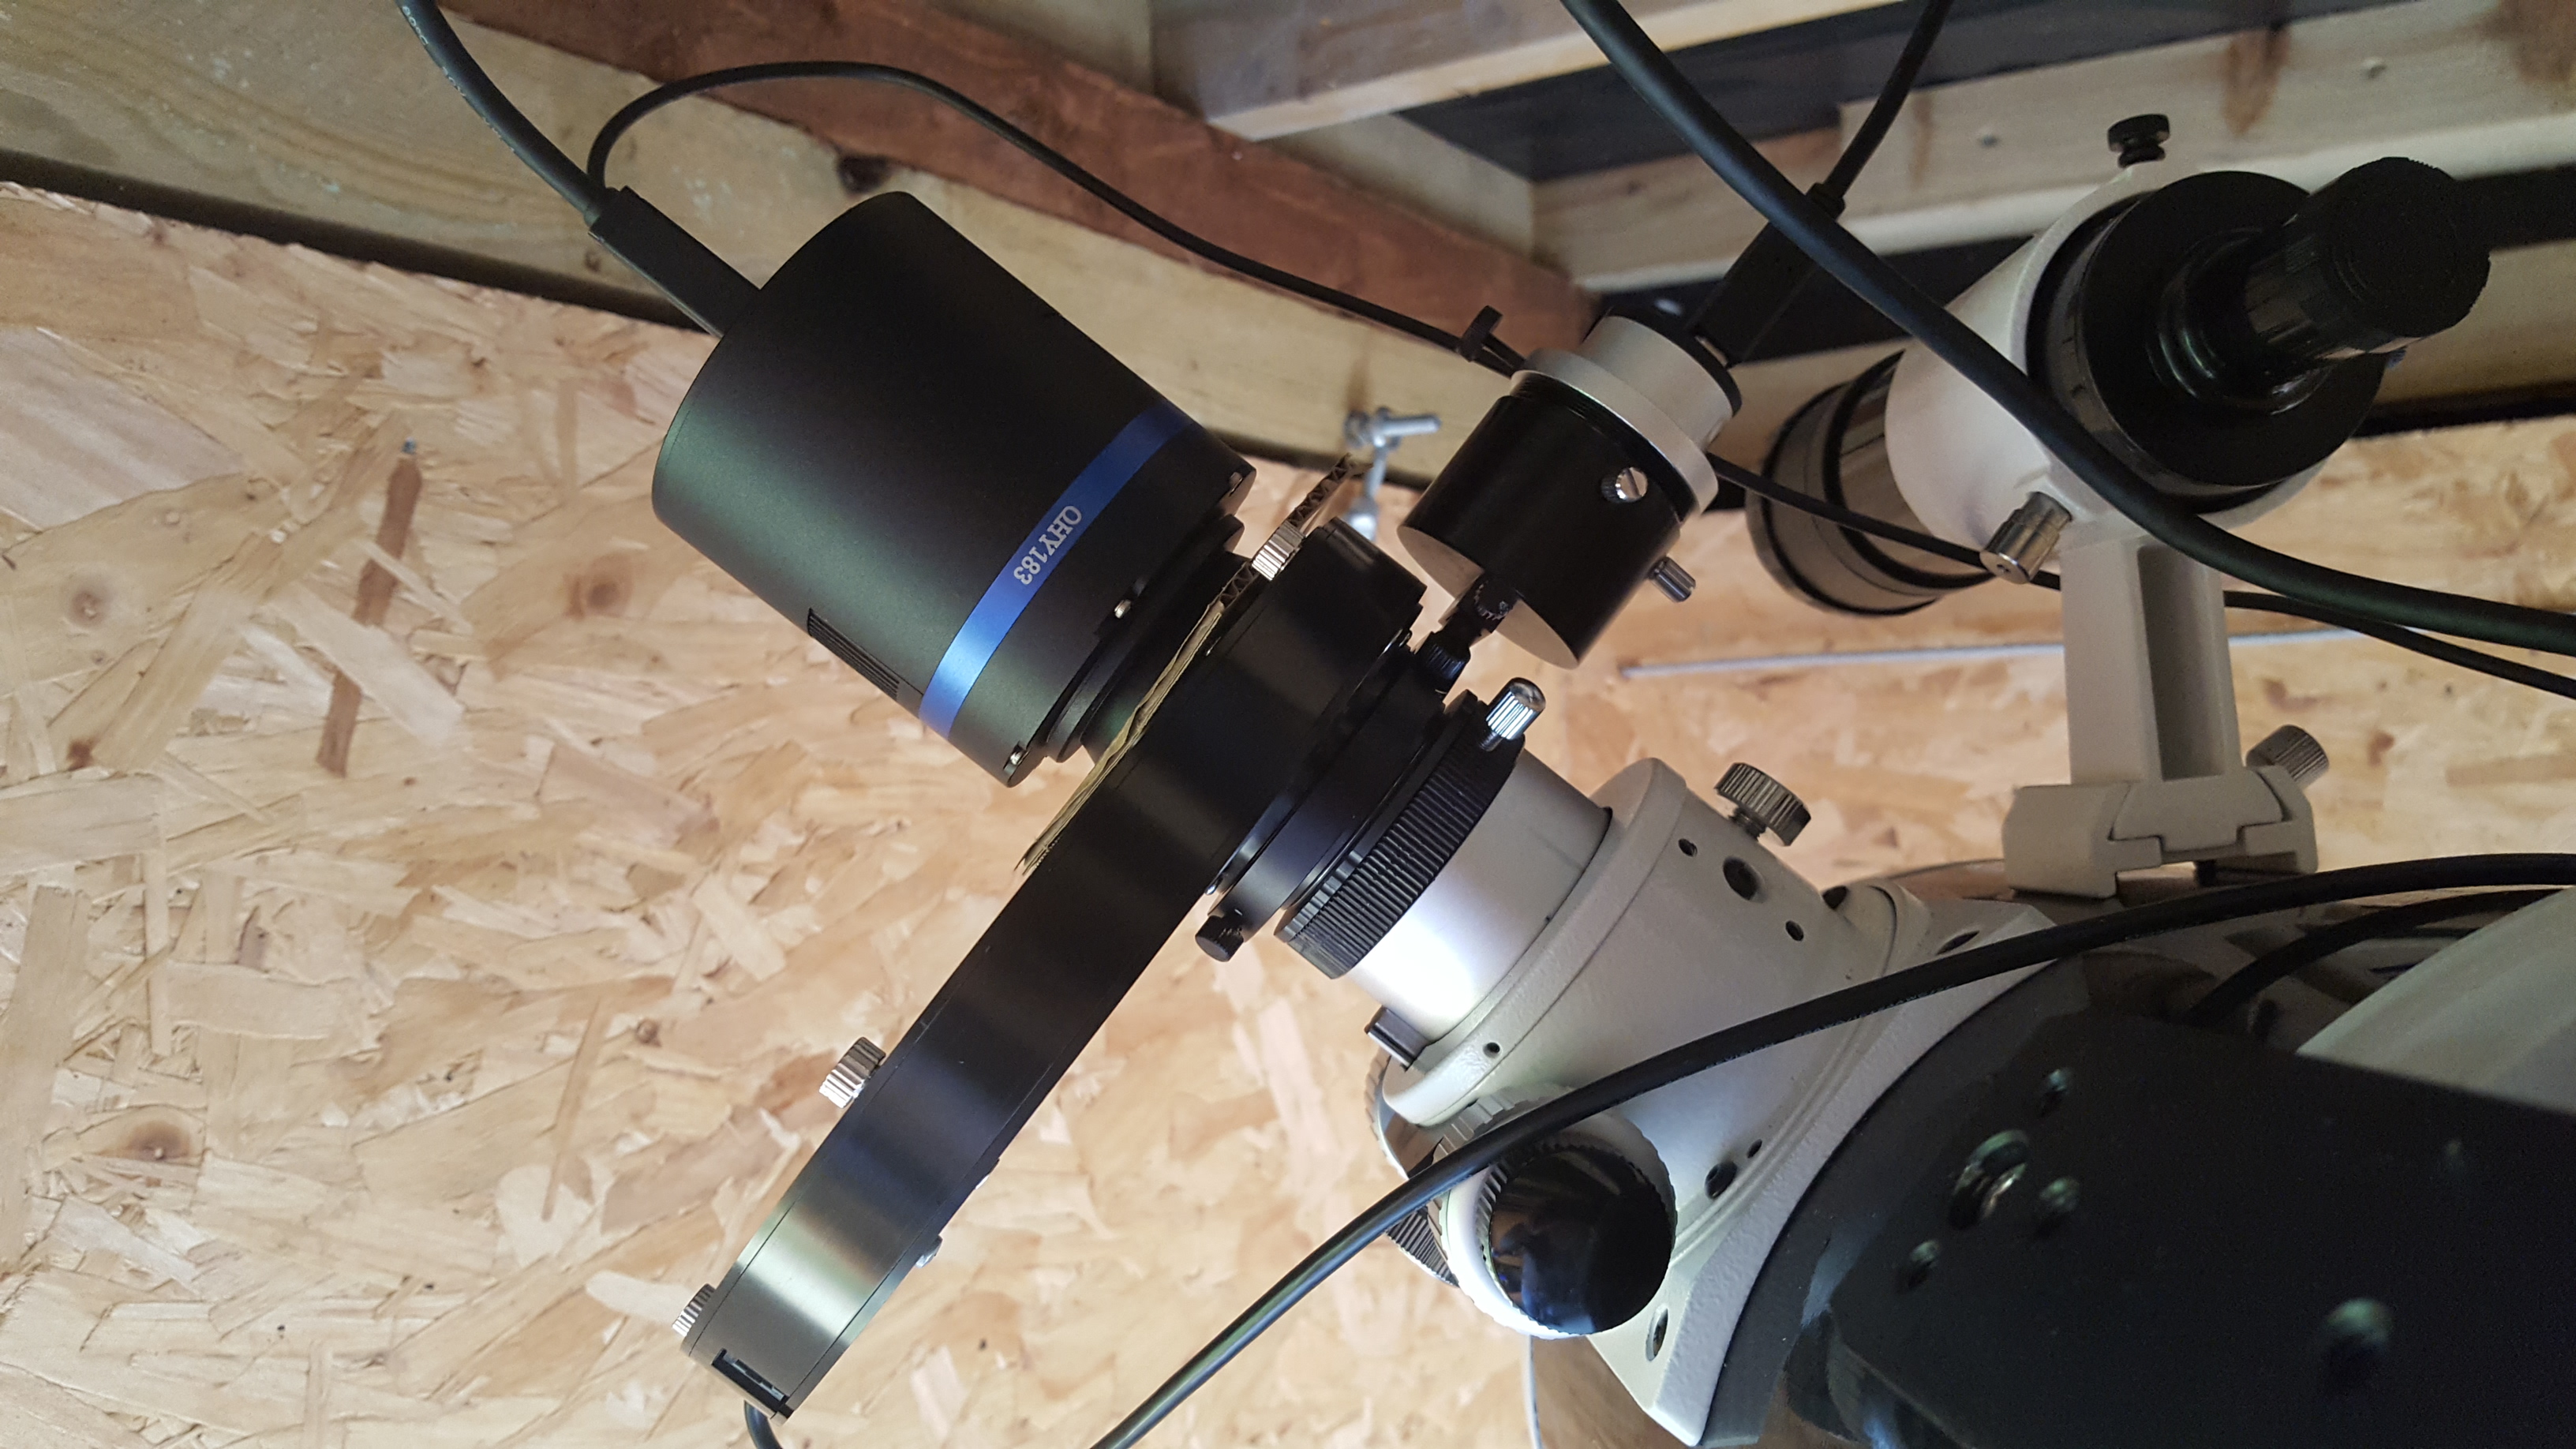
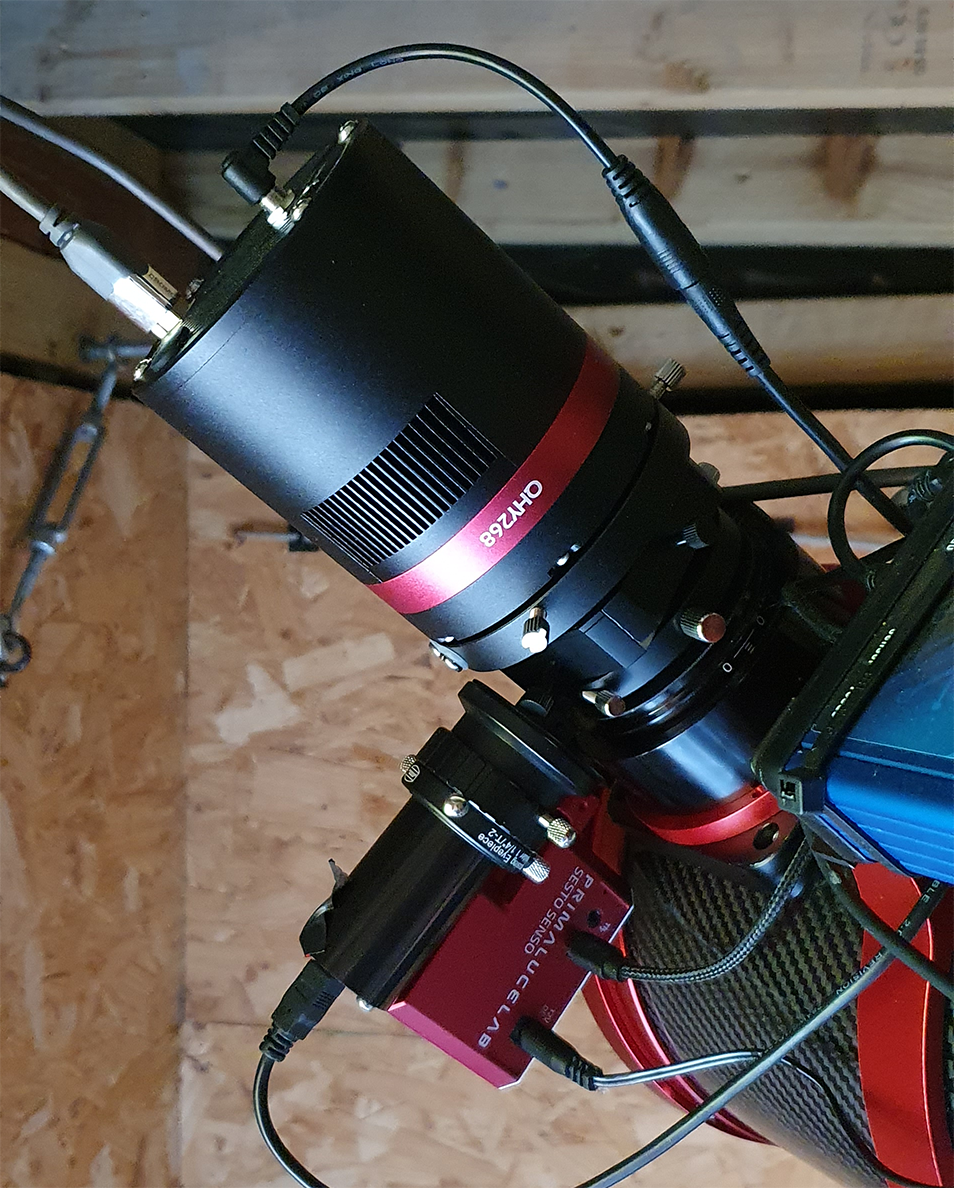
Attaching to the telescope was pretty straight forward as I had already planned the imaging train before the camera arrived, since I will be using the SharpStar 15028HNT F2.8 Paraboloid Astrograph which has an M48 thread, I decided to keep the whole imaging train at M48 except for the camera of course which has an M54 thread, so I did not actually need to use any of the adapters that came with the camera, the reason for this is because I wanted to include a filter drawer, so my image train consists of the following (from telescope to camera)

  • TSOAG9 – TS Off Axis Guider (9mm)
  • TSOAG9-M48 – TS M48 Adapter for the OAG (2.5mm)
  • TSFSLM48 – TS 2″ Filter Drawer with M48 Thread (18mm)
  • M48AbstimmA05 – TS Optics 0.5mm Aluminium spacing ring (0.5mm)
  • TSM54a-m48i – TS M48 to M54 Adapter (1.5mm)
  • QHY268C with M54 Centering Adapter (23.5mm)

As you can see with all the above I reach my desired back focus of 55mm perfectly, if I was not going to be using a filter drawer (For my Optolong L-Pro and L-eXtreme filters), I would probably have stuck with the spacers that came with the camera. Below is a picture of the camera successfully connected to the telescope.

As far as settings go, after speaking with QHY on this at great length, I will be imaging in Mode 0 (Photographic mode) to avail of the massive 75ke full well, offset I will leave at 30, but Gain I will use two different settings, I will use Gain 0 for most bright objects with the L-Pro filter, but for the L-eXtreme, I’ll probably set a gain level of 26, luckily with SGPro I can set the gain level per object. From a cooling perspective I always image at -20C, one thing I have noticed is that this camera cools to exactly -35C below ambient, I tested this when the ambient temperature was 20.10 degrees, and the camera cooled down to -14.9C, it was always 25C lower until the ambient dropped below 15C and the camera remained at my setting of -20C.

The build quality of the camera is as expected having owned a QHY183M, one thing I did notice is that the fan in the QHY268C is much quieter than the 183M. Technical Details of the camera:

CameraQHY268CQHY183M
Image SensorSony IMX571Sony IMX183
Sensor SizeAPS-C1″
IlluminationBack IlluminatedBack Illuminated
Pixel Size3.76um2.4um
Effective Image26mpx20mpx
Full well capacity51ke
(75ke in extended mode)
15.5ke
ADC16-Bit12-Bit
Image Buffer Memory1GB/2GB128MB
Max Cooling Delta-35C-40C
Weight1006g650g

I can’t wait to get imaging with this camera, I have a very aggresive target list for this year in both RGB and Narrowband with the Optolong L-eXtreme filter, I will write part two of the review once I have some actual imaging data. Time to build my dark library.

QHY183M Review – Part 1

After much waiting (due to delays on Sony Sensors) I have finally received my QHY183M ColdMOS camera from QHYCCD which I collected from ModernAstronomy last weekend, so I apologise for the really bad weather we’ve had.

As you all know, for the past few years I have been using an Atik 383L+ Mono 8.3Mpx CCD Camera, so when QHY announced the QHY183C I immediately asked them if there was going to be a mono version to which they said….Yes!

So firstly you might ask why I chose the QHY183 camera?  Well the simple reason for this is that it offered me a higher pixel resolution for almost the same field of view that my Atik 383L+ offered, however there were other factors that swayed my decission:

  • Back Illuminated Sensor
  • High Quantum Efficiency (QE)
  • Optimal Cooling
  • Lightweight

So let’s first of all talk about the back illumination and what this means to astrophotography.  Typically CMOS sensors are orientated with the light receiving surface and the transistors/wiring facing the light, so when imaging it is possible to get reflections of light bouncing off the circuitry, with a back illuminated sensor, all the circuitry are on the underside of the surface that faces the light, thus elliminating the possibility of reflections bouncing off the transistors, the following image shows this in a bit more detail (Courtesty of QHYCCD):

So obviously the more light we can get to the imaging surface the better it is for our data acquisition, every photon counts right?!

The QHY183M has an extremely high Quantum Efficiency (QE) of 84% which means that more data is absorbed by the chip than my previous imaging camera which had a QE of just over 60% based on the KAF-8300 sensor from Kodak.

One of the first things I tested when I unpacked the camera was the cooling system, I wanted to know how good the cooling system was, QHY stated between 40-45C Delta, so considering the outside temperature was +5C I managed to get the camera down to -41.6C which was a delta slightly above the 45C promised by QHY, so considering I typically image at -20C this now means I can image when the outside temperature at night is even as high as +25C which typically doesn’t happen in the UK.  I also noticed that the QHY183M uses less current than my 383L+ did to get ot the same temperature, so another bonus of less power requirement.

Weight is always an astrophotographers enemy, so it was much to my delight that the QHY183M weighs a lot less than my ATIK 383L+ did, the 383L+ weighed in around 700g and the QHY183M weighs in around 450g.

Out of the box
My first impression of the camera is that it is well built, a bit more of a compact design in comparison to my previous camera, has a USB3.0 connector (even though I am still using USB 2.0) and has a port to connect a dessicant tube to if required.

Software Installation
Driver installation was relatively straight forward, if you are using a third party imaging program like Sequence Generator Pro, make sure you install the ASCOM drivers so that SGPro can then speak to the camera.  In SGPro there are options for Gain settings, according to QHY the unity gain for the 183M is 11, so I have mine set to this value in SGPro.

Image Download Speed
After completing my dark frames library, I noticed that the download speed from Camera to Observatory PC was much much faster than my Atik was, even though I am using the same USB 2.0 Hub, on the Atik it could take anywhere up to 20 seconds to download the image at 1×1 binning, obviously the QHY183M is a much bigger sensor at 20mpx, however the image download time is circa 5 seconds which reduces image acquisition time greatly for multiple exposures.

Dark Frames
My dark frame library is completed, below are four different exposure times, 90, 180, 300 and 600 seconds, each image consists of 25 frames combined using PixInsight

90 Seconds:

180 Seconds:

300 Seconds:

600 Seconds:

As you can see the darks are really good, if you stretch out the images you will see the AMP glow on the right side of the image, this will be removed in dark frame subtraction and is a common artifact on all CMOS based imagers.

I did have the occasional icing issue on my 383L+, however the QHY183M has a heated optical window, so time will tell on how often I will need to use the dessicant tube.

Conclusion so far…before imaging

Pros:

  • Excellent design.
  • Lightweight.
  • Very predictable cooling system cools to -45C below ambient.
  • Cooling system is much quieter than my previous camera
  • Less current draw versus my previous camera.
  • Easy software installation.
  • Very fast download speed of around 5 seconds per frame at 1×1 Binning.
  • Very high QE of 84%

Cons:

  • AMP glow, I am probably being a bit mean considering all CMOS based cameras are subjected to this.
  • M42 thread on the camera is not long enough for the StarlightXpress EFW, I had to place a piece of card between the camera and the Filterwheel otherwise the camera just keeps spinning round and doesn’t tighten.
  • There’s no electronic shutter like my previous camera, which means for my dark frames it has to be completely dark in the observatory

I hope this review is beneficial to you all, especially if you are considering either the 183C or the 183M.  I will post part 2 of my review when I have actually got it all focused and acquired some photons from the sky.