Tag Archives: CCD

The CCD vs. CMOS Showdown: Why Monochrome Cameras Excel in Astrophotography Over One Shot Color

Introduction
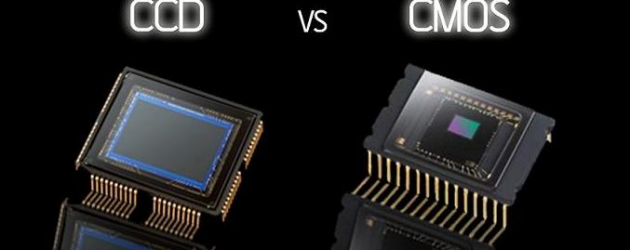
One of the first things photographers must decide when venturing into astrophotography is what kind of camera sensor they’ll need to capture the beauty of the cosmos. Charge-Coupled Device (CCD) and Complementary Metal Oxide Semiconductor (CMOS) image sensors are two of the most common on the market (CMOS). Each has its own set of pros and cons that make it better or worse for astrophotography in certain situations. Further complicating matters is the ongoing discussion between advocates of monochrome and one-shot colour cameras.

Understanding CCD and CMOS Sensors
Light is converted into electronic signals by the CCD or CMOS sensor at the centre of a digital camera. The image quality, cost, and power consumption are all impacted, but in fundamentally different ways.

CCD Sensors
CCDs have been the go-to sensors for astronomy photography for quite some time. They are well-known for the exceptional clarity and sensitivity to light of their photographs. These sensors generate low-noise, high-quality images by transferring charge across the chip and converting it into voltage in a single spot: the array’s corner. In turn, this improves light collection by allowing for a greater pixel fill-factor. CCDs, on the other hand, are typically more costly and power-hungry than their CMOS counterparts. In addition, they experience ‘blooming,’ an effect in which overcharged pixels leak their energy into neighbouring ones.

CMOS Sensors
In contrast, CMOS sensors have shorter processing times and use less power because light is converted to voltage right at each pixel’s location. They have lower manufacturing costs, making them common in smartphones and consumer-grade cameras. Their read noise and sensitivity are typically higher than that of CCDs, though. Recently developed technologies have allowed CMOS sensors to catch up to and even surpass CCDs in terms of performance, closing the gap between the two.

Monochrome vs. One Shot Colour Cameras
After settling on a CCD or CMOS camera, the next big decision in astrophotography is whether to use a monochrome or one-shot colour camera.

One Shot Color Cameras
As the name implies, a One Shot Color camera takes a complete colour picture with just one click of the shutter. The Bayer mosaic used in these cameras covers each pixel with red, green, and blue filters. The greatest benefit of these cameras lies in their ease of use. Even amateur astronomers can easily take stunning, colourful pictures of the night sky with these instruments.

Monochrome Cameras
Images taken with a monochrome camera are grayscale. These cameras capture red, green, and blue light through individual filters and combine them into full colour in post-production. Even though using a monochrome camera is more difficult and time-consuming, there are some benefits.

Why Monochrome Cameras Excel in Astrophotography
In general, monochrome cameras have higher sensitivities than single-shot colour ones. They are up to three times as sensitive as cameras that use a Bayer filter because all of the light that reaches the sensor is used to create the image. This heightened sensitivities is especially helpful in low-light astrophotography.

Additionally, more options and control can be had during the imaging process when separate filters are used with a monochrome camera. Using a hydrogen-alpha filter, astronomical photographers can isolate and emphasise specific wavelengths of light, such as the ionised hydrogen regions in nebulae. Imaging in light-polluted skies or capturing narrowband images greatly benefits from this ability.

Because the information for each colour channel is captured by the entire sensor rather than just a subset of pixels, as in one-shot colour cameras, the resulting images have greater resolution and detail.

Conclusion
In conclusion, CCD and CMOS sensors each have their uses in astrophotography, and the one you settle on will depend on your particular goals, financial constraints, and level of experience. Comparing monochrome and one-shot colour cameras, the former has better sensitivity, flexibility, and resolution while the latter is more user-friendly and saves time. Therefore, the investment in a monochrome camera and separate filters can be well worth it for serious astrophotographers seeking to capture the highest quality images.

StarlightXpress Lodestar X2

I was lucky enough that Terry from StarlightXpress sent me a Lodestar X2 for me to test to see how well it performed against my existing guider camera, so it only seemed fair that I provide my feedback via an equipment review. Many who know me know I have been using a QHY5L-II camera as a guide camera for a few years now but after seeing a few of my fellow astrophotographers using the Lodestar cameras it seemed silly not to try one out.

In comparison to the QHY5L-II the Lodestar X2 is a true CCD camera and not a CMOS camera, so immediately this would yield some higher sensitivity in what stars can be selected. One thing that is immediately noticable between the cameras is the Lodestar X2 is longer than the length of the QHY5L-II.

Just to add some more comparisons:

QHY5L-IILodestar X2
SensorAptima MT9M034Sony ICX829
Sensor TypeCMOSCCD
Sensor Size6.66mmx5.32mm6.47mmx4.81mm
Pixel Size3.75um8.2umx8.4um
MPX1.2mpx0.4mpx
QE74%77%
Length54mm85mm
Weight45g50g
Cost (27 Aug 2019)£175£378

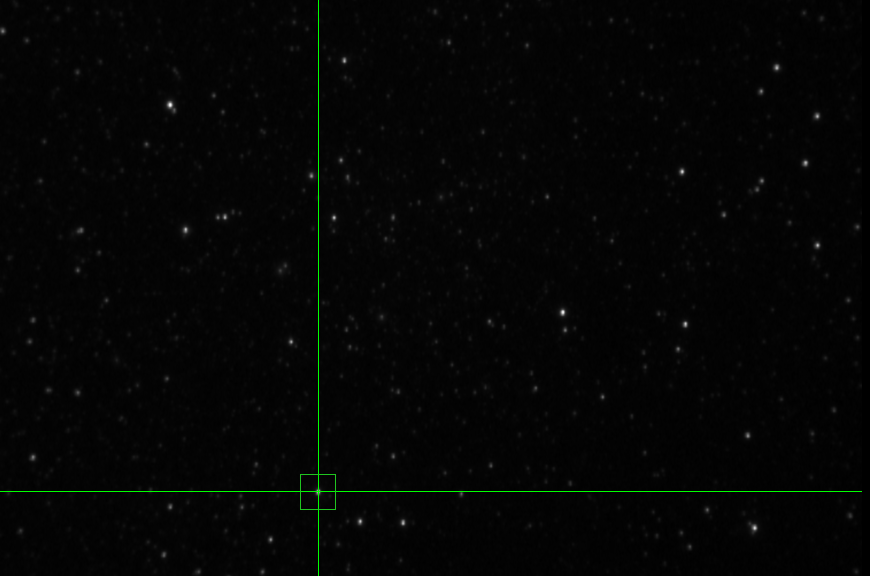
The first time I used the Lodestar X2, I was shocked at how many stars were in the field of view, for the same 2 second exposure I usually guide at there was a lot of stars to choose from, far more than I could see with the QHY5L-II, there is probably a number of reasons for this, higher sensitivity of the CCD Sensor, slightly higher QE, but also the FOV, with the QHY5L-II on my 8″ Quattro with a 0.73x reducer it would yield a field of view of 0.47°x0.35°, the Lodestar X2 on the other hand would yield a field of view of around 0.6°x0.48°.

Since I use PHD2 for guiding one thing that was immediately apparent was the built in driver for StarlightXpress cameras, I asked Terry which would be the best to use, he said either, it makes no difference, so I tested this and he was right, the in built driver and ASCOM driver produced the exact same result, I remember specifically with the QHY5L-II that QHY recommend you do not use the in built driver and always use the ASCOM driver. When firing up the Lodestar X2 in PHD2 I built my dark frame library in order for me to see how good the ICX829 was for noise, so I compared the 2 second exposures and there was very little difference between using a dark frame library versus not using one, the QHY5L-II definitely requires a dark frame library in PHD2 that’s for sure!

My first night of guider testing seen a little bit of odd behavoiur with the Lodestar X2, since I am using the Pegasus Astro Ultimate USB Hub, I had everything connected in there, including the QHY183M which is a USB3.0 camera albeit connected to a USB 2.0 hub. When the camera was downloading the image the Lodestar would display an array of dots on the screen. Terry confirmed that it was an indication that it was dropping down to USB 1.0 speed. It turns out that when I did the same thing with the QHY5L-II as the guider camera, the QHY5L-II would actually go unresponsive according to PHD2, so I moved the imaging camera to a dedicated USB 3.0 port on the Intel NUC and never had a repeat of the issue on either camera.

PHD2 has no issues picking up and selecting a guide star, there’s plenty of stars to choose from

Conclusion
The Lodestar X2 is awesome as a guide camera, it works extremely well, very sensitive, the only drawback in my opinion is price, at over double the price of the QHY5L-II camera maybe a tad out of some folks price range.

QHY183M Review – Part 1

After much waiting (due to delays on Sony Sensors) I have finally received my QHY183M ColdMOS camera from QHYCCD which I collected from ModernAstronomy last weekend, so I apologise for the really bad weather we’ve had.

As you all know, for the past few years I have been using an Atik 383L+ Mono 8.3Mpx CCD Camera, so when QHY announced the QHY183C I immediately asked them if there was going to be a mono version to which they said….Yes!

So firstly you might ask why I chose the QHY183 camera?  Well the simple reason for this is that it offered me a higher pixel resolution for almost the same field of view that my Atik 383L+ offered, however there were other factors that swayed my decission:

  • Back Illuminated Sensor
  • High Quantum Efficiency (QE)
  • Optimal Cooling
  • Lightweight

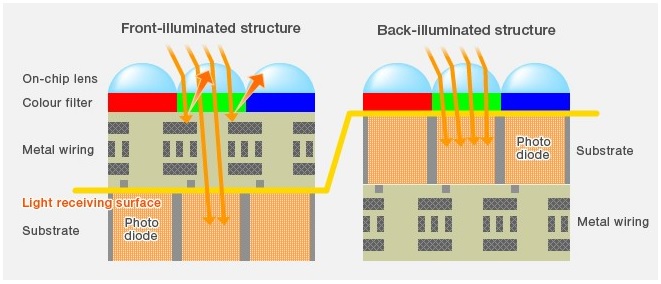
So let’s first of all talk about the back illumination and what this means to astrophotography.  Typically CMOS sensors are orientated with the light receiving surface and the transistors/wiring facing the light, so when imaging it is possible to get reflections of light bouncing off the circuitry, with a back illuminated sensor, all the circuitry are on the underside of the surface that faces the light, thus elliminating the possibility of reflections bouncing off the transistors, the following image shows this in a bit more detail (Courtesty of QHYCCD):

So obviously the more light we can get to the imaging surface the better it is for our data acquisition, every photon counts right?!

The QHY183M has an extremely high Quantum Efficiency (QE) of 84% which means that more data is absorbed by the chip than my previous imaging camera which had a QE of just over 60% based on the KAF-8300 sensor from Kodak.

One of the first things I tested when I unpacked the camera was the cooling system, I wanted to know how good the cooling system was, QHY stated between 40-45C Delta, so considering the outside temperature was +5C I managed to get the camera down to -41.6C which was a delta slightly above the 45C promised by QHY, so considering I typically image at -20C this now means I can image when the outside temperature at night is even as high as +25C which typically doesn’t happen in the UK.  I also noticed that the QHY183M uses less current than my 383L+ did to get ot the same temperature, so another bonus of less power requirement.

Weight is always an astrophotographers enemy, so it was much to my delight that the QHY183M weighs a lot less than my ATIK 383L+ did, the 383L+ weighed in around 700g and the QHY183M weighs in around 450g.

Out of the box
My first impression of the camera is that it is well built, a bit more of a compact design in comparison to my previous camera, has a USB3.0 connector (even though I am still using USB 2.0) and has a port to connect a dessicant tube to if required.

Software Installation
Driver installation was relatively straight forward, if you are using a third party imaging program like Sequence Generator Pro, make sure you install the ASCOM drivers so that SGPro can then speak to the camera.  In SGPro there are options for Gain settings, according to QHY the unity gain for the 183M is 11, so I have mine set to this value in SGPro.

Image Download Speed
After completing my dark frames library, I noticed that the download speed from Camera to Observatory PC was much much faster than my Atik was, even though I am using the same USB 2.0 Hub, on the Atik it could take anywhere up to 20 seconds to download the image at 1×1 binning, obviously the QHY183M is a much bigger sensor at 20mpx, however the image download time is circa 5 seconds which reduces image acquisition time greatly for multiple exposures.

Dark Frames
My dark frame library is completed, below are four different exposure times, 90, 180, 300 and 600 seconds, each image consists of 25 frames combined using PixInsight

90 Seconds:

180 Seconds:

300 Seconds:

600 Seconds:

As you can see the darks are really good, if you stretch out the images you will see the AMP glow on the right side of the image, this will be removed in dark frame subtraction and is a common artifact on all CMOS based imagers.

I did have the occasional icing issue on my 383L+, however the QHY183M has a heated optical window, so time will tell on how often I will need to use the dessicant tube.

Conclusion so far…before imaging

Pros:

  • Excellent design.
  • Lightweight.
  • Very predictable cooling system cools to -45C below ambient.
  • Cooling system is much quieter than my previous camera
  • Less current draw versus my previous camera.
  • Easy software installation.
  • Very fast download speed of around 5 seconds per frame at 1×1 Binning.
  • Very high QE of 84%

Cons:

  • AMP glow, I am probably being a bit mean considering all CMOS based cameras are subjected to this.
  • M42 thread on the camera is not long enough for the StarlightXpress EFW, I had to place a piece of card between the camera and the Filterwheel otherwise the camera just keeps spinning round and doesn’t tighten.
  • There’s no electronic shutter like my previous camera, which means for my dark frames it has to be completely dark in the observatory

I hope this review is beneficial to you all, especially if you are considering either the 183C or the 183M.  I will post part 2 of my review when I have actually got it all focused and acquired some photons from the sky.

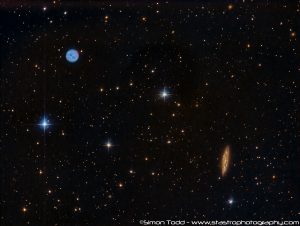
M97 and M108 – Owl Nebula and Surfboard Galaxy in LRGB

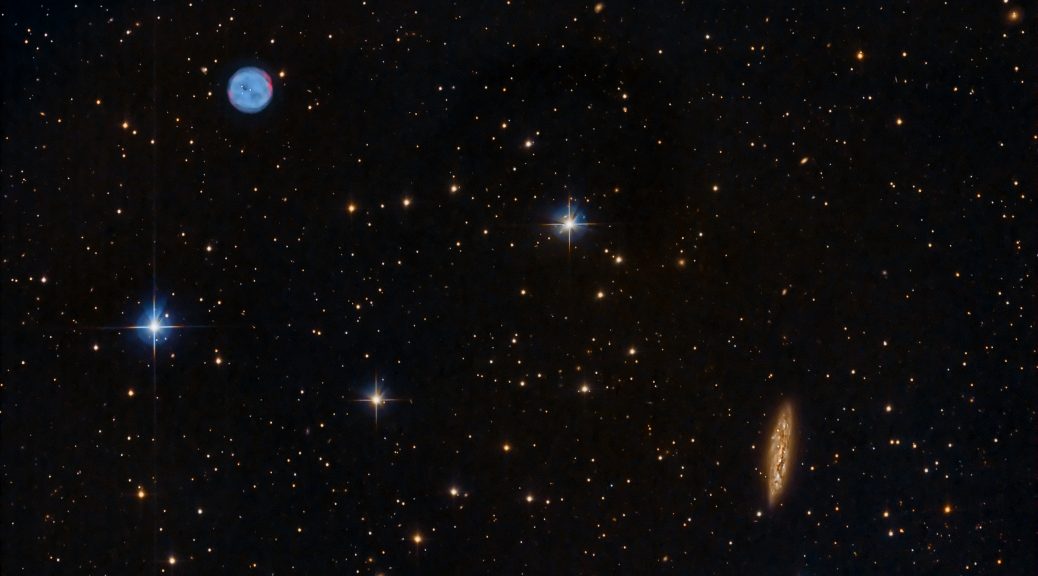
M97 and M108

The Owl Nebula (also known as Messier 97, M97 or NGC 3587) is a planetary nebula located approximately 2,030 light years away in the constellation Ursa Major.  It was discovered by French astronomer Pierre Méchain on February 16, 1781

Messier 108 (also known as NGC 3556) is a barred spiral galaxy in the constellation Ursa Major. It was discovered by Pierre Méchain in 1781 or 1782. From the perspective of the Earth, this galaxy is seen almost edge-on.

The image consists of the following
23x180S – Red
23x180S – Green
23x180S – Blue
25x180S – Luminance

25 Darks, 25 Flats and 25 BIAS frames have also been applied

Equipment Used:-
Imaging Scope: Sky-Watcher Quattro Series 8-CF F4 Imaging Newtonian
Flattener: Sky-Watcher Aplanatic Coma Corrector
Imaging Camera: Atik Cameras 383L+ Mono CCD -20C
Guide Scope: Celestron Telescopes C80ED Reftractor
Guide Camera: Qhyccd QHY5L-II
Mount: Sky-Watcher EQ8 Pro
Filterwheel: Starlight Xpress Ltd 7x36mm EFW
Filters: Baader Planetarium 36mm Unmounted LRGB
Image Capture: Main Sequence Software SGPro
Image Stacking: Maxim-DL
Image Processing: PixInsight

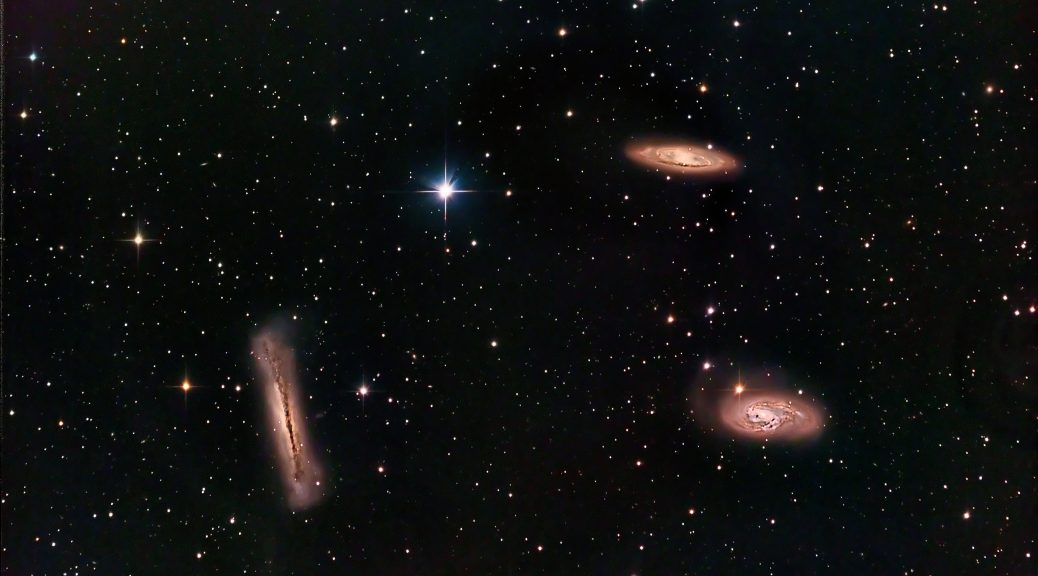
Leo Triplet of Galaxies

Leo Triplet In LRGB (above) and LRGB+HA (below)

The Leo Triplet consists of three galaxies at a distance of around 35 million light years, M65 (top right), M66 (bottom right) and NGC3628 (left).  I have always aimed at imaging the triplet since I started imaging but never got around to it.

M65 (NGC 3623) and M66 (NGC 3627) are classed as intermiediate spiral galaxies and NGC3628 is also known as the Hamburger Galaxy or Sarah’s Galaxy and is classed as an Unbarred Spiral Galaxy.

The image consists of:-
29x300S of Luminance
14x300S Red, Green and Blue
15x600S of 7nm HA in the LRGB+HA Image
25 Darks and flats subtracted from all frames

Equipment Details:
Imaging Telescope: Sky-Watcher Quattro 8-CF F4 Imaging Newtonian
Imaging Camera: Atik Cameras 383L+ Mono CCD
Coma Corrector: Sky-Watcher Aplanatic Coma Corrector
Guide Camera: Qhyccd QHY5L-II
Guide Scoope: Celestron Telescopes C80ED Refractor
Mount: Sky-Watcher EQ8 Pro
Filter Wheel: Starlight Xpress Ltd 7x36mm USB EFW
Filters: Baader Planetarium LRGB + 7NM HA

Image Aquisition: Main Sequence Software SGPro
Image Pre-Processing and STacking: Maxim-DL
Post Processing: PixInsight

In my opinion, there’s only a subtle difference between the LRGB and LRGBHA images, personally I preffer the LRGB Version, the data was captured over multiple nights since the beginning of 2017 but in total gives 5.91 Hours on the LRGB Image and 8.41 Hours for the LRGB+HA Image