Tag Archives: CMOS

Eternal Quest: The Elephant’s Trunk Nebula Unveiled

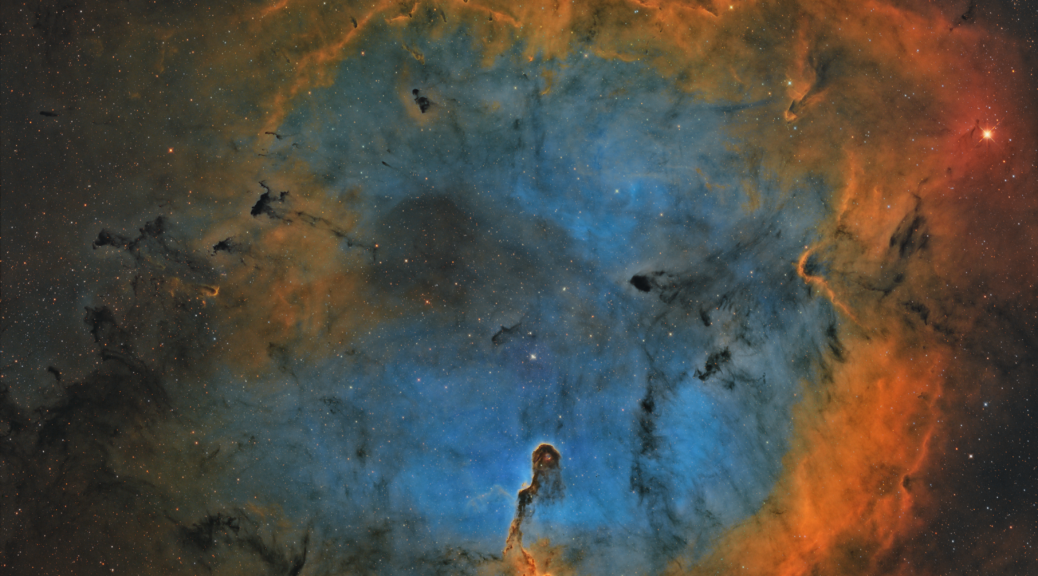
In the boundless theatre of the night sky, where celestial tales unfold across the eons, lies an ethereal masterpiece that has captivated the gaze of astronomers and dreamers alike. This image, a delicate two-panel mosaic, is a profound revelation of the Elephant’s Trunk Nebula, known formally by its catalog designations IC 1396A, nestled within the larger expanse of the IC 1396 complex in the constellation of Cepheus.

Crafted with meticulous dedication over the span of five months, this portrait of the cosmos was brought to life using a full-frame monochrome CMOS camera, a testament to the intersection of art and technology. The camera, acting as a modern-day alchemist, transformed the invisible into the visible, capturing the nebula’s intricate details and sweeping gas clouds that resemble an elephant’s trunk, reaching out into the void.

However, this image is more than a snapshot; it is a chapter in an ongoing saga dictated by the unpredictable whims of the UK’s weather. The journey to encapsulate the nebula’s full glory has been a dance with the elements, with many nights spent under the cloak of clouds rather than stars. Despite these challenges, the initial results have unveiled a stunning glimpse into the cosmos, showcasing the nebula’s haunting beauty and the vibrant activity within its star-forming regions.

Yet, the story does not end here. The image is a promise of what is yet to come, as there are plans to revisit the Elephant’s Trunk Nebula later this year. The aim is to deepen the exploration, to add more data to this cosmic tapestry, and to further refine the clarity and depth of this celestial phenomenon.

This endeavor, a blend of patience, passion, and precision, highlights not just the technical prowess required for astrophotography but also the enduring human desire to connect with the universe. Through this image, we are reminded of our place in the cosmos, a mere speck within the vastness, yet capable of capturing and celebrating its majesty.

The Elephant’s Trunk Nebula stands as a beacon in the dark, a symbol of the mysteries that await our discovery. With each photograph, we peel back another layer of the universe, bringing us closer to understanding the grand design of which we are a part. This image is an invitation to gaze upwards, to wonder, and to dream of the infinite possibilities that lie beyond our world.
Here is the Astrobin link for the full resolution image: https://www.astrobin.com/full/qxmduq/0/

Frames:
Chroma H-alpha 3nm Bandpass 50 mm: 81×300″(6h 45′) (gain: 100.00) -10°C bin 1×1
Chroma OIII 3nm Bandpass 50 mm: 91×300″(7h 35′) (gain: 100.00) -10°C bin 1×1
Chroma SII 3nm Bandpass 50 mm: 125×300″(10h 25′) (gain: 100.00) -10°C bin 1×1

Integration: 24h 45m
Darks: 51
Flats: 51
Bias: 201

Equipment:
Imaging Camera: ZWO ASI Cameras ASI6200MM Pro Gain 100 -10C
Imaging Scope: Sharpstar Optics 20032PNT F3.2 Paraboloid Astrograph
Filters: Chroma 50mm 3nm Filters
Filterwheel: ZWO ASI Cameras 7x EFW
Guide Camera: ZWO ASI Cameras ASI290MM
Mount: Sky-Watcher EQ8 Pro German Equatorial Mount
Auto Focuser: Primalucelab Sesto Senso2
Environmental conditions: Primalucelab ECCO2
Observatory Control: PrimaLuceLab Eagle Eagle 4 Pro
Roof Control: Talon RoR
Image Acquisition: Main Sequence Software Sequence Generator Pro
Image Calibration and Stacking: Astro Pixel Processor
Image Processing: PixInsight, Russ Croman’s BlurXterminator and StarExterminator

The CCD vs. CMOS Showdown: Why Monochrome Cameras Excel in Astrophotography Over One Shot Color

Introduction
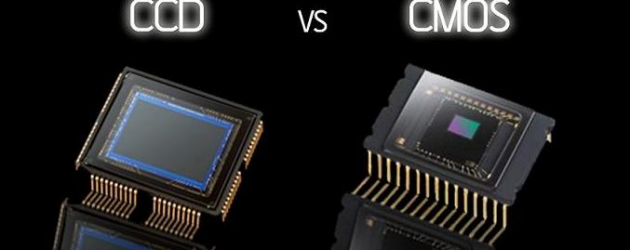
One of the first things photographers must decide when venturing into astrophotography is what kind of camera sensor they’ll need to capture the beauty of the cosmos. Charge-Coupled Device (CCD) and Complementary Metal Oxide Semiconductor (CMOS) image sensors are two of the most common on the market (CMOS). Each has its own set of pros and cons that make it better or worse for astrophotography in certain situations. Further complicating matters is the ongoing discussion between advocates of monochrome and one-shot colour cameras.

Understanding CCD and CMOS Sensors
Light is converted into electronic signals by the CCD or CMOS sensor at the centre of a digital camera. The image quality, cost, and power consumption are all impacted, but in fundamentally different ways.

CCD Sensors
CCDs have been the go-to sensors for astronomy photography for quite some time. They are well-known for the exceptional clarity and sensitivity to light of their photographs. These sensors generate low-noise, high-quality images by transferring charge across the chip and converting it into voltage in a single spot: the array’s corner. In turn, this improves light collection by allowing for a greater pixel fill-factor. CCDs, on the other hand, are typically more costly and power-hungry than their CMOS counterparts. In addition, they experience ‘blooming,’ an effect in which overcharged pixels leak their energy into neighbouring ones.

CMOS Sensors
In contrast, CMOS sensors have shorter processing times and use less power because light is converted to voltage right at each pixel’s location. They have lower manufacturing costs, making them common in smartphones and consumer-grade cameras. Their read noise and sensitivity are typically higher than that of CCDs, though. Recently developed technologies have allowed CMOS sensors to catch up to and even surpass CCDs in terms of performance, closing the gap between the two.

Monochrome vs. One Shot Colour Cameras
After settling on a CCD or CMOS camera, the next big decision in astrophotography is whether to use a monochrome or one-shot colour camera.

One Shot Color Cameras
As the name implies, a One Shot Color camera takes a complete colour picture with just one click of the shutter. The Bayer mosaic used in these cameras covers each pixel with red, green, and blue filters. The greatest benefit of these cameras lies in their ease of use. Even amateur astronomers can easily take stunning, colourful pictures of the night sky with these instruments.

Monochrome Cameras
Images taken with a monochrome camera are grayscale. These cameras capture red, green, and blue light through individual filters and combine them into full colour in post-production. Even though using a monochrome camera is more difficult and time-consuming, there are some benefits.

Why Monochrome Cameras Excel in Astrophotography
In general, monochrome cameras have higher sensitivities than single-shot colour ones. They are up to three times as sensitive as cameras that use a Bayer filter because all of the light that reaches the sensor is used to create the image. This heightened sensitivities is especially helpful in low-light astrophotography.

Additionally, more options and control can be had during the imaging process when separate filters are used with a monochrome camera. Using a hydrogen-alpha filter, astronomical photographers can isolate and emphasise specific wavelengths of light, such as the ionised hydrogen regions in nebulae. Imaging in light-polluted skies or capturing narrowband images greatly benefits from this ability.

Because the information for each colour channel is captured by the entire sensor rather than just a subset of pixels, as in one-shot colour cameras, the resulting images have greater resolution and detail.

Conclusion
In conclusion, CCD and CMOS sensors each have their uses in astrophotography, and the one you settle on will depend on your particular goals, financial constraints, and level of experience. Comparing monochrome and one-shot colour cameras, the former has better sensitivity, flexibility, and resolution while the latter is more user-friendly and saves time. Therefore, the investment in a monochrome camera and separate filters can be well worth it for serious astrophotographers seeking to capture the highest quality images.

StarlightXpress Lodestar X2

I was lucky enough that Terry from StarlightXpress sent me a Lodestar X2 for me to test to see how well it performed against my existing guider camera, so it only seemed fair that I provide my feedback via an equipment review. Many who know me know I have been using a QHY5L-II camera as a guide camera for a few years now but after seeing a few of my fellow astrophotographers using the Lodestar cameras it seemed silly not to try one out.

In comparison to the QHY5L-II the Lodestar X2 is a true CCD camera and not a CMOS camera, so immediately this would yield some higher sensitivity in what stars can be selected. One thing that is immediately noticable between the cameras is the Lodestar X2 is longer than the length of the QHY5L-II.

Just to add some more comparisons:

QHY5L-IILodestar X2
SensorAptima MT9M034Sony ICX829
Sensor TypeCMOSCCD
Sensor Size6.66mmx5.32mm6.47mmx4.81mm
Pixel Size3.75um8.2umx8.4um
MPX1.2mpx0.4mpx
QE74%77%
Length54mm85mm
Weight45g50g
Cost (27 Aug 2019)£175£378

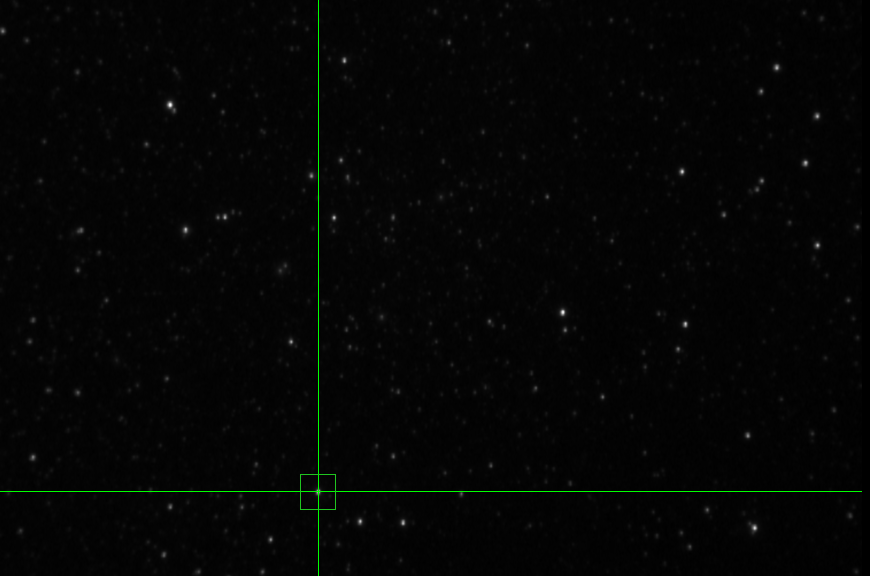
The first time I used the Lodestar X2, I was shocked at how many stars were in the field of view, for the same 2 second exposure I usually guide at there was a lot of stars to choose from, far more than I could see with the QHY5L-II, there is probably a number of reasons for this, higher sensitivity of the CCD Sensor, slightly higher QE, but also the FOV, with the QHY5L-II on my 8″ Quattro with a 0.73x reducer it would yield a field of view of 0.47°x0.35°, the Lodestar X2 on the other hand would yield a field of view of around 0.6°x0.48°.

Since I use PHD2 for guiding one thing that was immediately apparent was the built in driver for StarlightXpress cameras, I asked Terry which would be the best to use, he said either, it makes no difference, so I tested this and he was right, the in built driver and ASCOM driver produced the exact same result, I remember specifically with the QHY5L-II that QHY recommend you do not use the in built driver and always use the ASCOM driver. When firing up the Lodestar X2 in PHD2 I built my dark frame library in order for me to see how good the ICX829 was for noise, so I compared the 2 second exposures and there was very little difference between using a dark frame library versus not using one, the QHY5L-II definitely requires a dark frame library in PHD2 that’s for sure!

My first night of guider testing seen a little bit of odd behavoiur with the Lodestar X2, since I am using the Pegasus Astro Ultimate USB Hub, I had everything connected in there, including the QHY183M which is a USB3.0 camera albeit connected to a USB 2.0 hub. When the camera was downloading the image the Lodestar would display an array of dots on the screen. Terry confirmed that it was an indication that it was dropping down to USB 1.0 speed. It turns out that when I did the same thing with the QHY5L-II as the guider camera, the QHY5L-II would actually go unresponsive according to PHD2, so I moved the imaging camera to a dedicated USB 3.0 port on the Intel NUC and never had a repeat of the issue on either camera.

PHD2 has no issues picking up and selecting a guide star, there’s plenty of stars to choose from

Conclusion
The Lodestar X2 is awesome as a guide camera, it works extremely well, very sensitive, the only drawback in my opinion is price, at over double the price of the QHY5L-II camera maybe a tad out of some folks price range.