Tag Archives: 383L+

QHY183M Review – Part 2

As promised, now that I have done some imaging with my new QHYCCD 183M Mono ColdMOS Back Illuminated camera here’s the second part of my review on the camera.

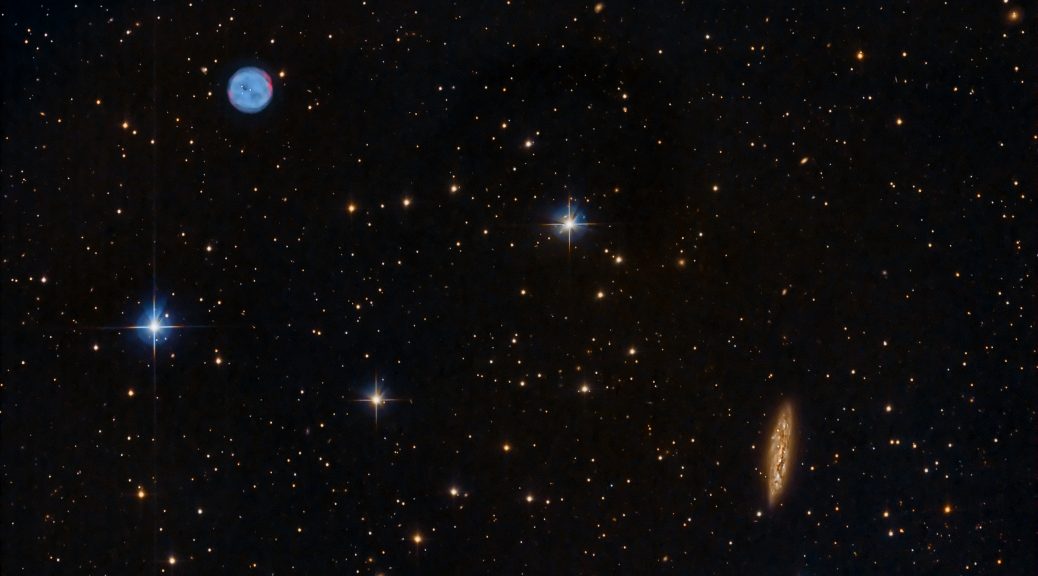
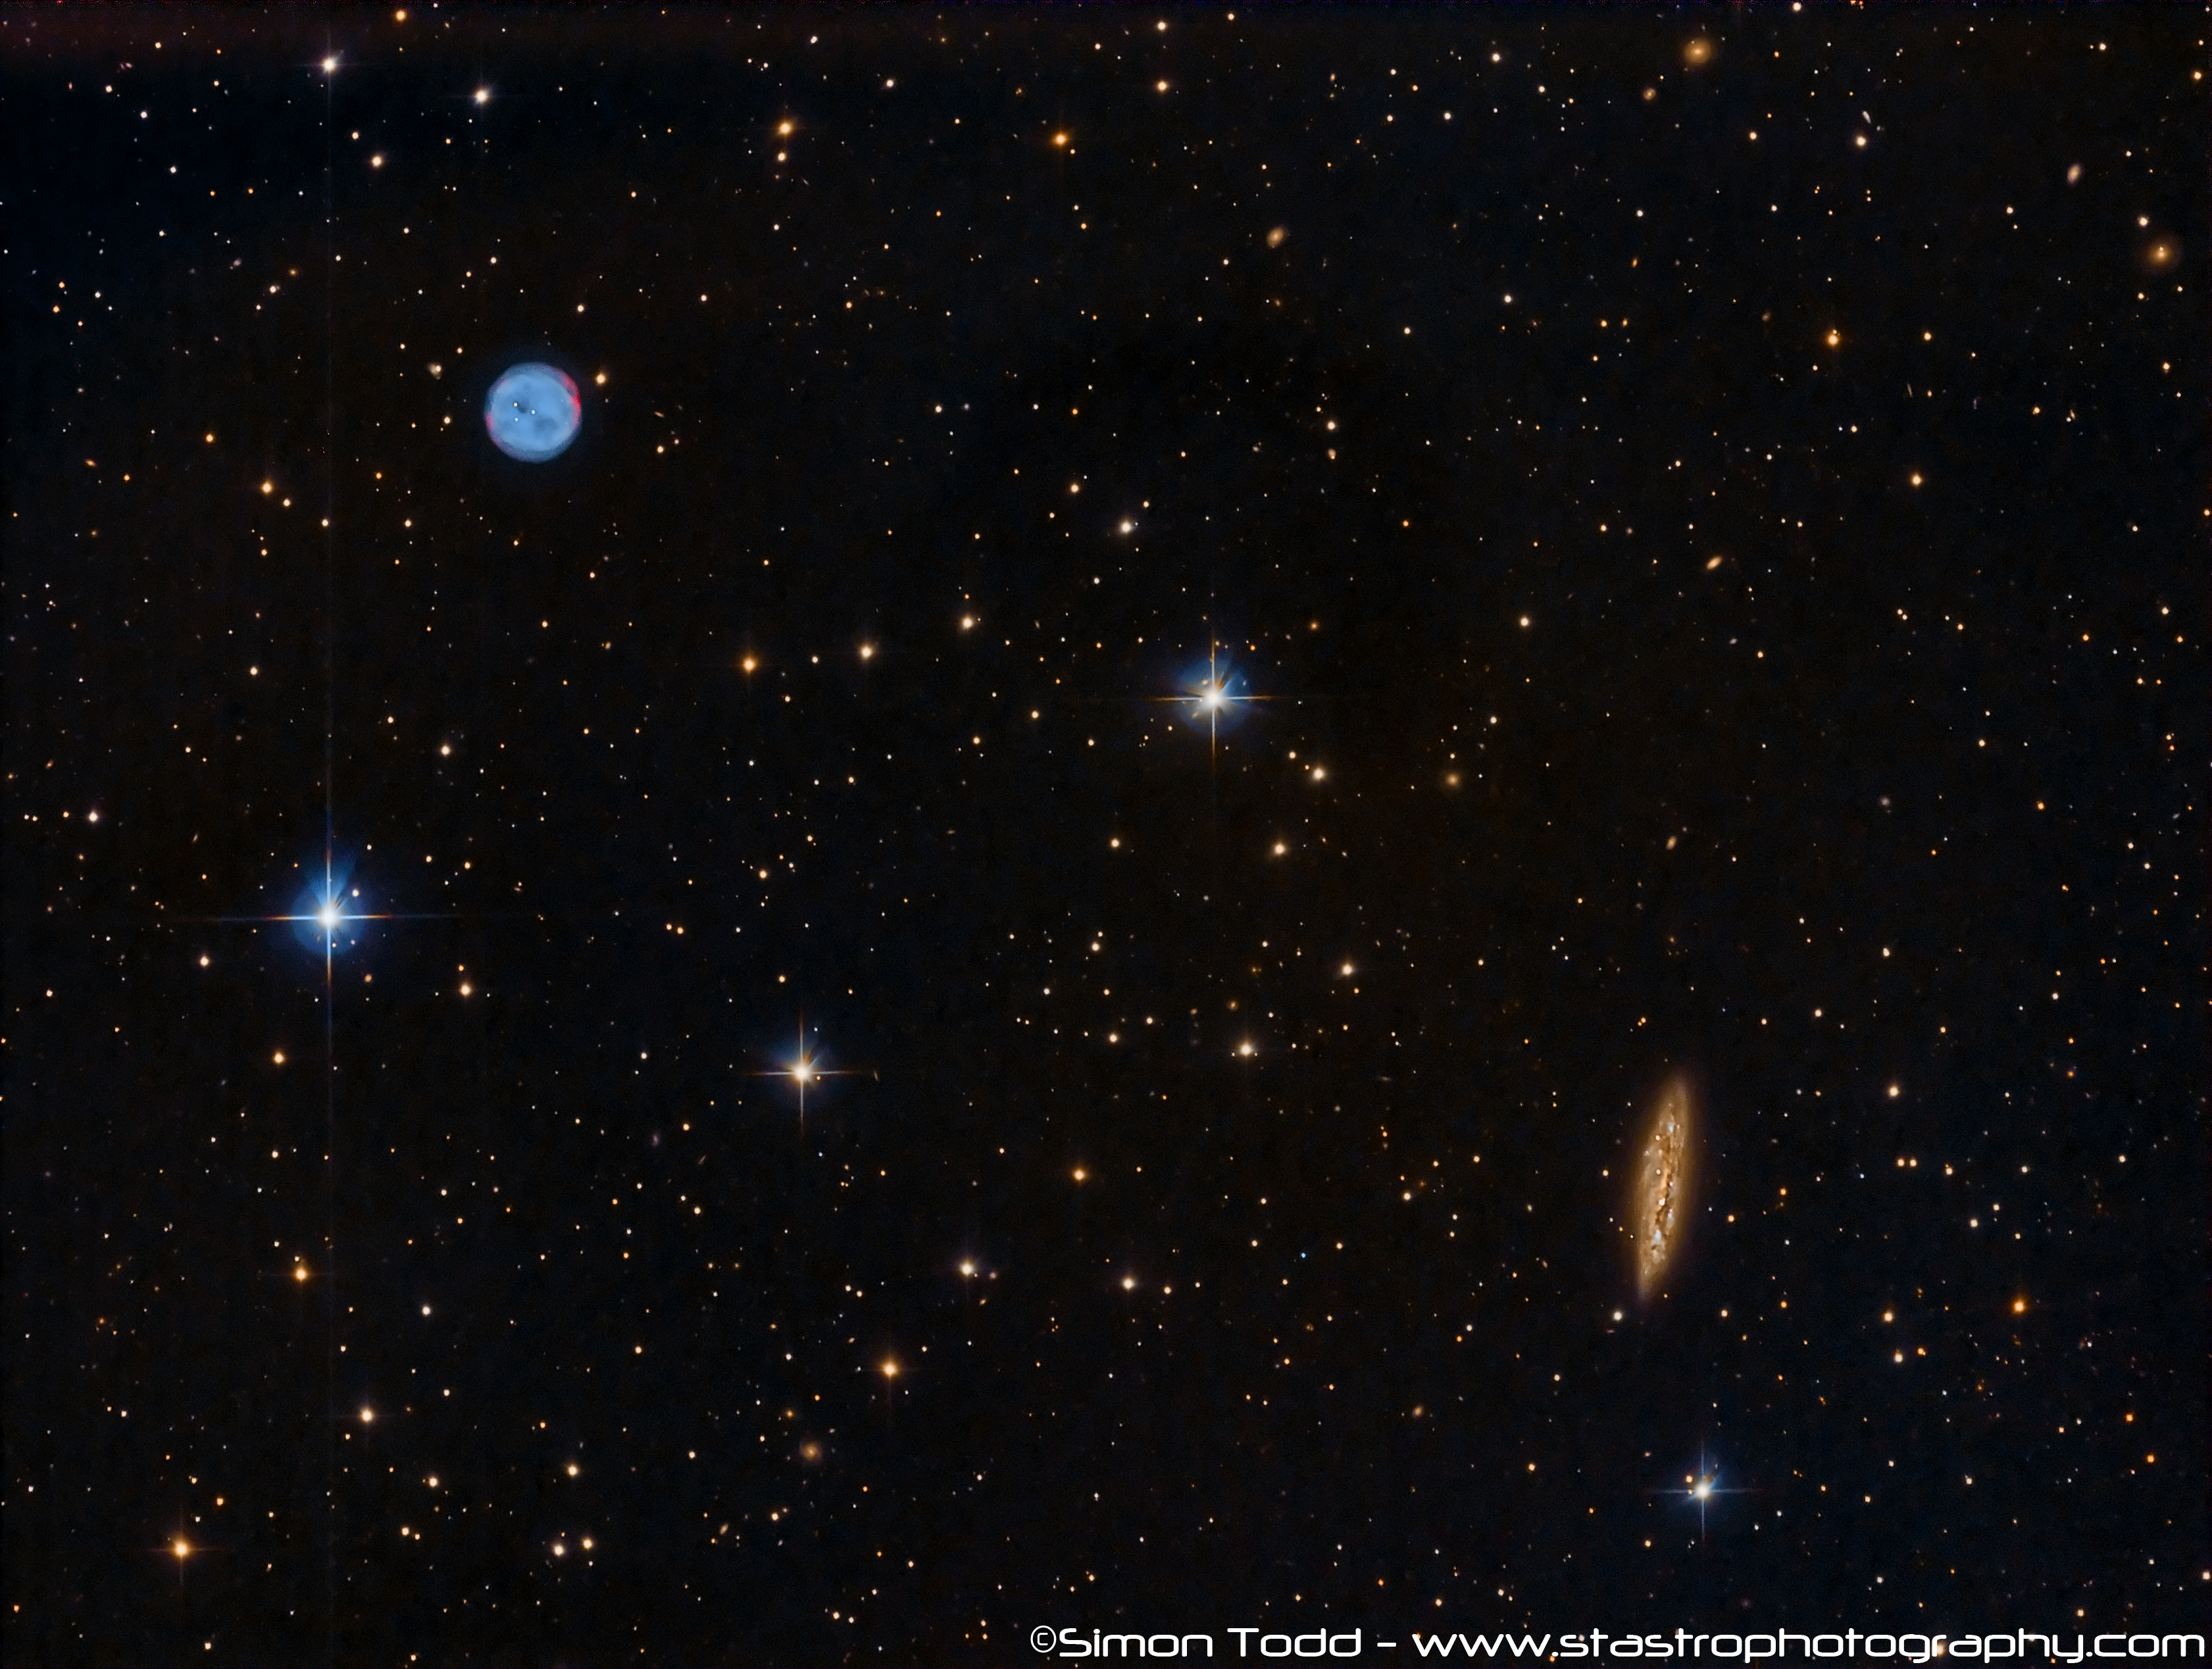
Pixel size:- The pixel size on the 183M is 2.4um which I absolutely love, on my Sky-Watcher 8 Inch Quattro F4 the camera gives me a field of view of 0.62 Arcseconds/Pixel, which is a fantastic resolution, I remember when I had my Atik 383L+ and my Astro-Tech AT8RC F8, that offered me a resolution of around 0.63 Arcseconds/Pixel, so I am now imaging at almost the same field of view but at F4 and at 20mpx, but let’s just put that into comparison on the same scope, the first image below is IC434 taken with the Atik 383L+ on the Quattro, and the second image below is taken with the QHY183M on the same telescope, you can see what impact it has on the field of view:

FOV on Atik 383L+ with 8″ Quattro F4
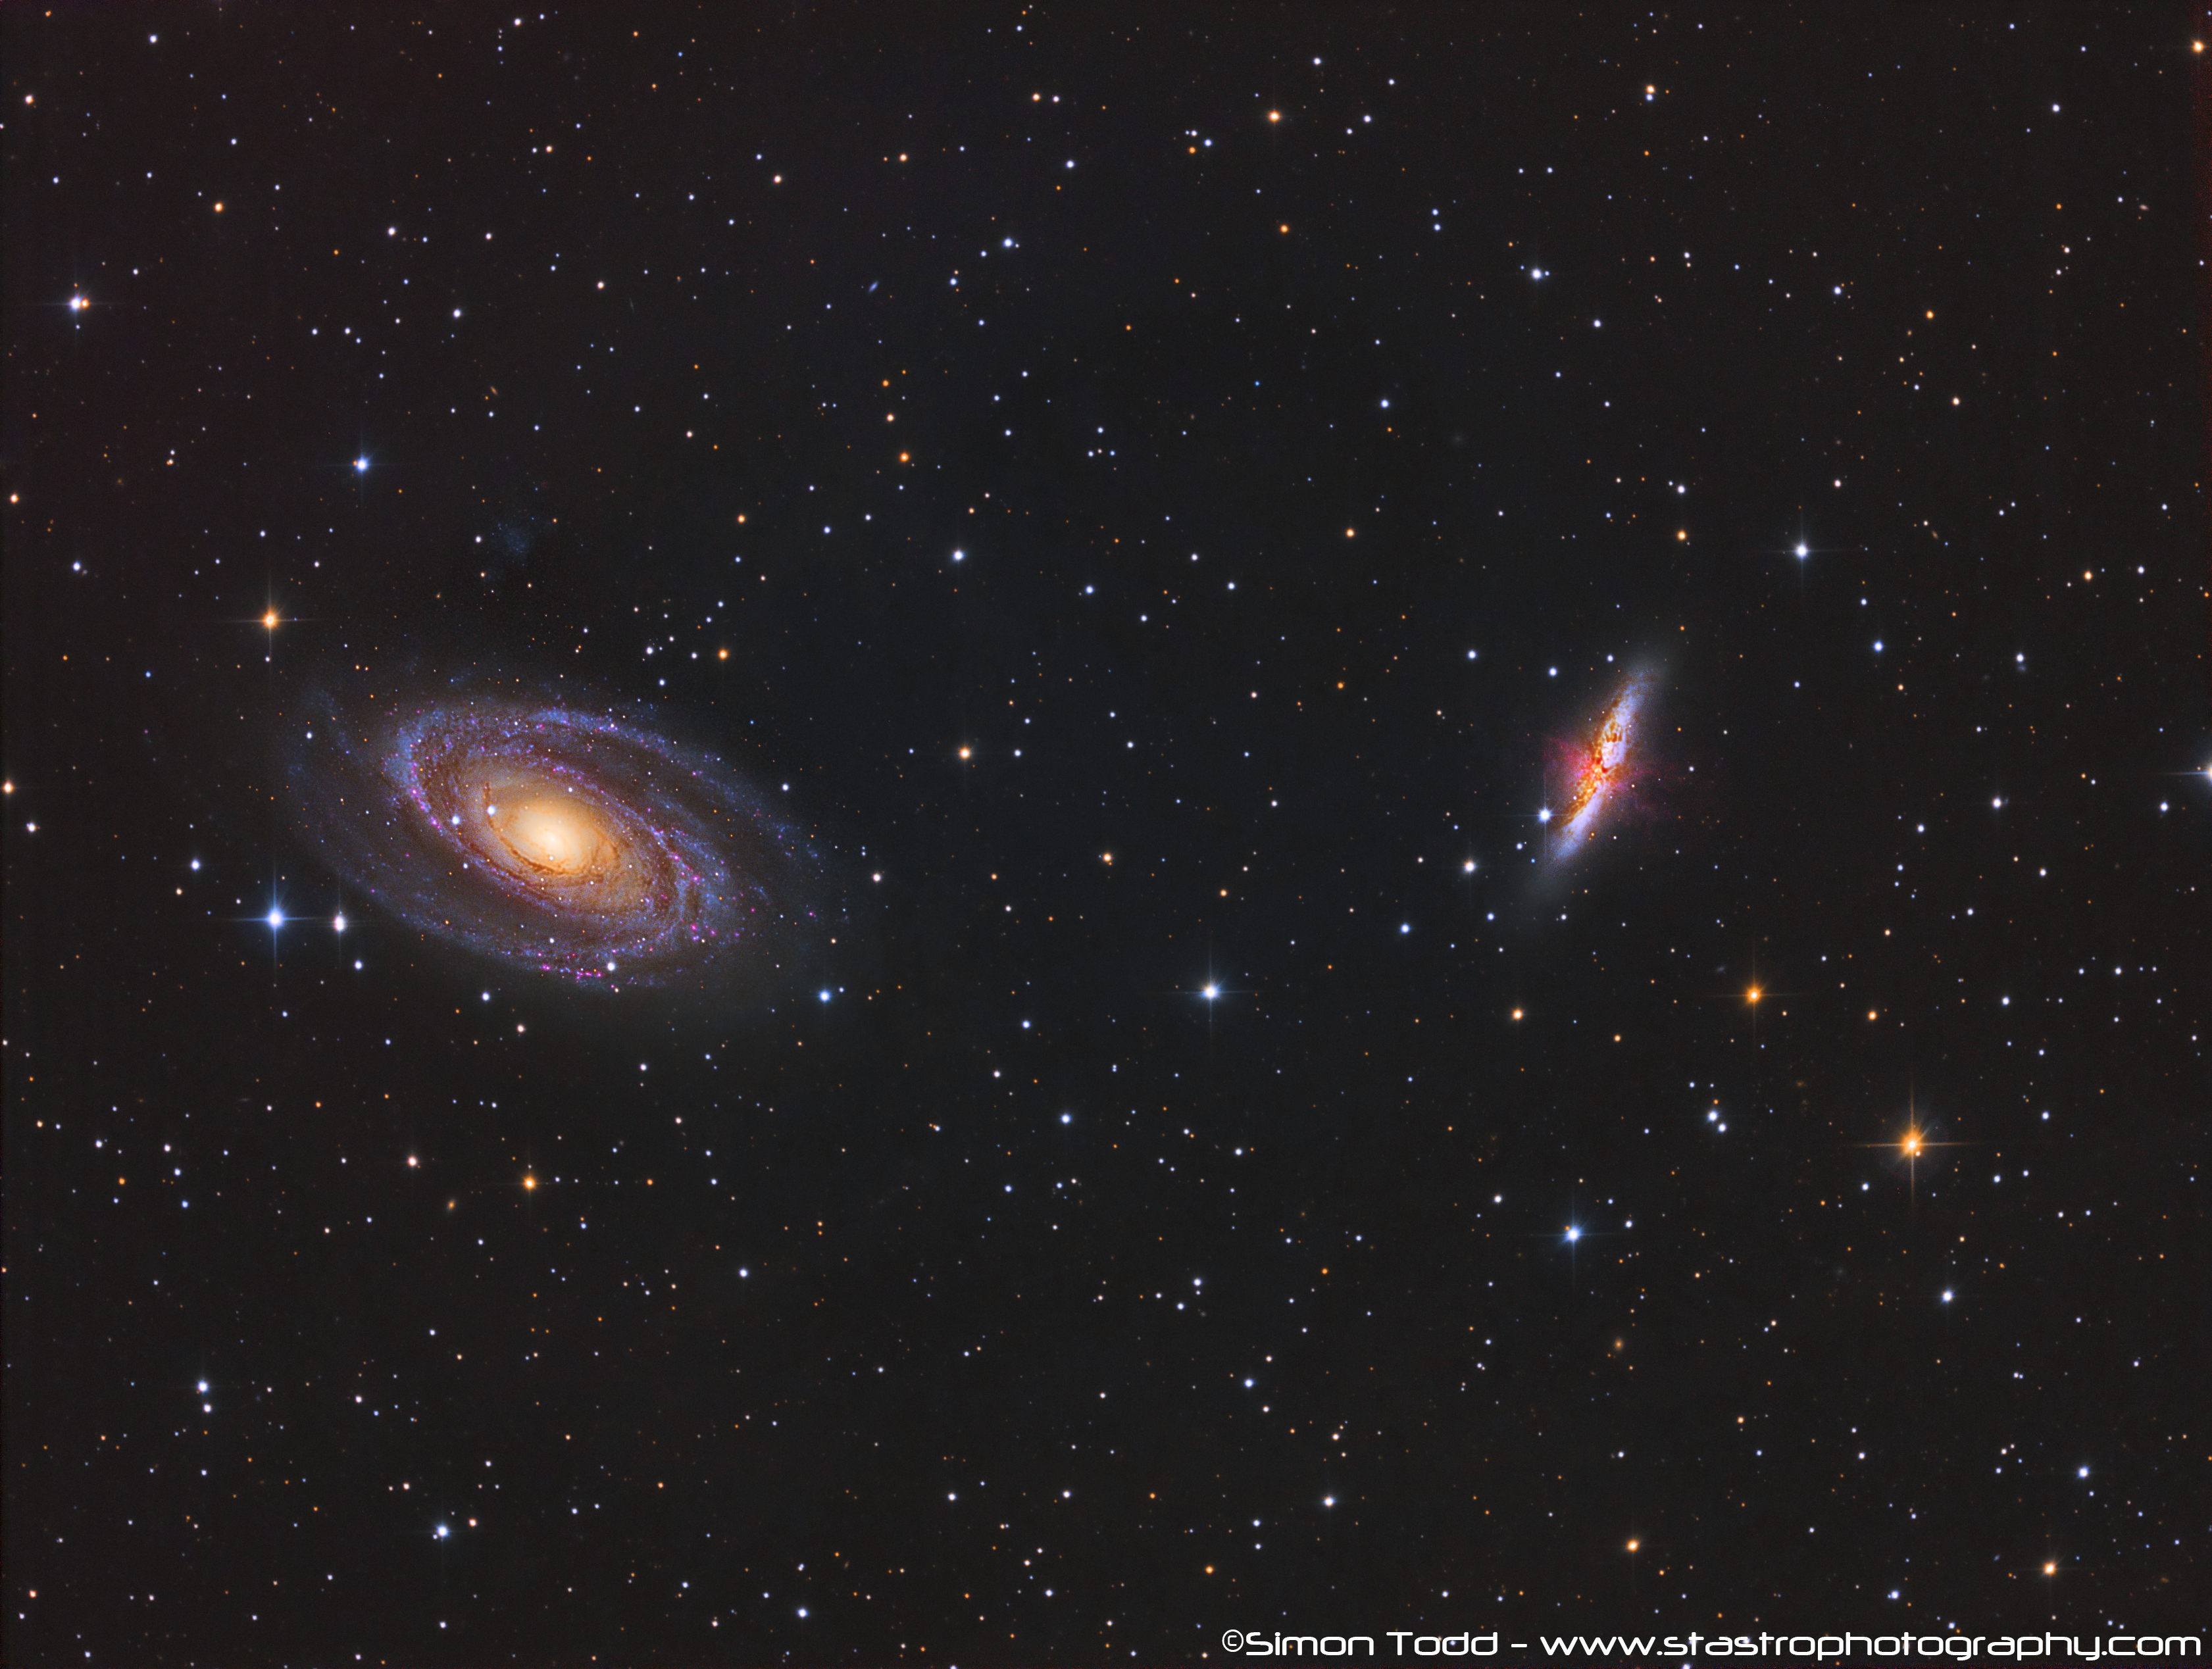
FOV on QHY183M with 8″ Quattro F4

As you can see from the above two images the difference in the field of view due to the chip size.

Camera Sensitivity:- Since moving to the QHY183M I have had to make changes to how I image, having owned the Atik 383L+ for a good few years, I got used to imaging with it, so when I moved to the QHY183M I suddenly noticed that this camera was quite a bit more sensitive, the first image above consists of 300 second frames for the LRGB whereas the second image consists of just 150 second frames, yes 150 second frames!!!

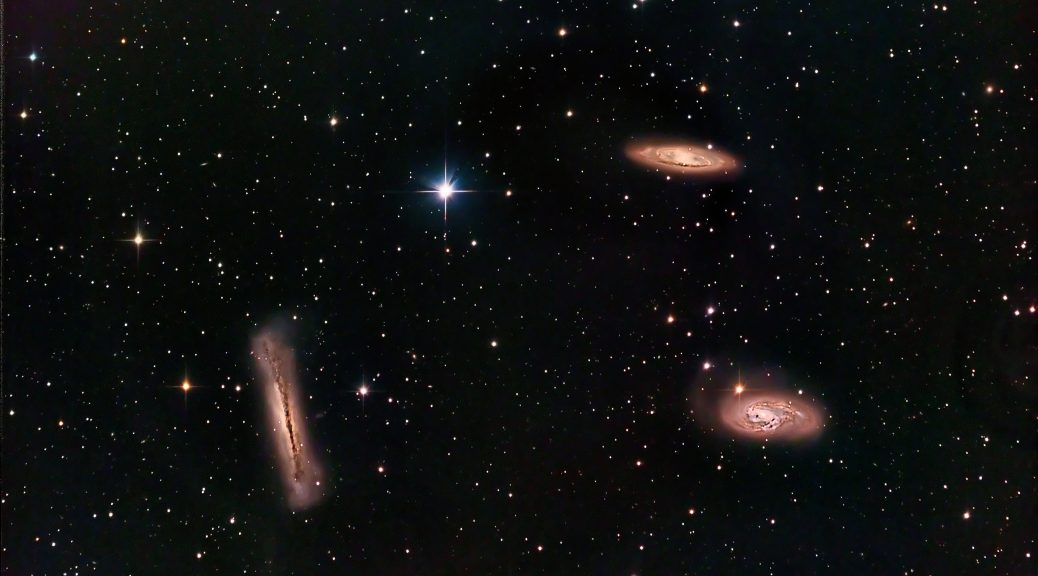
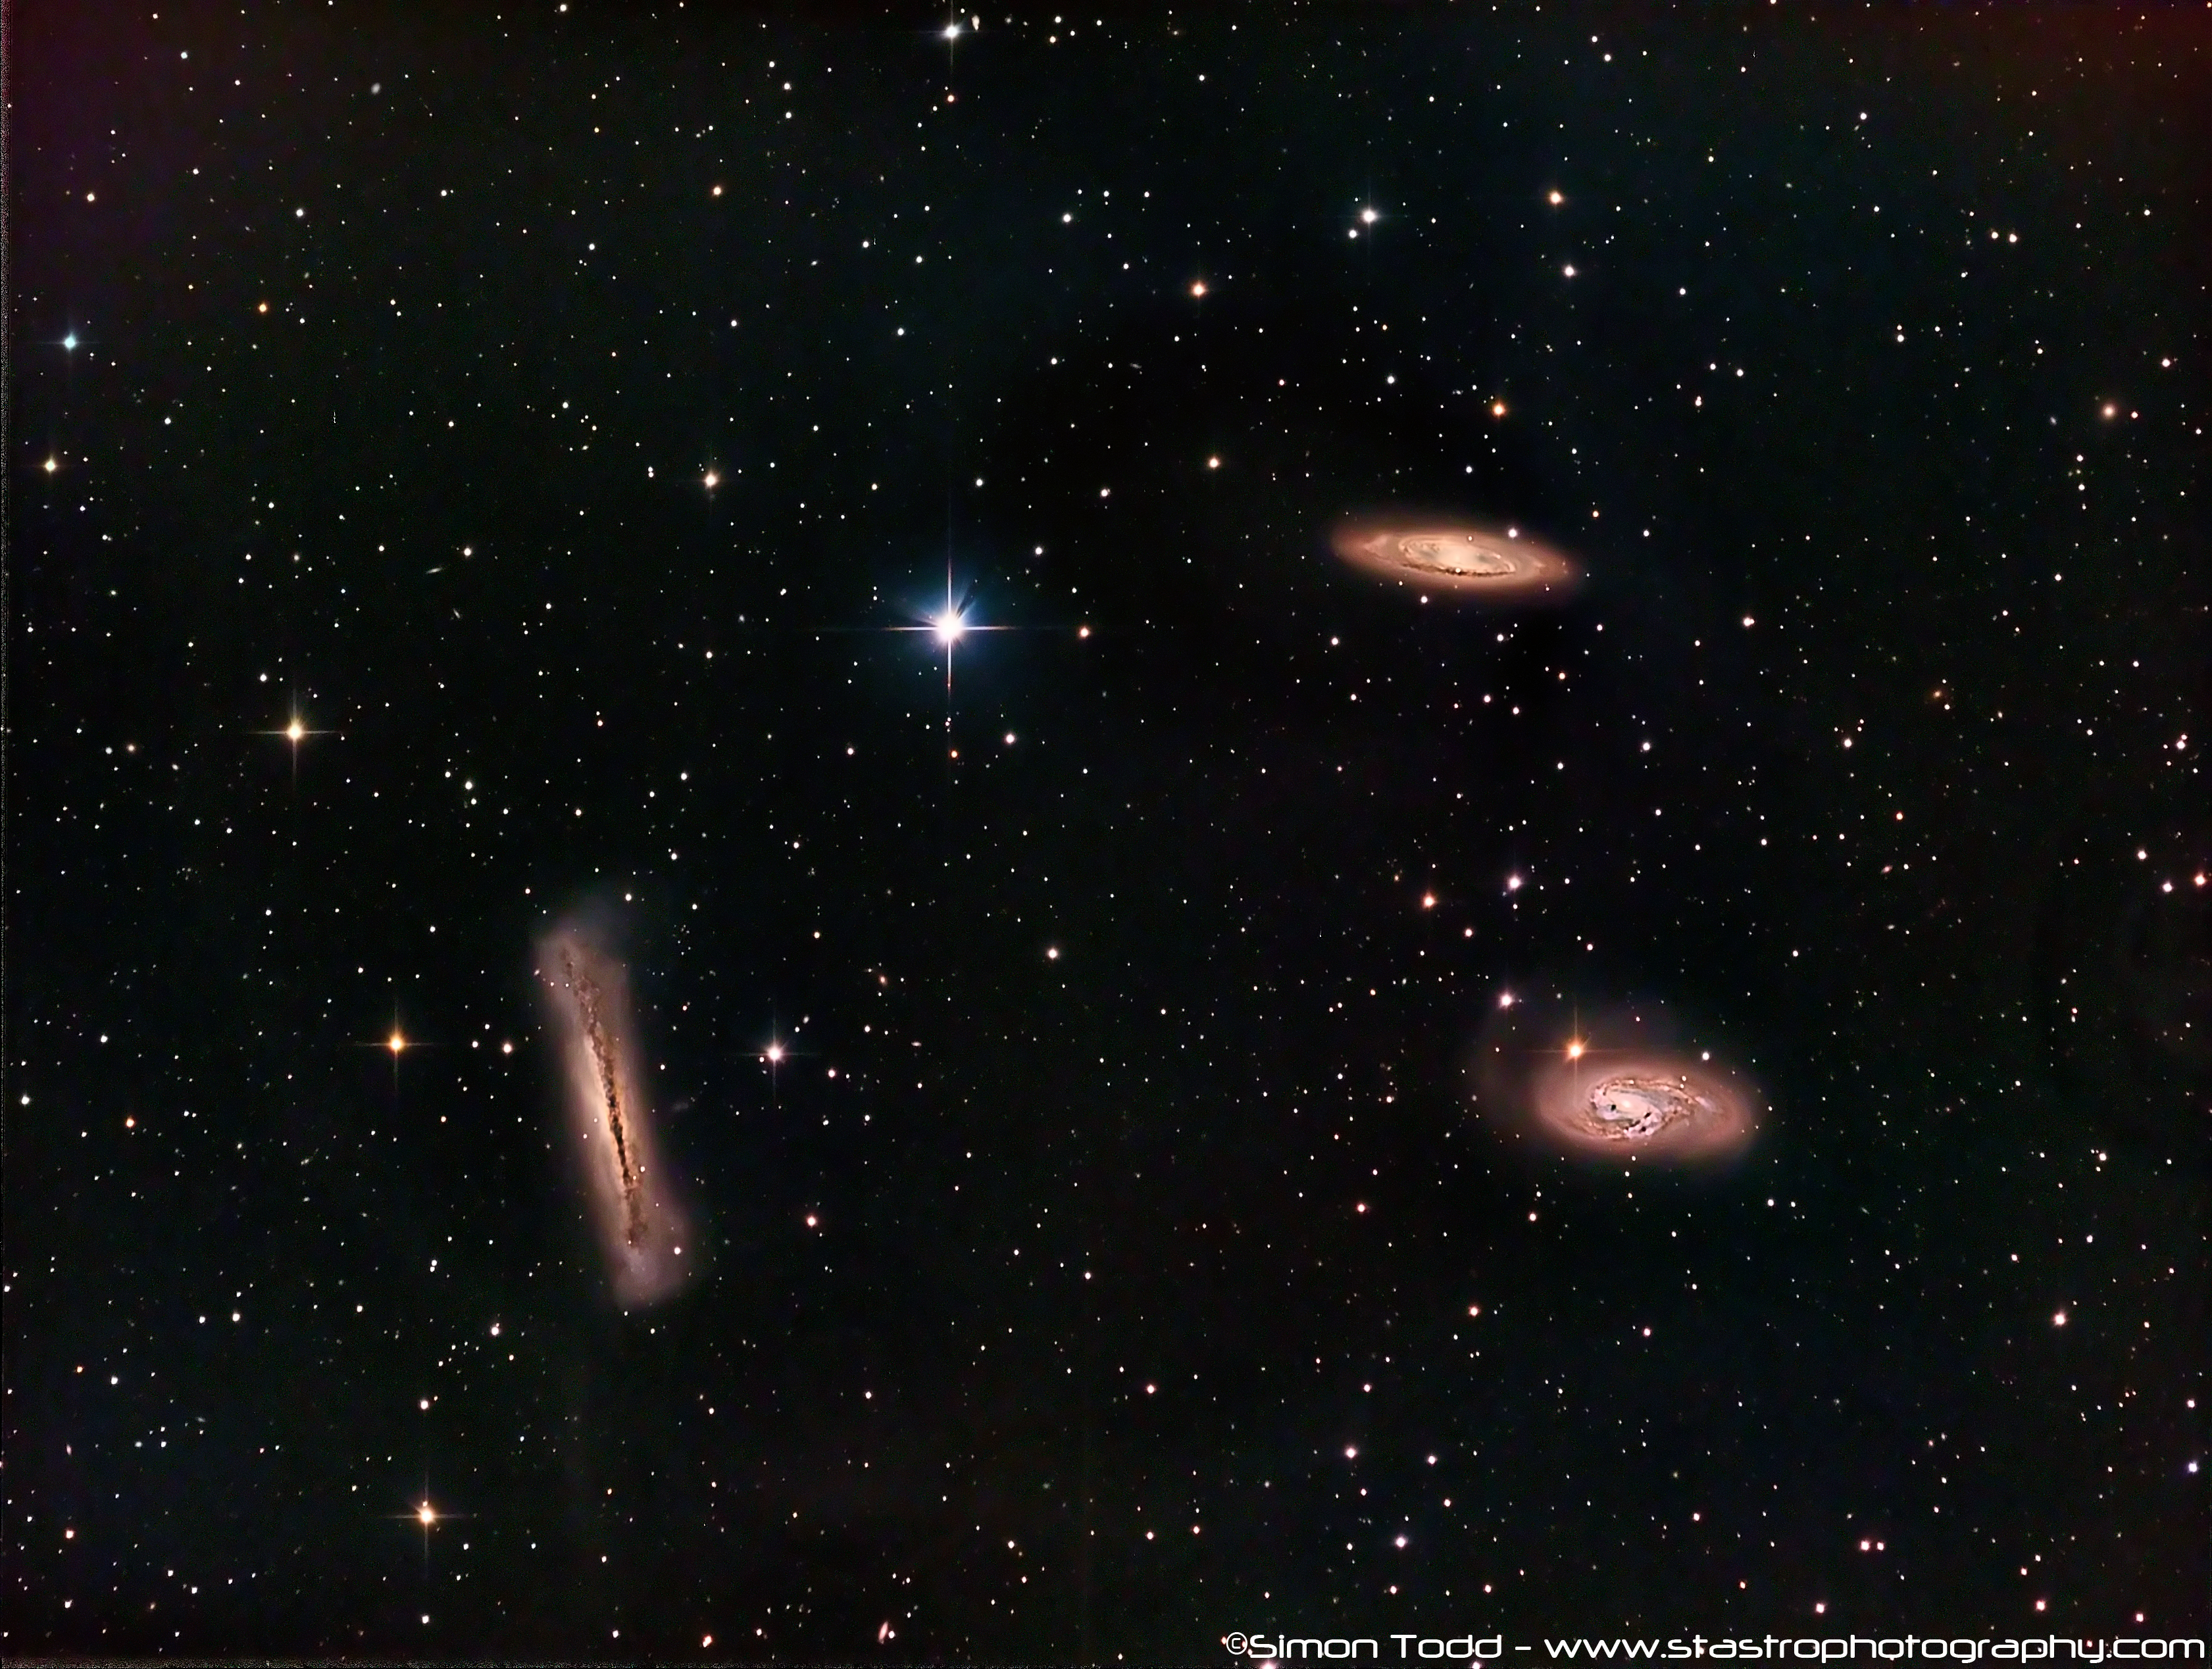
When I first started imaging M81/M82 with the QHY183M, I immediately started with 300 Second frames, I ended up with the same amount of 300 second frames that I had with the Atik 383L+ but I just could not process it, after further analysis I noticed then that the lights were severely clipped, to put this into perspective, below is the Sequence Generator Pro Histogram for both the 300 second exposure (left) and the 150 second exposure (right)

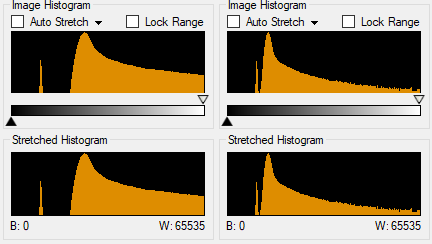
As you can see the histogram on the left for the 300 second exposure is severly clipped on the right side of the histogram indicating that the exposure was too long, the histogram on the right for the 150 second exposure is a lot better, there is still some slight clipping happening but this was a luminance frame, this clearly indicates that the 183M is much more sensitive than my previous CCD imager.

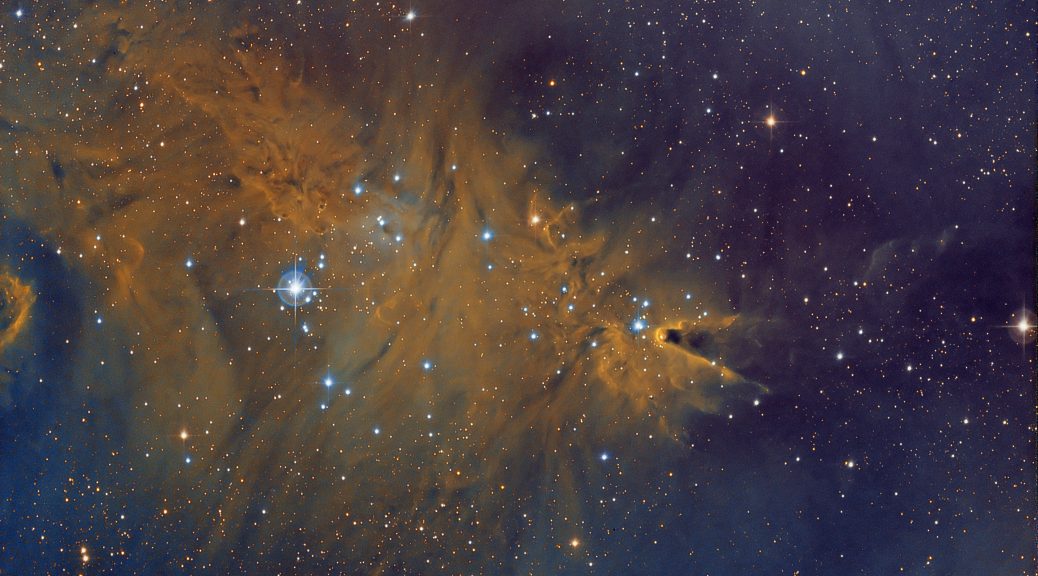
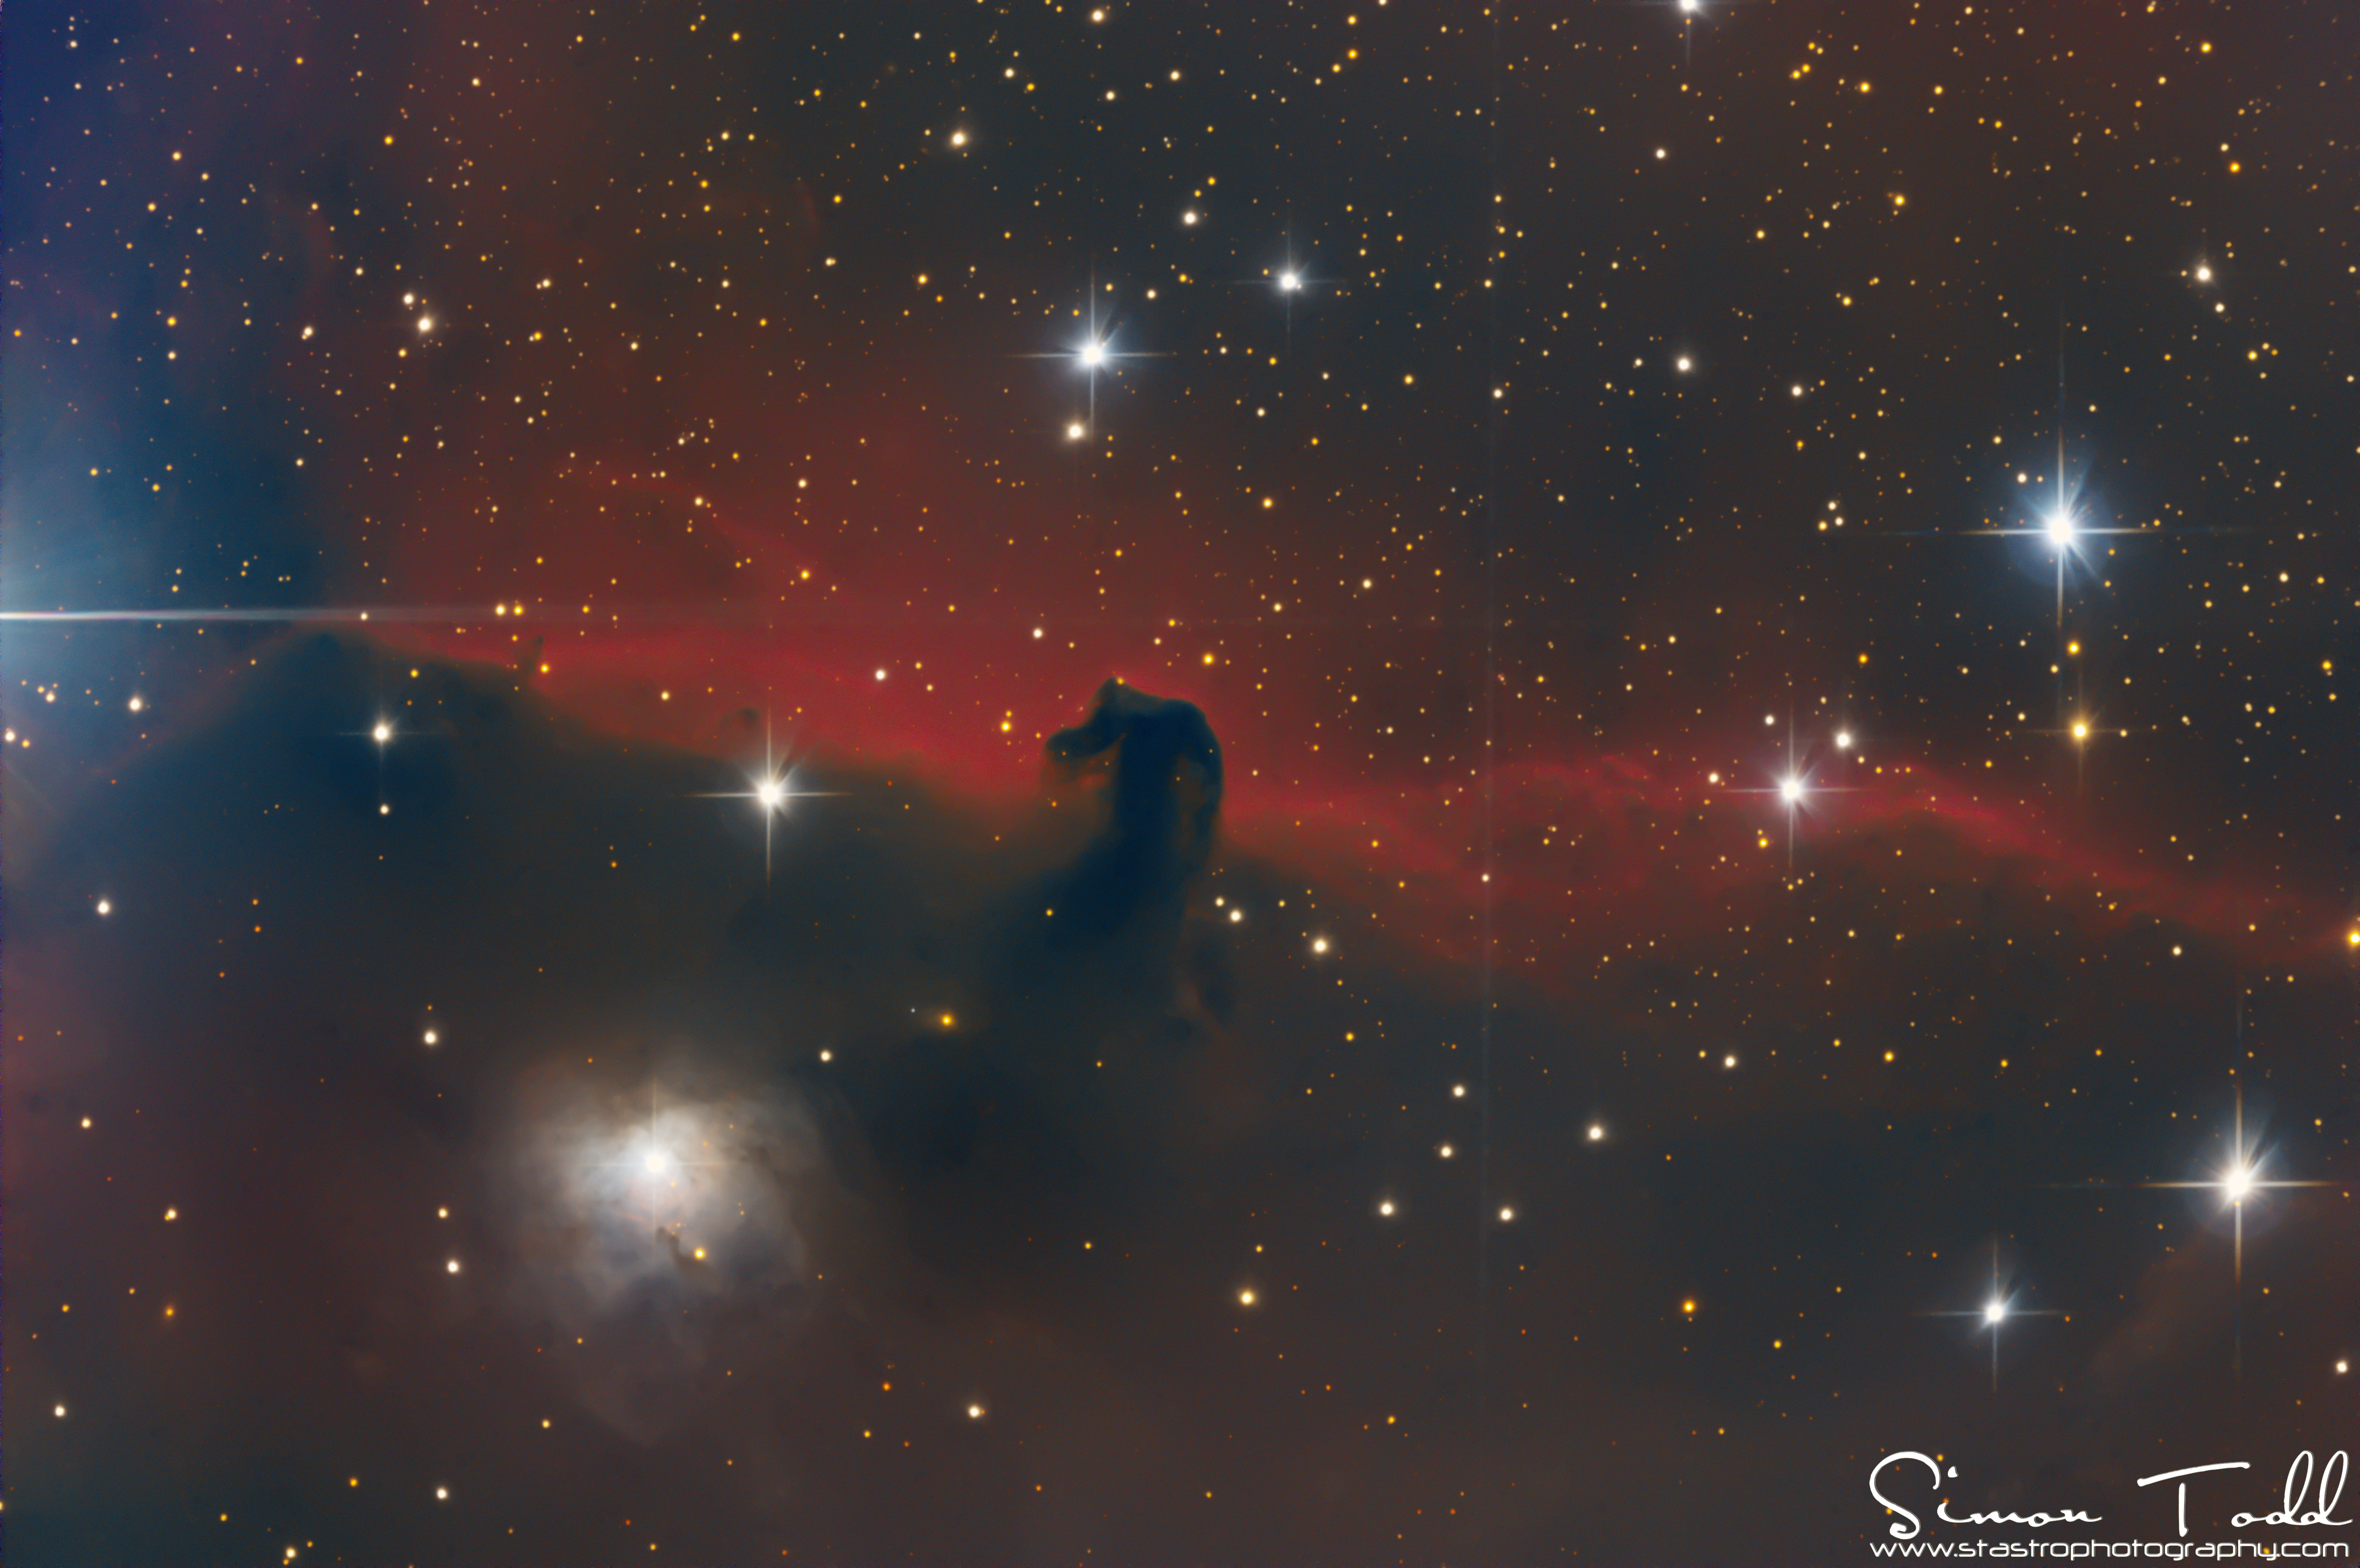
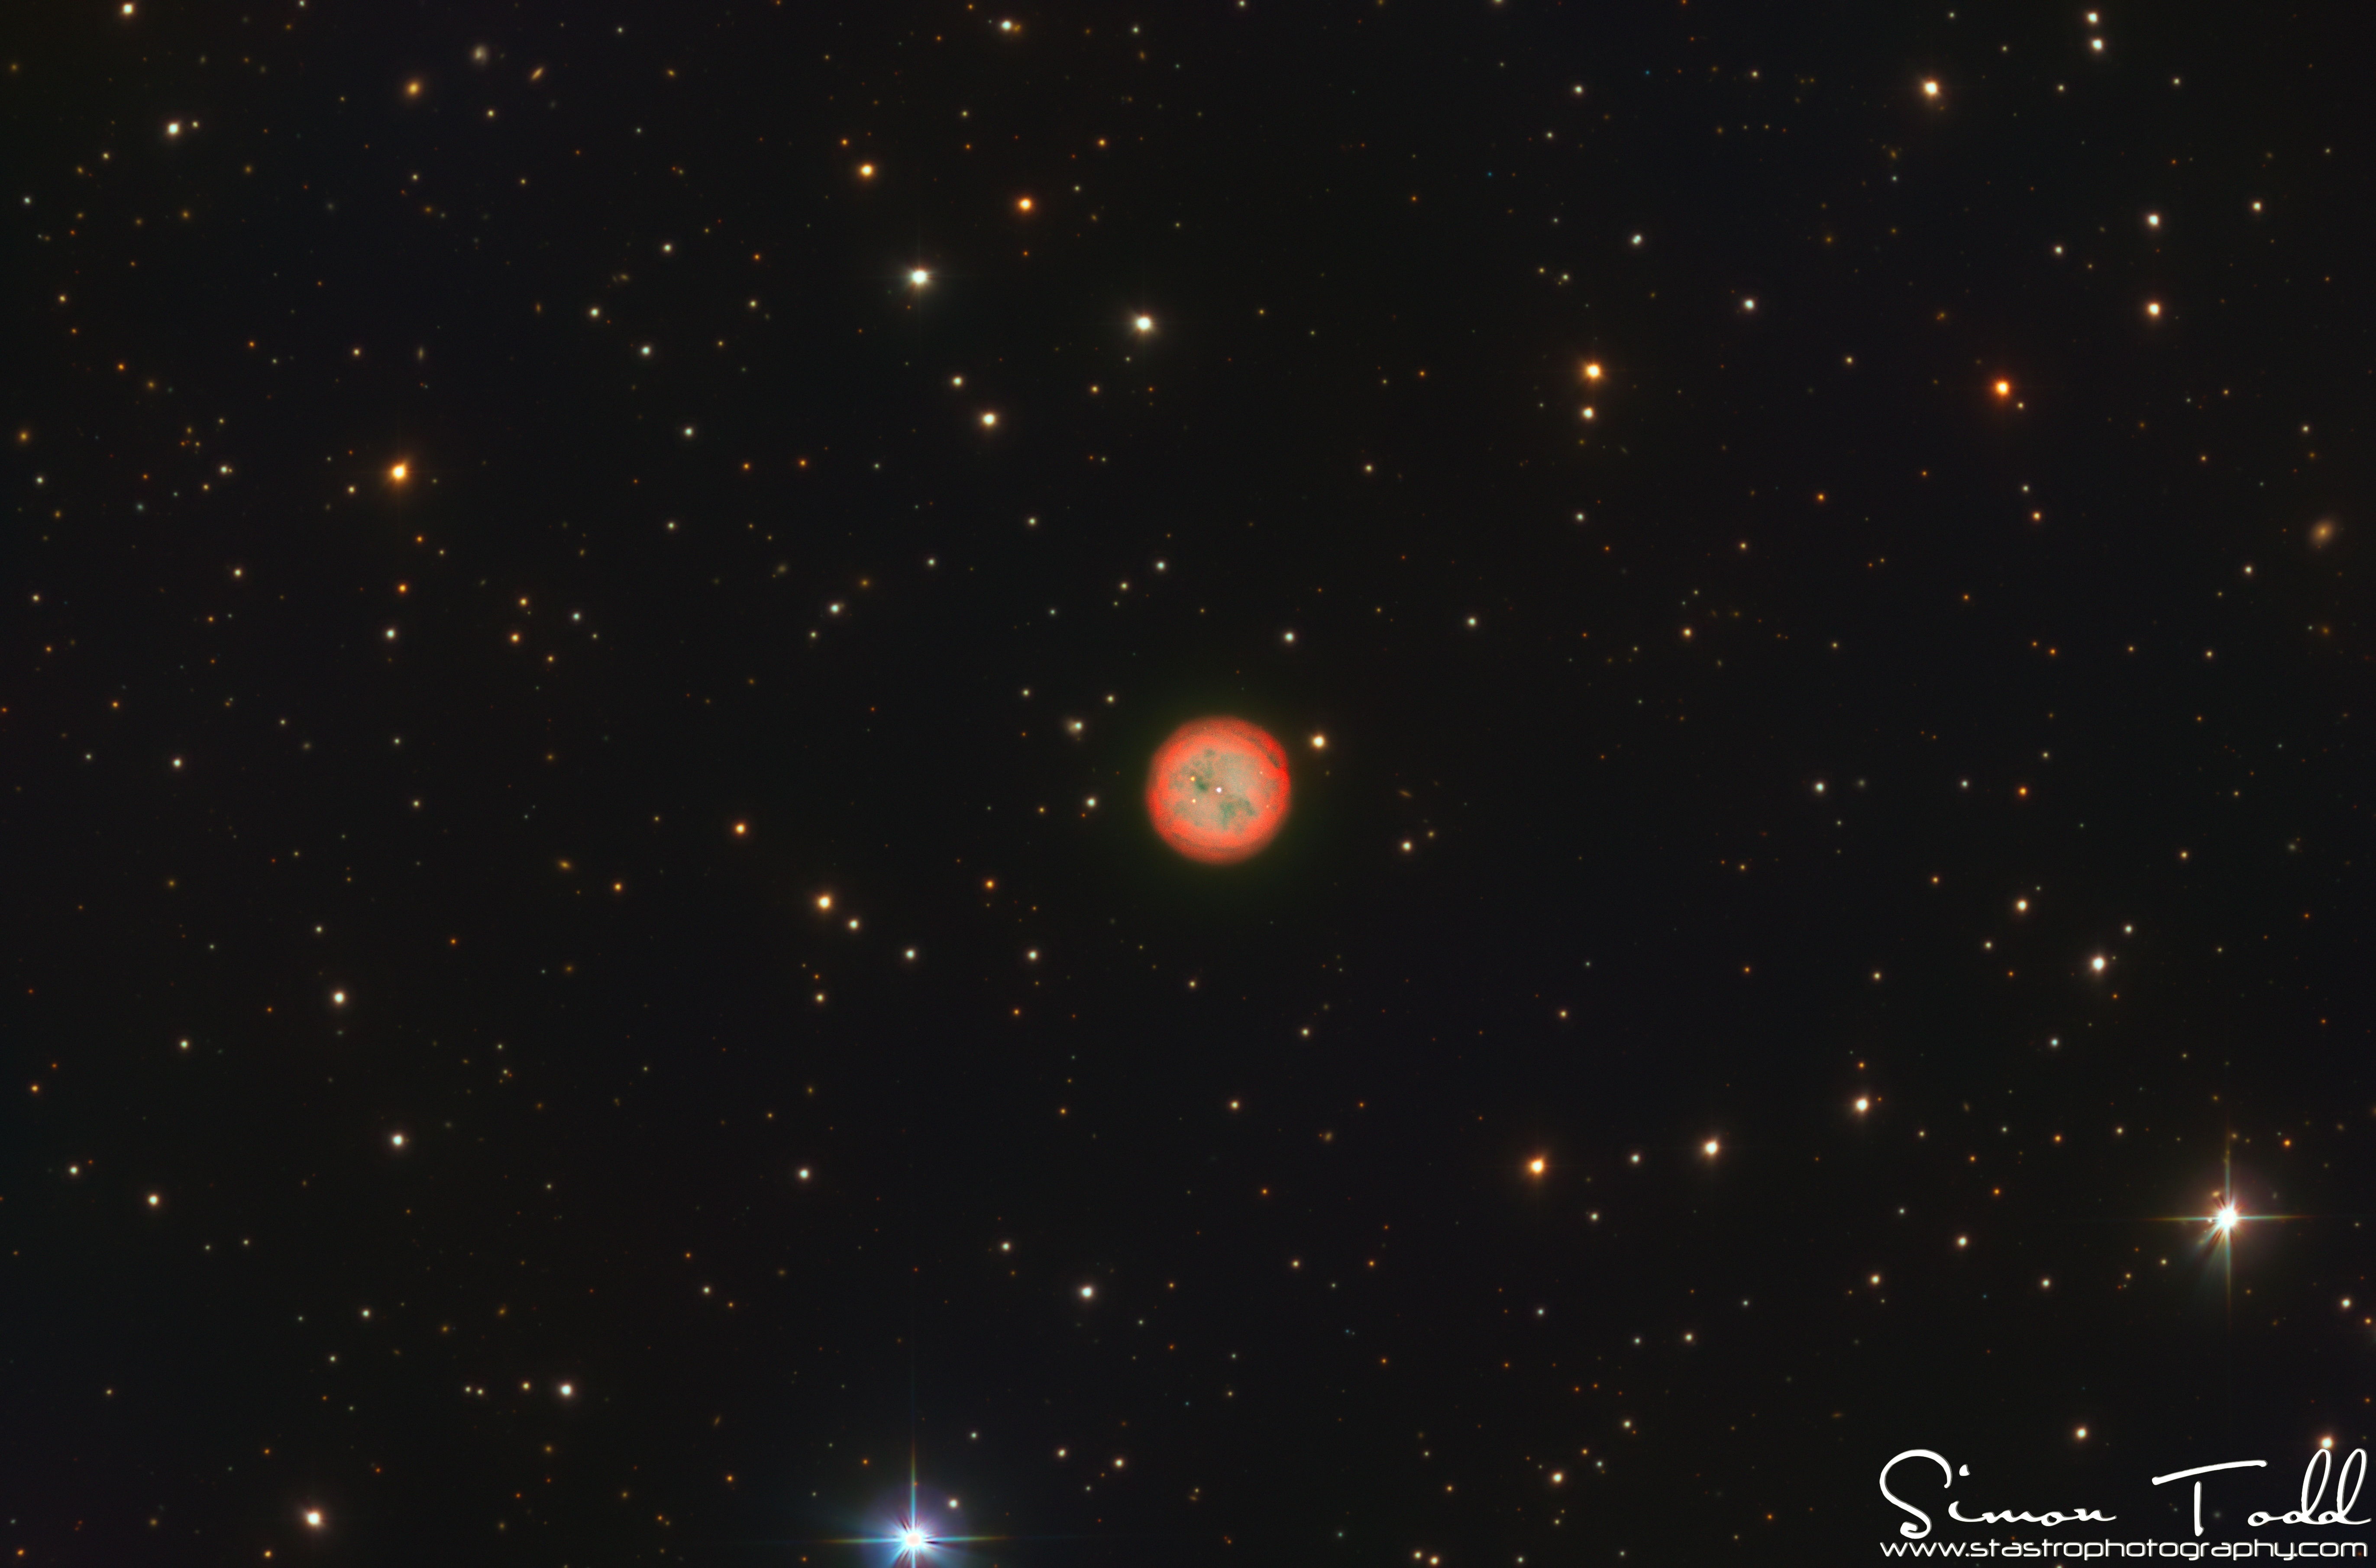
The following two images were produced with the 183M, firstly IC434 consists of 19×300 Second Exposures in RGB and the Second Image of The Owl Nebula consists of 27×300 second exposures in RGB + 25x600S in Ha

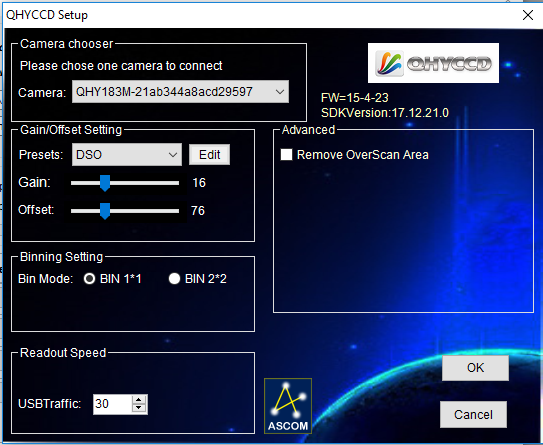
Software Integration:- As you probably know already, I use Sequence Generator Pro for my image acquisition and the integration with the camera has been pretty seemless, the ASCOM platform driver works pretty well, and I have the camera set to the default gain and offset setting that QHY have provided which is 16 of Gain and 76 for offset:

UV/IR Sensitivity:- I have read online that the 183M is a little bit sensitive to UV/IR Light, so I asked the guys at QHYCCD about this abd they informed be that the window on the senor is straight clear glass, so it also lets in UV/IR Light, which for me is not an issue as all of my Baader filters are UV/IR Blocked anyway, but it is something to consider if I ever change filters.

Conclusion
The camera has performed way beyond my expectations, had to change some of my approaches to image acquisition but that was to be expected, I am extremely happy with the camera and look forward to getting more data to compliment the Luminance for M81/M82 in the not so distant future.

If you are considering the QHY183M as an imaging camera, and would like to discuss, then feel free to reach out to me.

Clear Skies

QHY183M Review – Part 1

After much waiting (due to delays on Sony Sensors) I have finally received my QHY183M ColdMOS camera from QHYCCD which I collected from ModernAstronomy last weekend, so I apologise for the really bad weather we’ve had.

As you all know, for the past few years I have been using an Atik 383L+ Mono 8.3Mpx CCD Camera, so when QHY announced the QHY183C I immediately asked them if there was going to be a mono version to which they said….Yes!

So firstly you might ask why I chose the QHY183 camera?  Well the simple reason for this is that it offered me a higher pixel resolution for almost the same field of view that my Atik 383L+ offered, however there were other factors that swayed my decission:

  • Back Illuminated Sensor
  • High Quantum Efficiency (QE)
  • Optimal Cooling
  • Lightweight

So let’s first of all talk about the back illumination and what this means to astrophotography.  Typically CMOS sensors are orientated with the light receiving surface and the transistors/wiring facing the light, so when imaging it is possible to get reflections of light bouncing off the circuitry, with a back illuminated sensor, all the circuitry are on the underside of the surface that faces the light, thus elliminating the possibility of reflections bouncing off the transistors, the following image shows this in a bit more detail (Courtesty of QHYCCD):

So obviously the more light we can get to the imaging surface the better it is for our data acquisition, every photon counts right?!

The QHY183M has an extremely high Quantum Efficiency (QE) of 84% which means that more data is absorbed by the chip than my previous imaging camera which had a QE of just over 60% based on the KAF-8300 sensor from Kodak.

One of the first things I tested when I unpacked the camera was the cooling system, I wanted to know how good the cooling system was, QHY stated between 40-45C Delta, so considering the outside temperature was +5C I managed to get the camera down to -41.6C which was a delta slightly above the 45C promised by QHY, so considering I typically image at -20C this now means I can image when the outside temperature at night is even as high as +25C which typically doesn’t happen in the UK.  I also noticed that the QHY183M uses less current than my 383L+ did to get ot the same temperature, so another bonus of less power requirement.

Weight is always an astrophotographers enemy, so it was much to my delight that the QHY183M weighs a lot less than my ATIK 383L+ did, the 383L+ weighed in around 700g and the QHY183M weighs in around 450g.

Out of the box
My first impression of the camera is that it is well built, a bit more of a compact design in comparison to my previous camera, has a USB3.0 connector (even though I am still using USB 2.0) and has a port to connect a dessicant tube to if required.

Software Installation
Driver installation was relatively straight forward, if you are using a third party imaging program like Sequence Generator Pro, make sure you install the ASCOM drivers so that SGPro can then speak to the camera.  In SGPro there are options for Gain settings, according to QHY the unity gain for the 183M is 11, so I have mine set to this value in SGPro.

Image Download Speed
After completing my dark frames library, I noticed that the download speed from Camera to Observatory PC was much much faster than my Atik was, even though I am using the same USB 2.0 Hub, on the Atik it could take anywhere up to 20 seconds to download the image at 1×1 binning, obviously the QHY183M is a much bigger sensor at 20mpx, however the image download time is circa 5 seconds which reduces image acquisition time greatly for multiple exposures.

Dark Frames
My dark frame library is completed, below are four different exposure times, 90, 180, 300 and 600 seconds, each image consists of 25 frames combined using PixInsight

90 Seconds:

180 Seconds:

300 Seconds:

600 Seconds:

As you can see the darks are really good, if you stretch out the images you will see the AMP glow on the right side of the image, this will be removed in dark frame subtraction and is a common artifact on all CMOS based imagers.

I did have the occasional icing issue on my 383L+, however the QHY183M has a heated optical window, so time will tell on how often I will need to use the dessicant tube.

Conclusion so far…before imaging

Pros:

  • Excellent design.
  • Lightweight.
  • Very predictable cooling system cools to -45C below ambient.
  • Cooling system is much quieter than my previous camera
  • Less current draw versus my previous camera.
  • Easy software installation.
  • Very fast download speed of around 5 seconds per frame at 1×1 Binning.
  • Very high QE of 84%

Cons:

  • AMP glow, I am probably being a bit mean considering all CMOS based cameras are subjected to this.
  • M42 thread on the camera is not long enough for the StarlightXpress EFW, I had to place a piece of card between the camera and the Filterwheel otherwise the camera just keeps spinning round and doesn’t tighten.
  • There’s no electronic shutter like my previous camera, which means for my dark frames it has to be completely dark in the observatory

I hope this review is beneficial to you all, especially if you are considering either the 183C or the 183M.  I will post part 2 of my review when I have actually got it all focused and acquired some photons from the sky.

M97 and M108 – Owl Nebula and Surfboard Galaxy in LRGB

M97 and M108

The Owl Nebula (also known as Messier 97, M97 or NGC 3587) is a planetary nebula located approximately 2,030 light years away in the constellation Ursa Major.  It was discovered by French astronomer Pierre Méchain on February 16, 1781

Messier 108 (also known as NGC 3556) is a barred spiral galaxy in the constellation Ursa Major. It was discovered by Pierre Méchain in 1781 or 1782. From the perspective of the Earth, this galaxy is seen almost edge-on.

The image consists of the following
23x180S – Red
23x180S – Green
23x180S – Blue
25x180S – Luminance

25 Darks, 25 Flats and 25 BIAS frames have also been applied

Equipment Used:-
Imaging Scope: Sky-Watcher Quattro Series 8-CF F4 Imaging Newtonian
Flattener: Sky-Watcher Aplanatic Coma Corrector
Imaging Camera: Atik Cameras 383L+ Mono CCD -20C
Guide Scope: Celestron Telescopes C80ED Reftractor
Guide Camera: Qhyccd QHY5L-II
Mount: Sky-Watcher EQ8 Pro
Filterwheel: Starlight Xpress Ltd 7x36mm EFW
Filters: Baader Planetarium 36mm Unmounted LRGB
Image Capture: Main Sequence Software SGPro
Image Stacking: Maxim-DL
Image Processing: PixInsight

Leo Triplet of Galaxies

Leo Triplet In LRGB (above) and LRGB+HA (below)

The Leo Triplet consists of three galaxies at a distance of around 35 million light years, M65 (top right), M66 (bottom right) and NGC3628 (left).  I have always aimed at imaging the triplet since I started imaging but never got around to it.

M65 (NGC 3623) and M66 (NGC 3627) are classed as intermiediate spiral galaxies and NGC3628 is also known as the Hamburger Galaxy or Sarah’s Galaxy and is classed as an Unbarred Spiral Galaxy.

The image consists of:-
29x300S of Luminance
14x300S Red, Green and Blue
15x600S of 7nm HA in the LRGB+HA Image
25 Darks and flats subtracted from all frames

Equipment Details:
Imaging Telescope: Sky-Watcher Quattro 8-CF F4 Imaging Newtonian
Imaging Camera: Atik Cameras 383L+ Mono CCD
Coma Corrector: Sky-Watcher Aplanatic Coma Corrector
Guide Camera: Qhyccd QHY5L-II
Guide Scoope: Celestron Telescopes C80ED Refractor
Mount: Sky-Watcher EQ8 Pro
Filter Wheel: Starlight Xpress Ltd 7x36mm USB EFW
Filters: Baader Planetarium LRGB + 7NM HA

Image Aquisition: Main Sequence Software SGPro
Image Pre-Processing and STacking: Maxim-DL
Post Processing: PixInsight

In my opinion, there’s only a subtle difference between the LRGB and LRGBHA images, personally I preffer the LRGB Version, the data was captured over multiple nights since the beginning of 2017 but in total gives 5.91 Hours on the LRGB Image and 8.41 Hours for the LRGB+HA Image