Many people like myself have transitioned from a MONO camera to a One Shot Colour (OSC) for whatever reason, for me it was all about not being able to get the required amount of time due to weather conditions here in the UK. When I first considered moving to an OSC camera, it dawned on me that I would not be able to produce the vibrant Hubble Palette images that I could produce by imaging with specific filters on my MONO camera, specifically Hydrogen Alpha (Ha), Oxygen 3 (OIII) and Sulphur Dioxide 2 (SII) which would then be mapped to the appropriate colour channels when creating the final image stack.
Now along came Dual and Tri band narrowband filters for OSC cameras which peaked my attention, the Dual Band filters allow Ha and OIII data to pass, the Tri Band filters allow Ha, Hb (Hydrogen Beta) and OIII to pass but at a high Nm value. I reached out to my friends at Optolong who had two filters, the L-eNhance and the L-eXtreme, the L-eNhance is a Tri Band filter, but after speaking with Optolong it would not work well for me at F2.8, so I went with the L-eXtreme Dual Band filter which has both the Ha and OIII at 7nm.
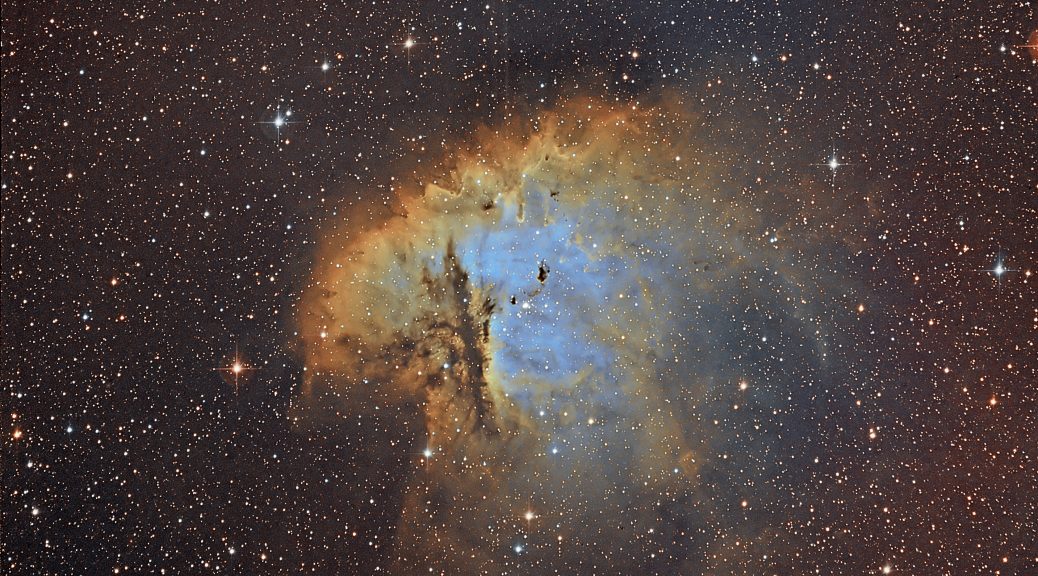
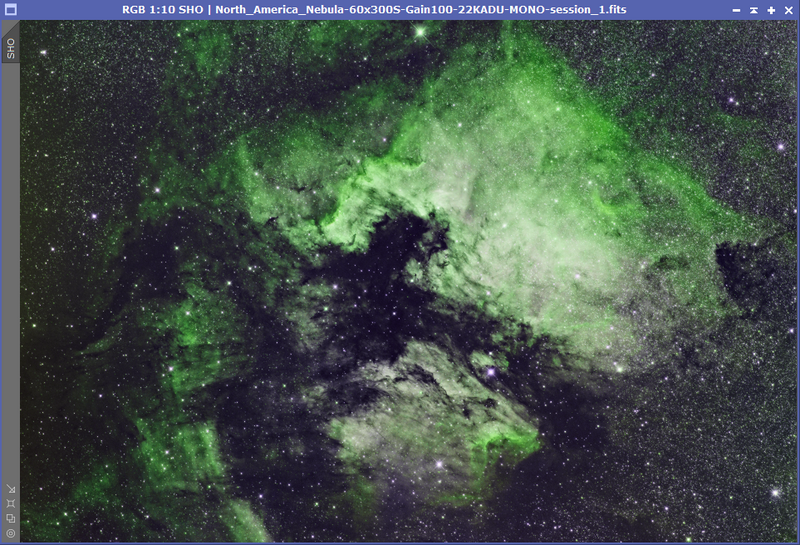
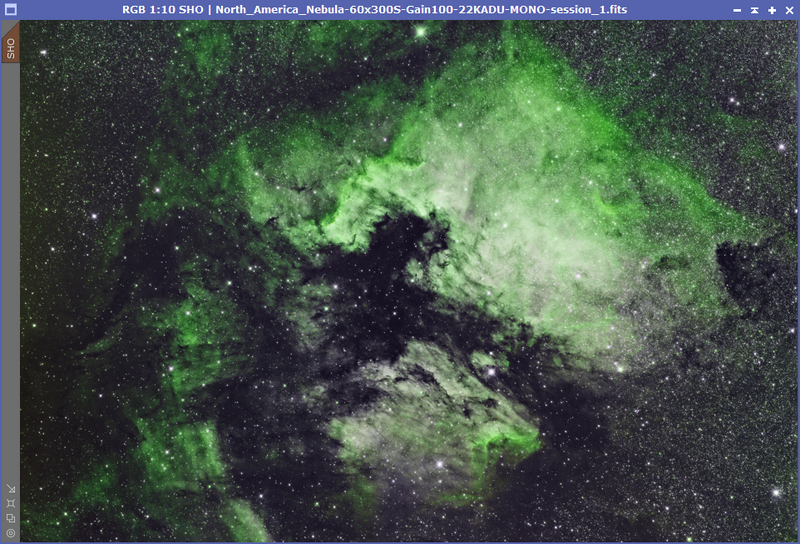
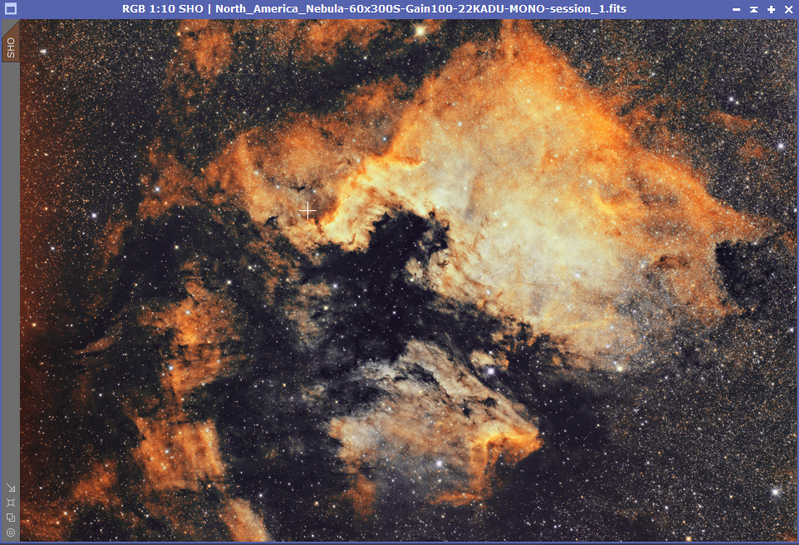
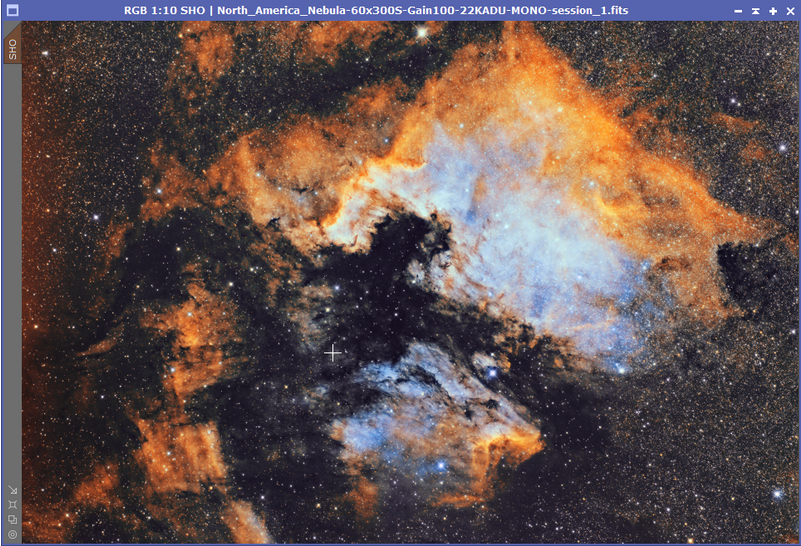
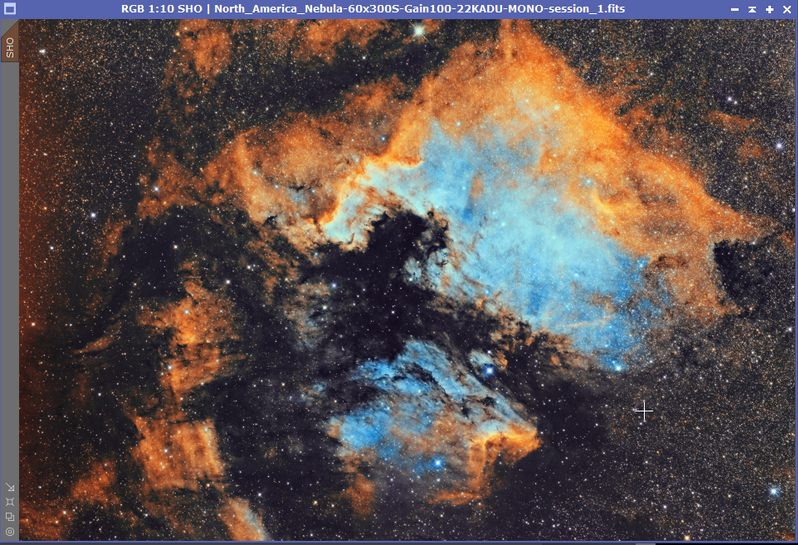
After receinving my ASI6200MC Pro, I decided to start acquiring data on a 1/2 to 2/3 moonlit nights on the North America Nebula, and so far when writing this post I had acquired a total of 60 frames of 300 seconds each at a gain value of 100, I processed the image my normal way in PixInsight and below is the result of the image:
I thought that my data looks good enough to work with and experiment with trying to build an SHO (Hubble Palette) image with, and I have spoken with Shawn Nielsen on this exact subject a few times so he gave me some hints and tips especially with the blending of the channels. So off I went to try and produce an SHO image.
Before we start, there are some requirements:
- This tutorial uses PixInsight, I am not sure how you would acomplish this with Photoshop since I have not used PhotoShop for Astro Image Processing for a number of years
- Data captured with a One Shot Color (OSC) camera using a Dual or Tri Band Narrowband filter
- Image is non-linear…so fully processed
Step 1 – Split the Channels
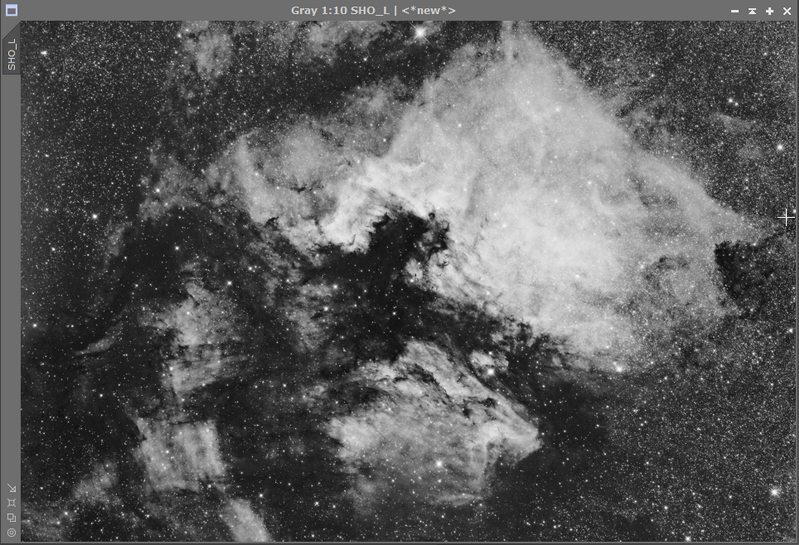
In order to re-assign the channels, you have to split the normal image into Red, Green and Blue channels, I found this to work better on a fully processed “Non-Linear” image as above, once this was done, I renamed the images in PixInsight to “Ha” – Red Channel, “OIII” – Blue Channel and “SII” – Green Channel, this makes it easier for Pixelmath in PixInsight to work with the image names. Once this was done, I used PixelMath to create a new image stack with the channels assigned, and this is how PixelMath was configured
Red Channel = SII
Green Channel = 0.8*Ha + 0.2*OIII
Blue Channel = OIII
Once applied this produced the following image stack (do not close the Ha, OIII or SII images, you will need these later on):
Step 2 – Reduce Magenta saturation
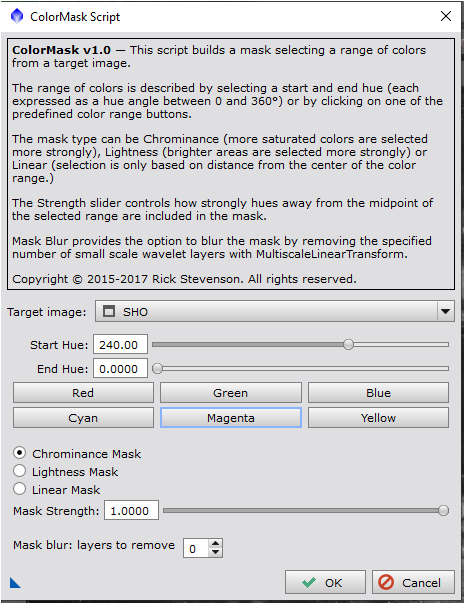
As you can see from the above image, some of the brighter stars have a magenta hue around them, so to reduce this, I use the ColorMask plugin in PixInsight (You will need to download this), and selected Magenta
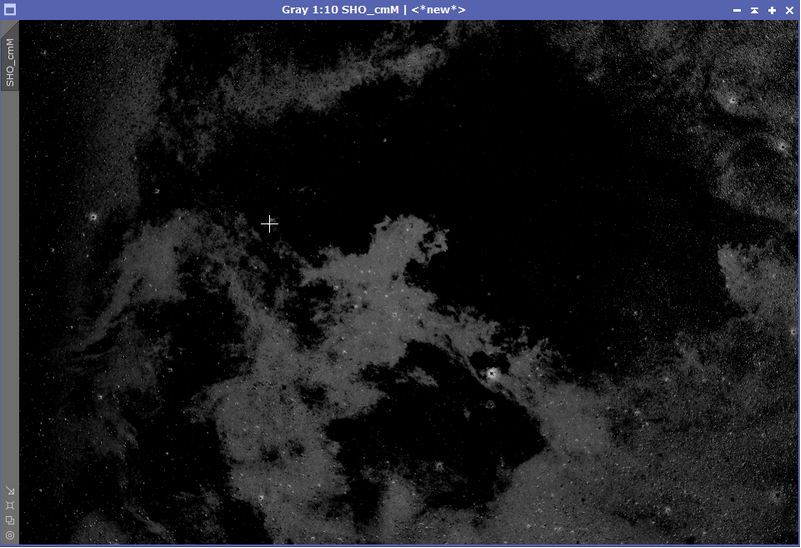
When you click on OK, it will create the Magenta Mask which would look something like this:
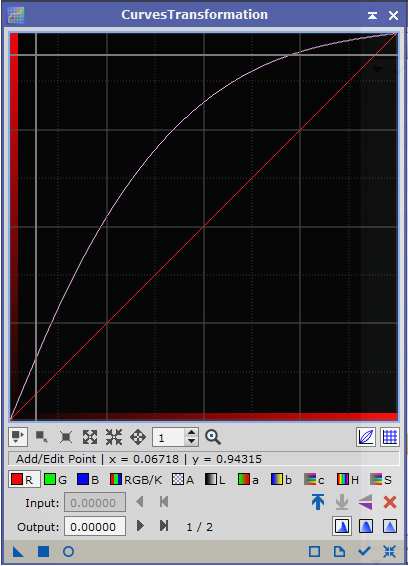
Once the mask has been applied to the image, I then use Curves Transformation to reduce the saturation which will reduce the Magenta in the image
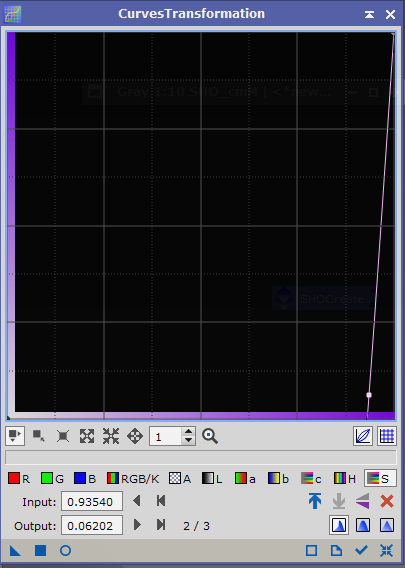
The result in reducing the magenta can be seen in this image, you will notice there is now no longer a hue around the brighter stars
Step 4 – ColorMask – Green
Again using the Color Mask tool, I want to select the green channel, as we will want to manipulate most of the green here to red, so again ColorMask:
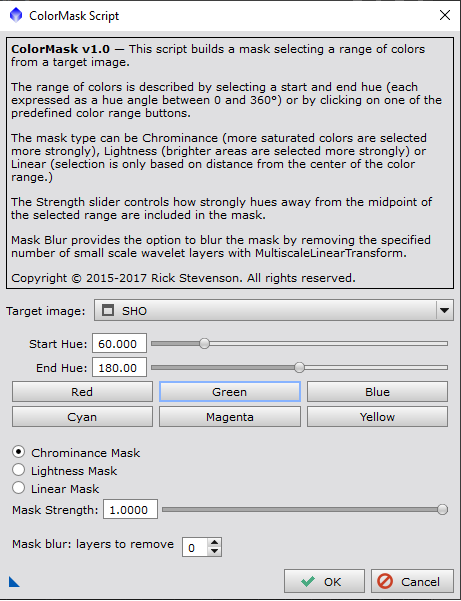
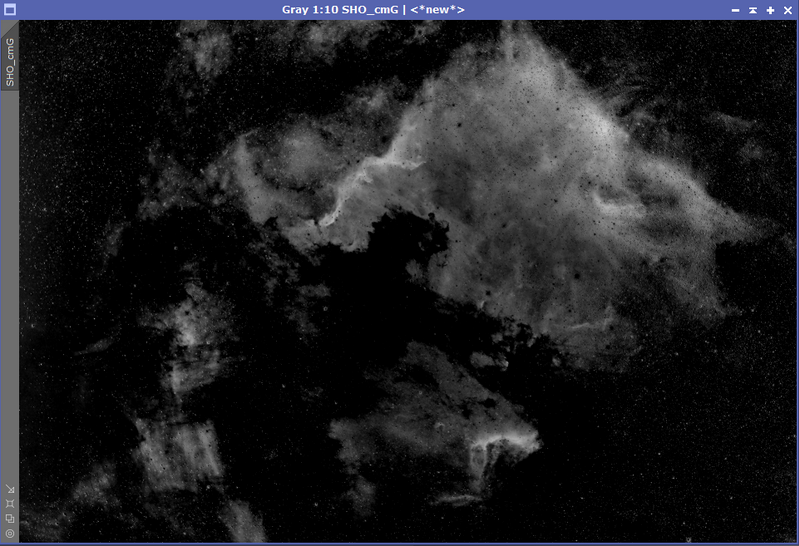
This then produced a mask that looks like the following:
Step 5 – Manipulate the Green Data
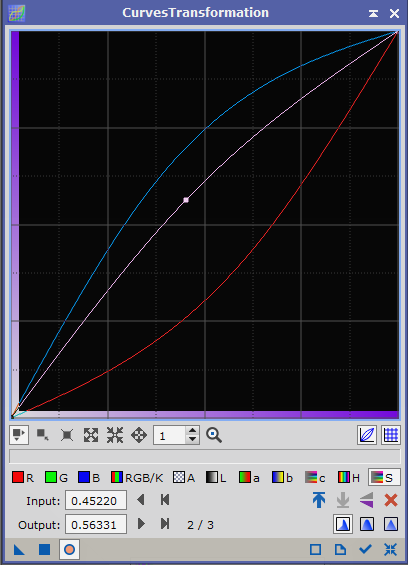
Once the Green Mask has been applied to the image, since most of the data in the image is green, we are looking to manipulate that data to turn it golden yellow, so for this we use the Curves Transformation again
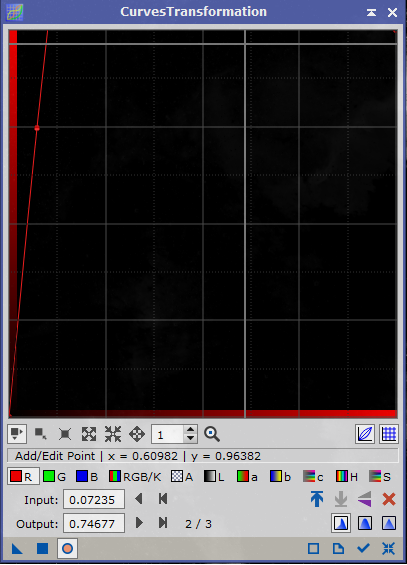
The above Curves transformation was applied to the image three times whilst the the green mask was still im place, and this resulted in the following image changes:
So as you can see we are starting to see the vibrant colours associated with Hubble Palette images
Step 6 – Create a Starless version of the OIII Data
Now remember I said not to close out the separated channel images, this is because we are going to want ot bring out the blue in the image without affecting the stars, so for this we will turn the OIII image into a starless version by using the StarNet tool in PixInsight
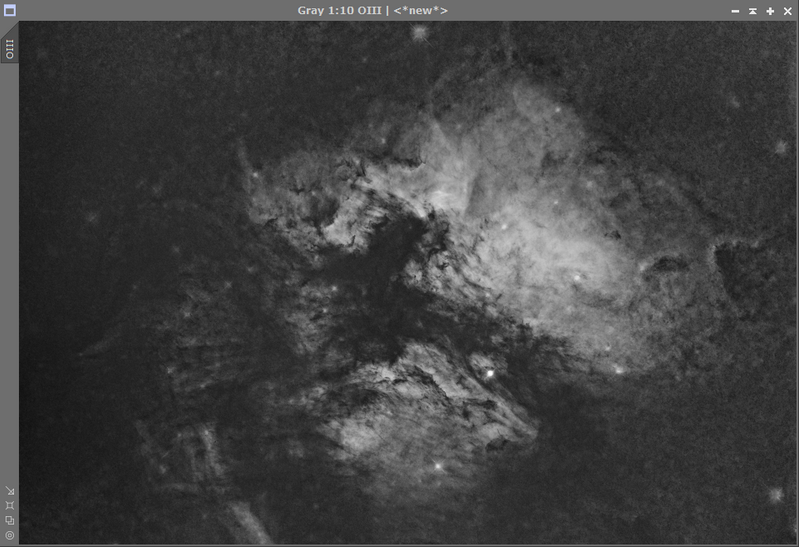
Here’s the OIII Image before we apply StarNet star removal:
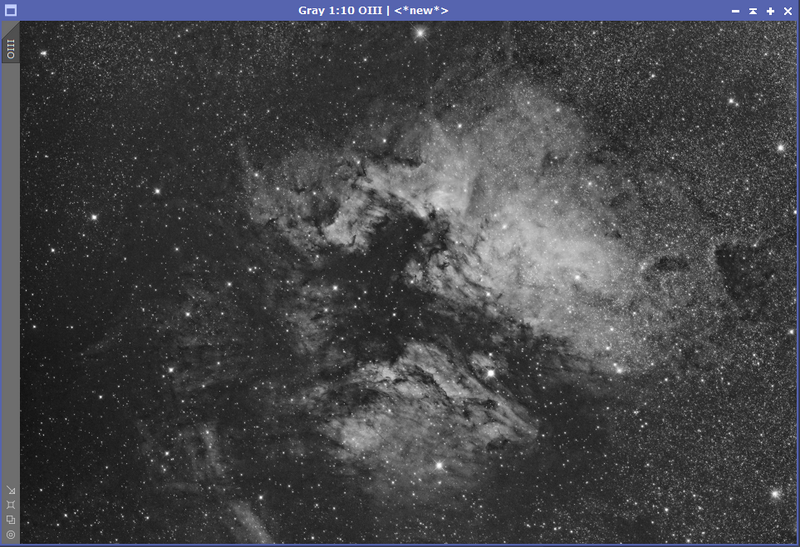
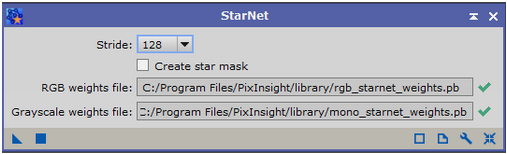
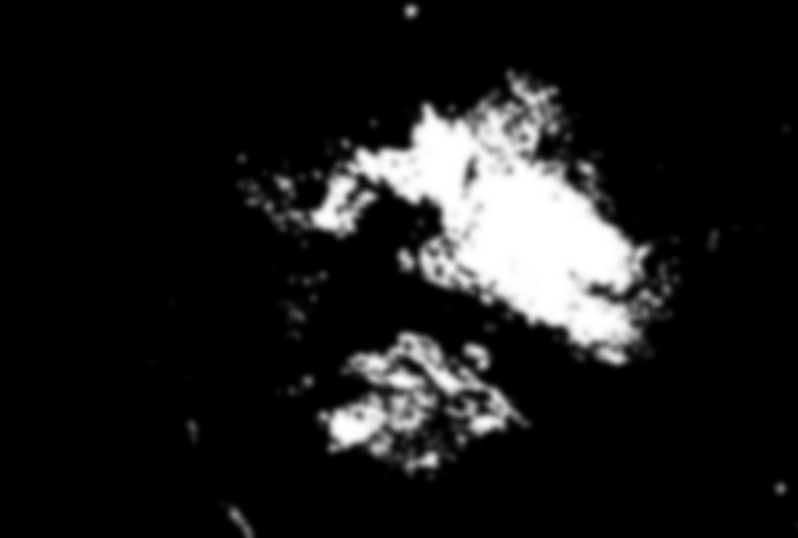
This resulted in the following OIII image with no stars:
Step 7 – Range Selection on OIII Data
Because we do not want to affect the whole image, we will use the range selection tool on the starless OIII image to select areas we wish to manipulate, now we have to be careful that the changes we make are not too “Sharp” that they cause blotchy areas, so within the range selection tool, not only do we change the upper limit to suit the range we want to create the mask for, but we also need to change the fuzziness and smoothness settings to make it more blended, these are the setings I used:

Which resulted in the following range mask
Step 8 – Bring out the Blue with Curves Transformation
We apply the Range Mask to the SHO Image so that we can bring out the Blue in the section of the nebula where the OIII resides, with the range mask applied we will use the Curves Transformation Process again as follows:
The result of which is:
As you can see we have started to bring out the blue data, but we are not quite there yet, with the range mask still applied, we will go again with the curves transformation only this time, just reducing the red element:

The result of the 2nd curves transformation with the Range Mask is as follows:
Step 9 – Apply Saturation against a luminance mask
On the above image, we extract out the luminance and apply as a mask to the image, and we then use the Curves Transformation for the final time to boost the saturation to the luminance
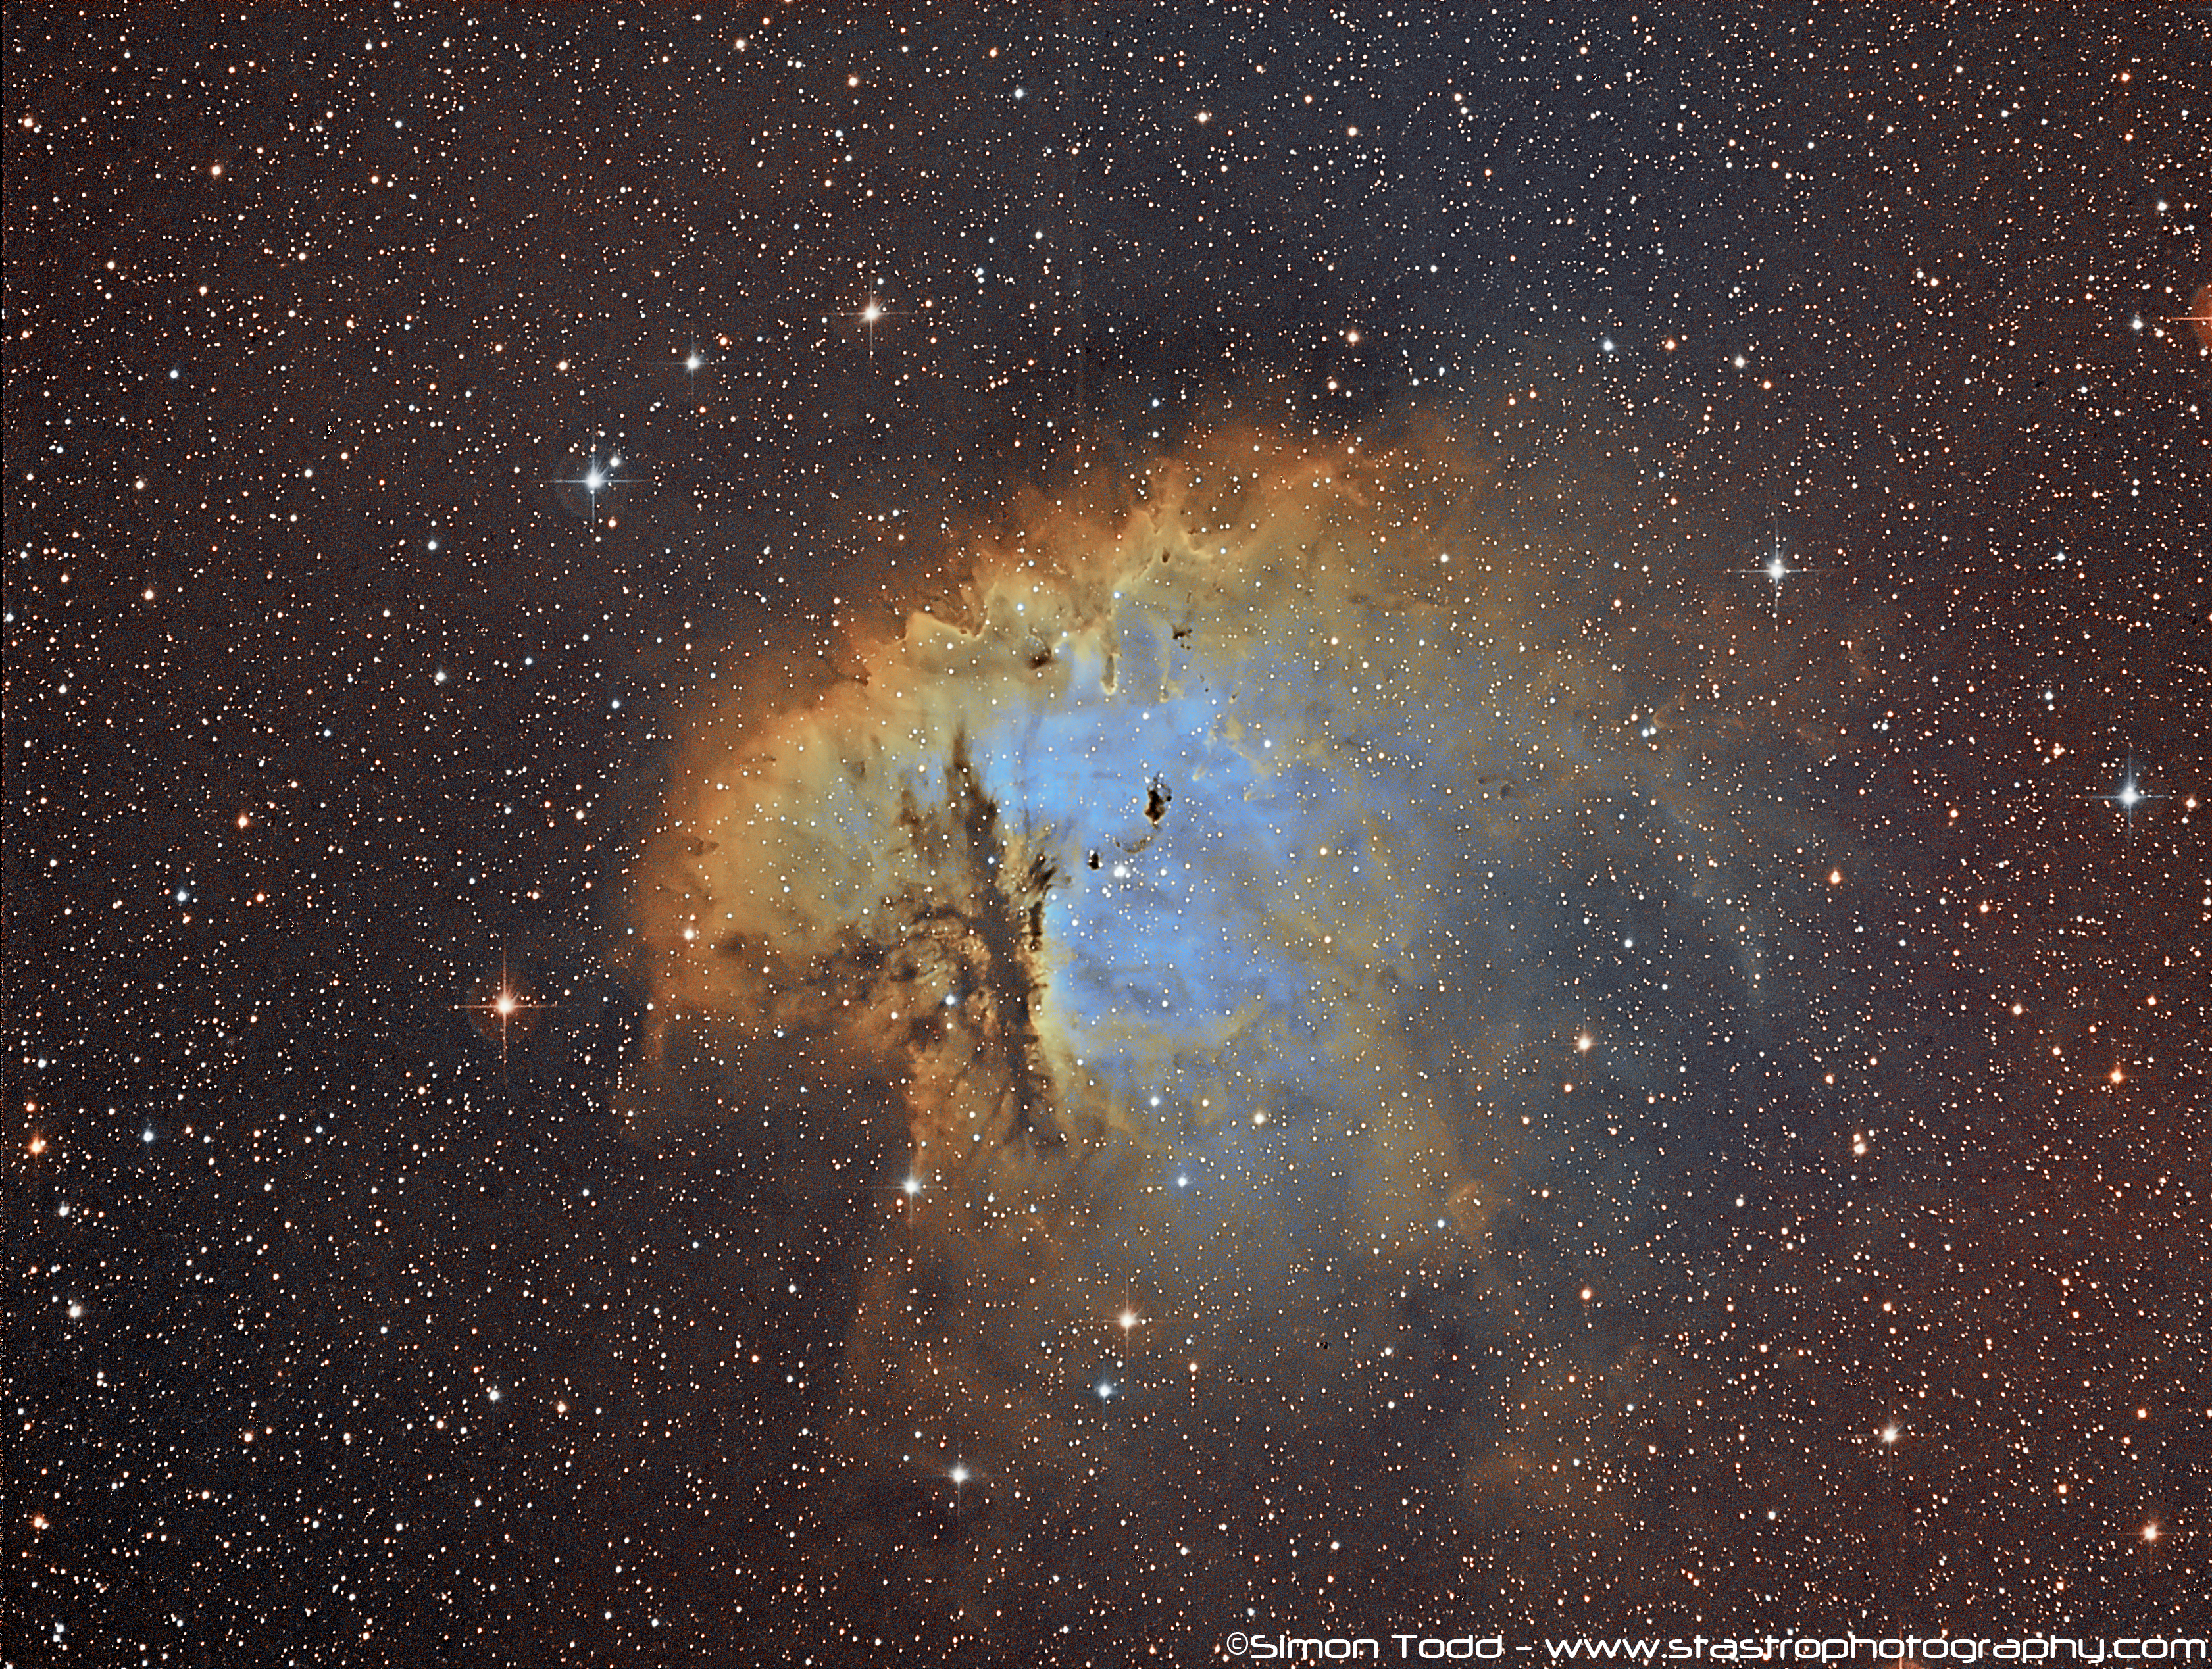
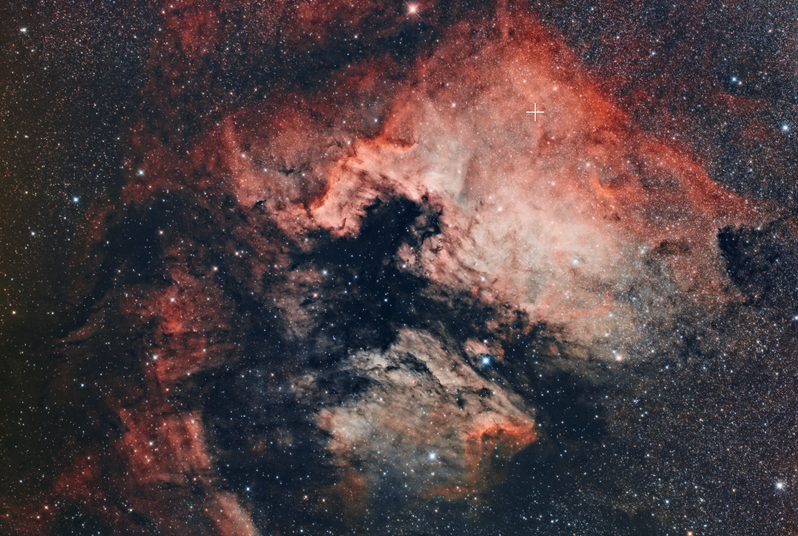
Final Image

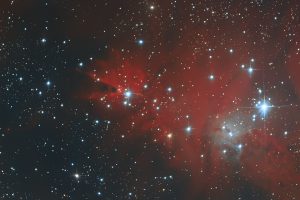
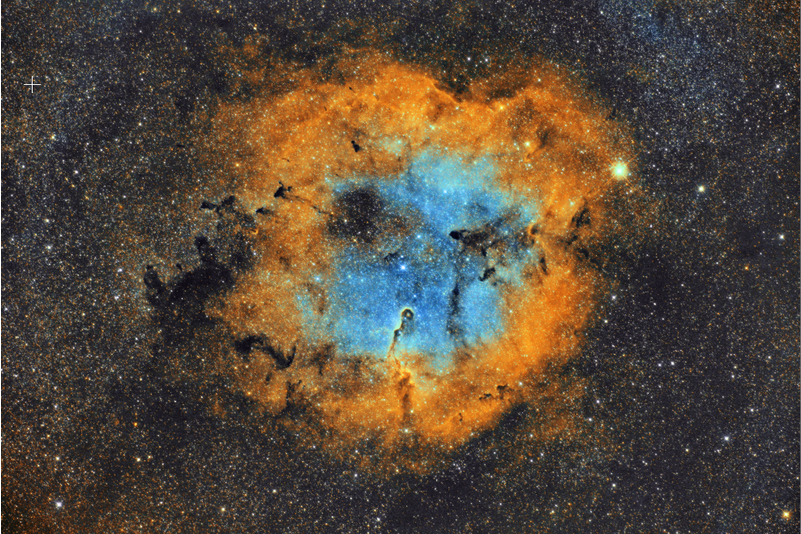
I repeated the same process on my Elephant’s Trunk Nebula that I acquired the data when testing out the ASI2400MC Pro and this was the resulting image:
I hope this tutorial helps in producing your SHO images from your OSC Narrowband images, I know many of my followers have been waiting for me to write this up, so enjoy and share.